AI Workbench
About Platform GenAI
Generative Artificial Intelligence (GenAI) features are built on top of the Platform’s AI Workbench module to create powerful GenAI-based solutions in a structured and safe environment.
The user must have a good understanding of the terminology related to LLMs and GenAI to leverage the capabilities of the GenAI-based module.
You can create GenAI agents (also referred to as AI agents or agents) and Bots that respond to you as per your predefined behavior details and configurations.
AI Workbench
The AI Workbench is an integrated feature in the Platform that enables you to apply GenAI features within your workflow.
AI Workbench allows you to create agents in the system that are capable of autonomously performing tasks on behalf of a user.
AI Agents
AI agents are GenAI-based agents created for a specific purpose, which can be used to understand your goals and provide action plans or act as per your needs. Over time, agents can learn and adapt to the exact requirements.
The core idea of agents is to use an LLM to choose a sequence of actions to take. Agents use the LLM as a reasoning engine to determine which actions to take and in which order.
Using AI Workbench in the Platform, you can create agents for a specific activity type. The behavior of the agent is depends on the activity type selected. There are predefined activity/task types available in the AI Workbench for creating agents.
Autonomous agents can work independently, and multiple AI agents can work together effectively.
In the Platform AI Workbench, the agents that are created appear on the Agents tab.
Agentic Mesh is an ecosystem that enables autonomous AI agents to find each other, collaborate, interact, and transact safely.
Activities for Agents
Activities are predefined tasks built as components ready to be used in any process/data/event flows to enable Agentic Process Automation.
Activities are associated with AI models for achieving a specific purpose. Each activity category in the AI Workbench has a purpose.
The predefined activity type appears on the Activities tab page.
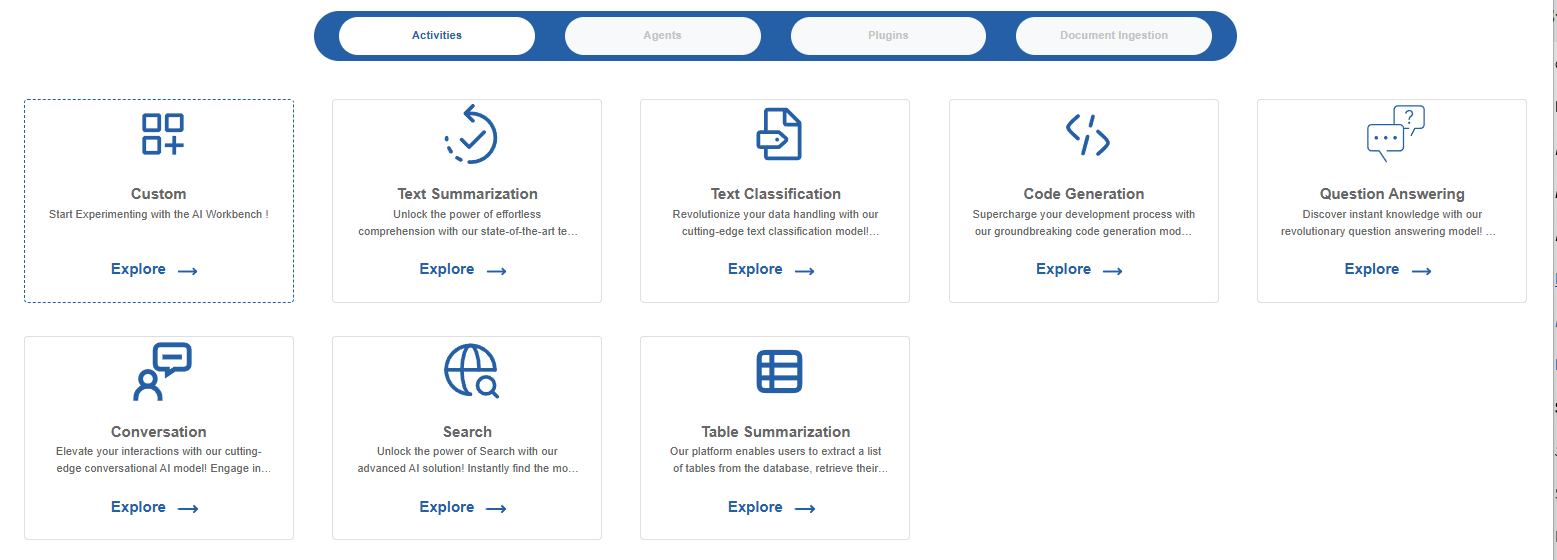
- Select an activity type and create an agent to perform specific tasks based on the activity and configurations provided for that agent.
The pre-set prompt in a particular activity type focuses on generating a response based on the basic logic of the prompt and the additional configurations provided. Except for Custom Activity, prompt is predefined and you can always modify them as per your needs.
Plugins for Agents👑
Plugins include specific task-oriented capabilities (e.g., SQL to text generation) that can be used by agents. Language models themselves have limitations, such as not having access to real-time information or the ability to interact with external systems. Tools, Functions, Output Parser included in the Plugins section bridge this gap.
Document Ingestion👑
The document ingestion section allows you to upload documents for ingestion and select those document ingestions for the agent. The agent responds to your requests, aligning with the content in the document ingestion source. Your model will respond to you based on the uploaded document as first-priority.
Activities
In the AI Workbench module, Activities are listed in the Activities tab, and these activities are used to create agents of the selected activity type.
Each activity in the AI Workbench defined for AI models has a specific purpose. For any activity type, the model’s API (input and output) in the background indicates what task it needs to perform. Based on the activity category, the model processes the input data.
Creating Agents Using Activities
Create or build an agent from the available activity types or a custom activity.
To create an agent with a predefined prompt:
- Go to Main Menu > GenIQ > AI Workbench > Activities > {ActivityType_Name} - Explore
If you select an activity for creating an agent, the prompt templates are predefined. - Select a template and provide other configuration details to complete the agent creation.
To create a custom type agent:
- Go to Main Menu > GenIQ > AI Workbench > Activities > Custom - Explore
- If you select “Custom” to create an agent, define the prompt along with the configuration details.
When you create an agent, the system automatically creates an agent ID in the background for that agent. The agent ID appears on the agent card displayed on the Agents page.
Custom
The custom category (other than the categories available or predefined activities) allows you to create an agent based on your specific or custom goals. This empowers the developers to build tailored solutions that meet specific business needs.
If you want a custom task feature for your agent, create your agent with “Custom” and define the goals in the configurations.
To create and configure a custom activity type agent:
- Go to Main Menu > GenIQ > AI Workbench > Activities tab > click Custom > Explore. The AI Workbench-Custom page appears. Start experimenting by creating the AI agent as per your requirements.
- Define your custom prompt. The custom activity allows you to define your own system prompt.
- In the LLM settings, provide configurations as per your needs. Refer to Configuring Agent.
To Test, Save, and Publish the agent, at the bottom-right of the AI Workbench,
- Click Test to test the agent. Refer to Testing Agent.
- Click Save to save the agent. Refer to Creating and Saving the Agent.
- Click Publish to publish the agent. Refer to Publishing the Agent.
Code Generation
The code generation activity allows you to create initial code snippets based on your functional requirements. With this prompt, obtain the starting code for your requirement in various programming languages. Utilize this to accelerate the beginning of your software development tasks by reducing manual coding efforts.
To create and configure a code generation agent:
- Go to Main Menu > GenIQ > AI Workbench > Activities tab > click Code Generation > Explore. The AI Workbench-Code generation page appears. You can start experimenting by creating the AI agent as per your requirements.
- Select a system prompt template. Each template defines a different
system prompt for code generation. Choose the most matching template
for your requirement.
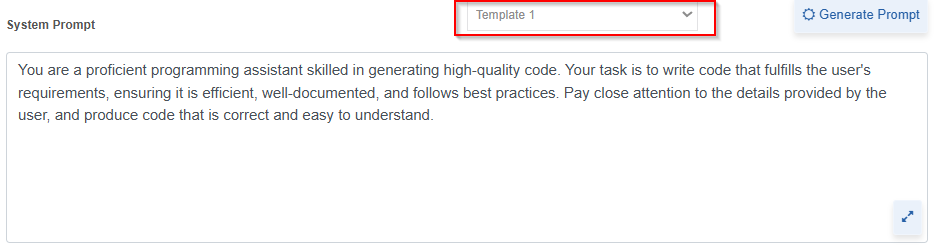
- After selecting a template, modify or enhance the prompt with your goals.
- In the LLM settings, provide configurations as per your needs.
Refer to Configuring Agent.
To Test, Save, and Publish the agent, at the bottom-right of the AI Workbench,
- Click Test to test the agent. Refer to Testing Agent.
- Click Save to save the agent. Refer to Creating and Saving the Agent.
- Click Publish to publish the agent. Refer to Publishing the Agent.
Conversation
The conversation prompt template allows you to engage in multi-turn conversations with the platform. This feature facilitates more natural and interactive user experiences.
To create and configure a conversation agent:
- Go to Main Menu > GenIQ > AI Workbench > Activities tab > Conversation > Explore. The AI Workbench-Conversation page appears. Start experimenting by creating the AI agent as per your requirements.
- Select a system prompt template. Each template defines a different
system prompt for conversation. Choose the most matching template
for your requirement.
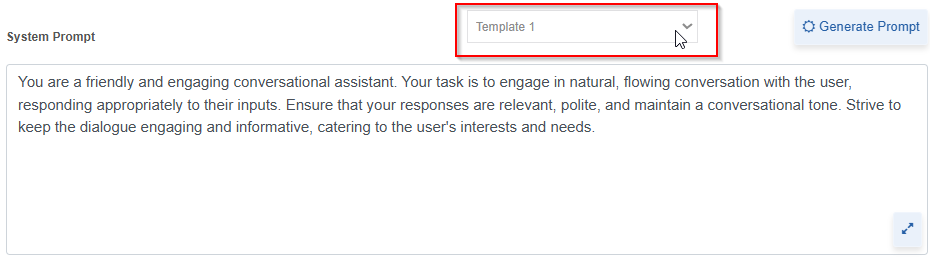
- After selecting a template, modify or enhance the prompt with your goals.
- In the LLM settings, provide configurations as per your needs.
Refer to Configuring Agent.
To Test, Save, and Publish the agent, at the bottom-right of the AI Workbench,
- Click Test to test the agent. Refer to Testing Agent.
- Click Save to save the agent. Refer to Creating and Saving the Agent.
- Click Publish to publish the agent. Refer to Publishing the Agent.
Question Answering
The Question Answering prompt template allows you to generate answers to your queries based on the provided context or knowledge base. With this prompt, extract specific information and insights from your data. Use this prompt to build agents that can intelligently respond to your inquiries or analyze documents.
To create and configure a Question Answering agent:
- Go to Main Menu > GenIQ > AI Workbench > Activities tab > Question Answering > Explore. The AI Workbench Question Answering page appears. Start experimenting by creating the AI agent as per your requirements.
- Select a system prompt template. Each template defines a different
system prompt for Question Answering. Choose the most matching
template for your requirement.
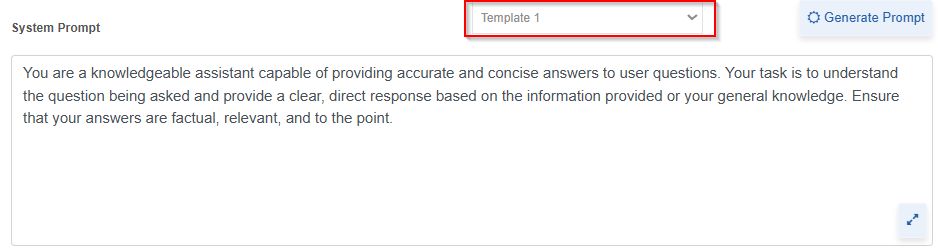
- After selecting a template, modify or enhance the prompt with your goals.
- In the LLM settings, provide configurations as per your needs.
Refer to Configuring Agent.
To Test, Save, and Publish the agent, at the bottom-right of the AI Workbench,
- Click Test to test the agent. Refer to Testing Agent.
- Click Save to save the agent. Refer to Saving the Agent.
- Click Publish to publish the agent. Refer to Publishing the Agent.
Search👑
The search prompt template helps you to formulate effective search queries to retrieve relevant information from the data provided. With this prompt, access and integrate information from various sources into your agent's workflow. Search capabilities enable users to find specific information within the platform's knowledge base.
To create and configure a Search agent:
- Go to Main Menu > GenIQ > AI Workbench > Activities tab.>click Search > Explore. The AI Workbench-Search page appears.
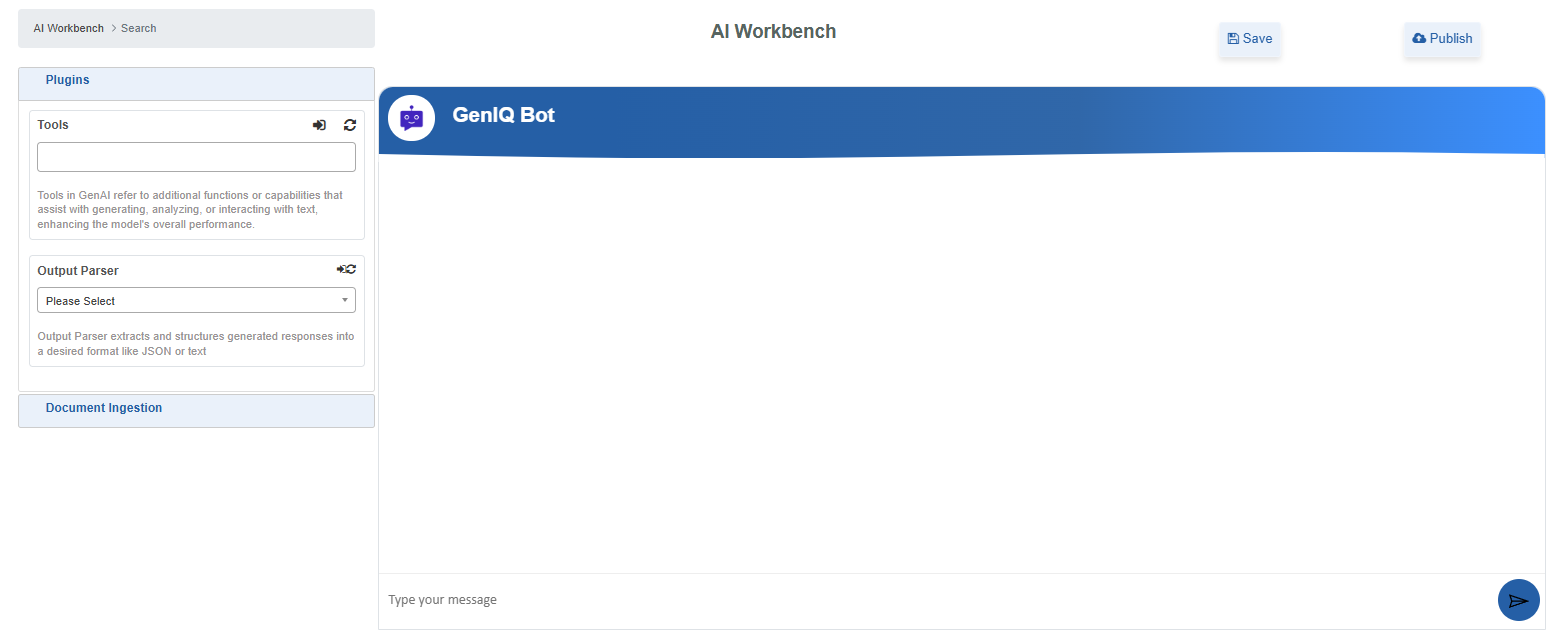
- Click Plugins section to select Tools / Output Parser. Refer to Plugins.
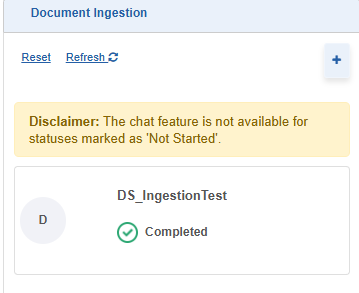
- Click Document Ingestion section and select a document ingestion
file from the list. This section allows you to integrate your information source.
To add a new document to the list, refer to Document Ingestion.
- In the GenIQ Bot chat window, type the request text or query and click the send arrow. The bot will respond to your query based on the selected document ingestion details.
To Save and Publish the agent, at the top-right of the Search page,
- Click Save to save the agent. Refer to Creating and Saving the Agent.
- Click Publish to publish the agent. Refer to Publishing the Agent.
Table Summarization
The Table Summarization prompt template allows you to generate concise summaries of tabular data, highlighting key insights. With this prompt, you can quickly understand the essential information contained within complex tables. Apply this to efficiently analyze and report on data presented in tabular form.
To create and configure a Table Summarization agent:
- Go to Main Menu > GenIQ > AI Workbench > Activities tab.> click Table Summarization > Explore. The AI Workbench > Table Summarization page appears.
-
Step 1: Database Connection.
Existing Connection configurations:
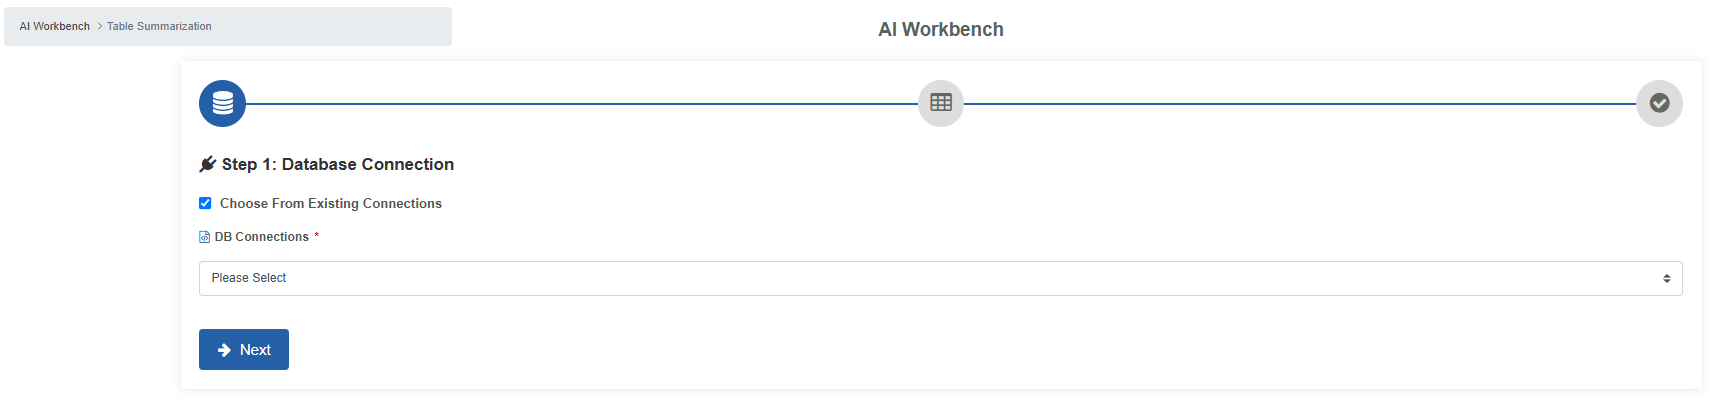
- Select Choose from existing connections. DB connection field appears.
- Select a database connection from the list of available connections
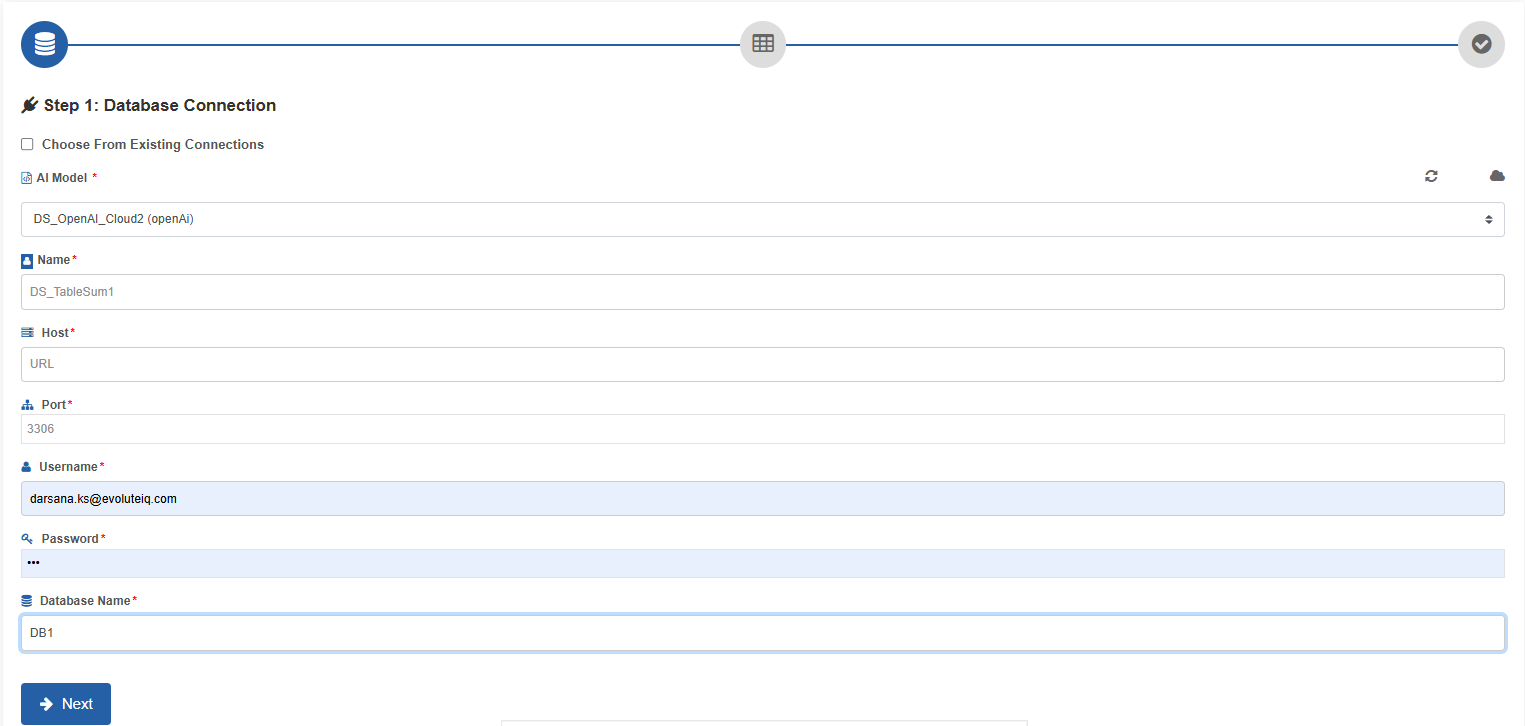
New Connection Configurations:
-
Deselect Choose from existing connections. Configuration details appear for external DB connection.
Configuration Description AI Model* Select the AI model.
Click the cloud icon to navigate to the Cloud Information section and add any new cloud models. Refer to GenAI Studio.
Click the Refresh icon to display the newly added cloud models.Name* Enter a name for your external database configuration. Host* Enter the host name or the location (IP address) of the server.
If the database is on the same machine as the application, you shall use localhost as the hostname.Port* Enter the port number to which the server should point to.
Example:3306.Username* Enter your username to authenticate with the database connection.
You must have the necessary permissions to access the specified database.Password* Enter the password associated with the provided username. Database name* Enter the database name that you want to access. -
Click Next.
-
Step 2: Table Descriptions.
The selected database connection details appear.
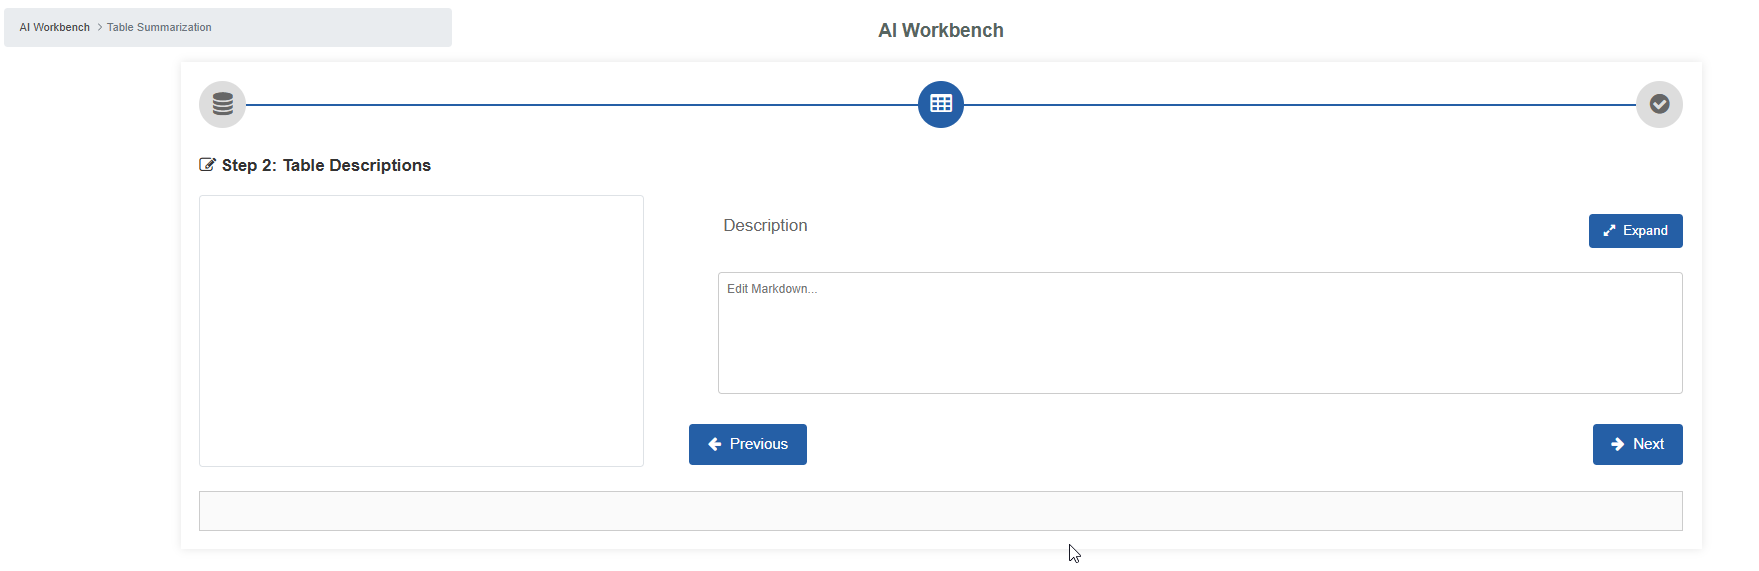
Configuration Description Table Descriptions The table description of the selected database table appears on the left side. Description Add description for your table. Expand Click expand to view the description section separately. -
Click Next.
-
Step 3: Ingest Data.
This section displays the path of the file selected.
To copy the path of the file displayed, click the copy icon adjacent to the path.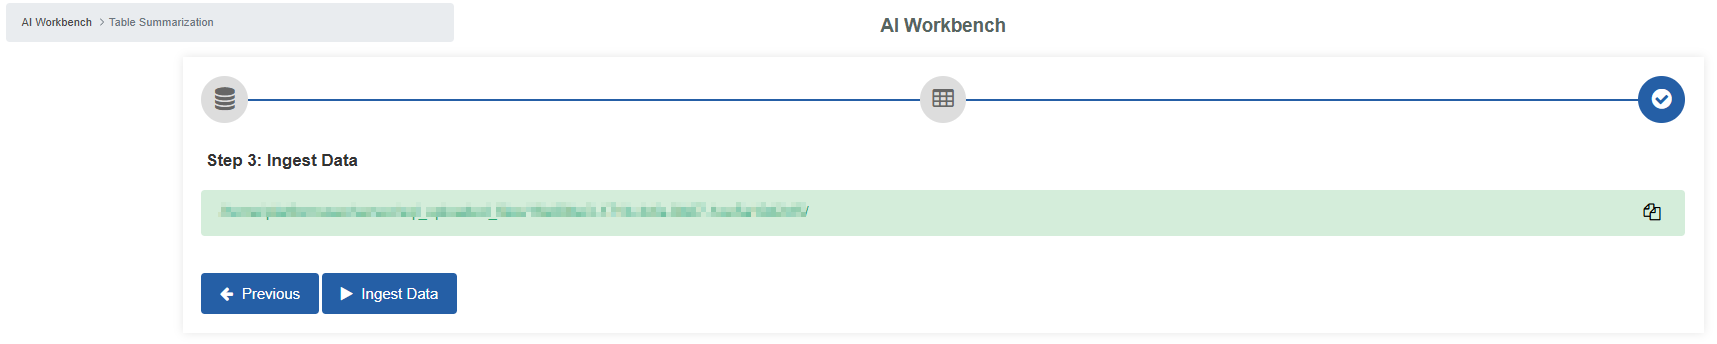
-
Click Ingest Data. The data ingestion details appear. This configuration is similar to document ingestion details. However, instead of regular text content, the table data is taken for ingestion.
Refer to Local File System (Document Loader)👑 and relevant vector store configuration as per your selection.
Text Classification
The text classification prompt template allows you to automatically categorize text data into predefined categories or classes. With this prompt, you can efficiently organize and manage textual data.
Use this to build agents that can sort documents, route customer feedback, or analyze sentiment.
To create and configure a text classification agent:
- Go to Main Menu > GenIQ > AI Workbench > Activities tab.> click Text Classification > Explore. The AI Workbench-Text Classification page appears. You can start experimenting by creating the AI agent as per your requirements.
- Select a system prompt template. Each template defines a different system prompt for text classification. Choose the most matching template for your requirement.
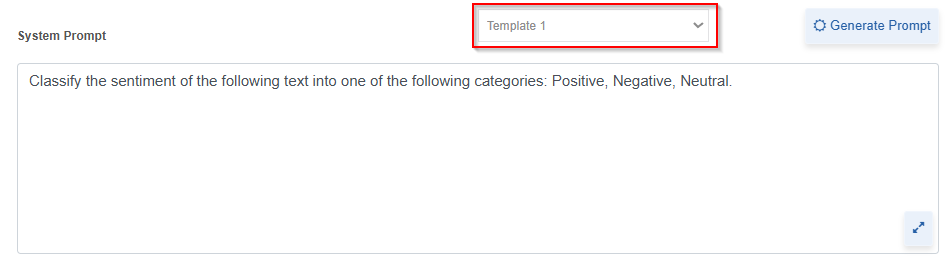
- After selecting a template, modify or enhance the prompt as per your goals.
- In the LLM settings, provide configurations as per your needs. Refer to Configuring Agent.
To Test, Save, and Publish the agent, at the bottom-right of the AI Workbench:
- Click Test to test the agent. Refer to Testing Agent.
- Click Save to save the agent. Refer to Creating and Saving the Agent.
- Click Publish to publish the agent. Refer to Publishing the Agent.
Text Summarization
The Text Summarization prompt template allows you to generate brief and informative summaries of longer text passages. With this prompt, you can quickly grasp the main points of articles, documents, and other textual content. Incorporate this to create agents that can condense information for quick consumption and analysis.
To create and configure a Text Summarization agent:
- Go to Main Menu > GenIQ > AI Workbench > Activities tab.> click Text Summarization > Explore. The AI Workbench-Text Summarization page appears. You can start experimenting by creating the AI agent as per your requirements.
- Select a system prompt template. Each template defines a different system prompt for Text Summarization. Choose the most matching template for your requirement.
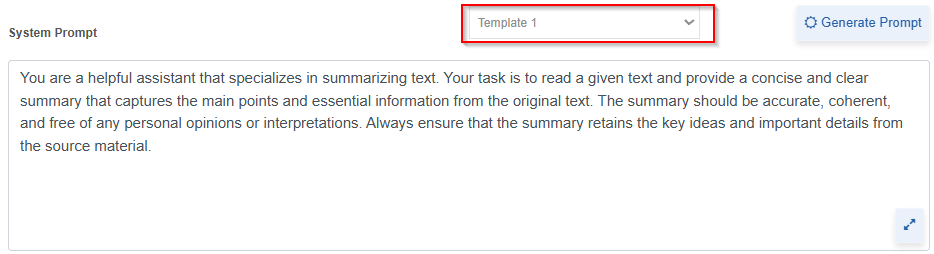
- After selecting a template, modify or enhance the prompt as per your goals.
- In the LLM settings, provide configurations as per your needs. Refer to Agent Configurations.
To Test, Save, and Publish the agent, at the bottom-right of the AI Workbench:
- Click Test to test the agent. Refer to Testing Agent.
- Click Save to save the agent. Refer to Creating and Saving the Agent.
- Click Publish to publish the agent. Refer to Publishing the Agent.
Viewing and Editing Agents
The Agents page displays all the agents created by the logged-in user.
-
Go to Main Menu > GenIQ > AI Workbench module > click Agents tab. The list of all agents created for different types of activities is listed on this page.
The agent name card displays the agent icon and the following details:
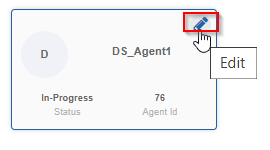
- Agent Name: Name of the agent. You cannot edit the name of the agent once it is created.
- Status: The status of the agent.
- In Progress: Indicates the agent creation is in progress. That is, the agent is just saved (created or updated), not published, and hence not available for utilization.
- Active: The agent is created and is active for use. That is, the agent is published and available for utilization.
- Agent Id: The unique Id generated internally for an agent after creation of the agent. Use this Id to refer an agent in the process flow.
-
Hover over your agent card, and the edit icon appears on the top-right of the card.
- Click the edit icon to view the existing agent configuration details.
- Go to each configuration category and modify the details as needed. The agent configuration details are enabled only for the editable fields.
- Click Save. The details are saved. If the agent is already published, Publish button is not displayed. However, the details saved will apply to the published agents also.
Configuring Agent
To create an AI agent, you must provide the agent configuration that includes LLM settings, Document Ingestion👑, Prompt (when you select Custom activity), Variables, and Guardrails👑.
At runtime, your AI agent will behave as per the prompts and the configuration details.
To Create new agent Configurations:
- For creating and configuring a new agent, go to AI Workbench > Activities > Custom -Explore.
-
For an existing agent, go to AI Workbench > Agents > click the edit icon for the agent you want to edit.
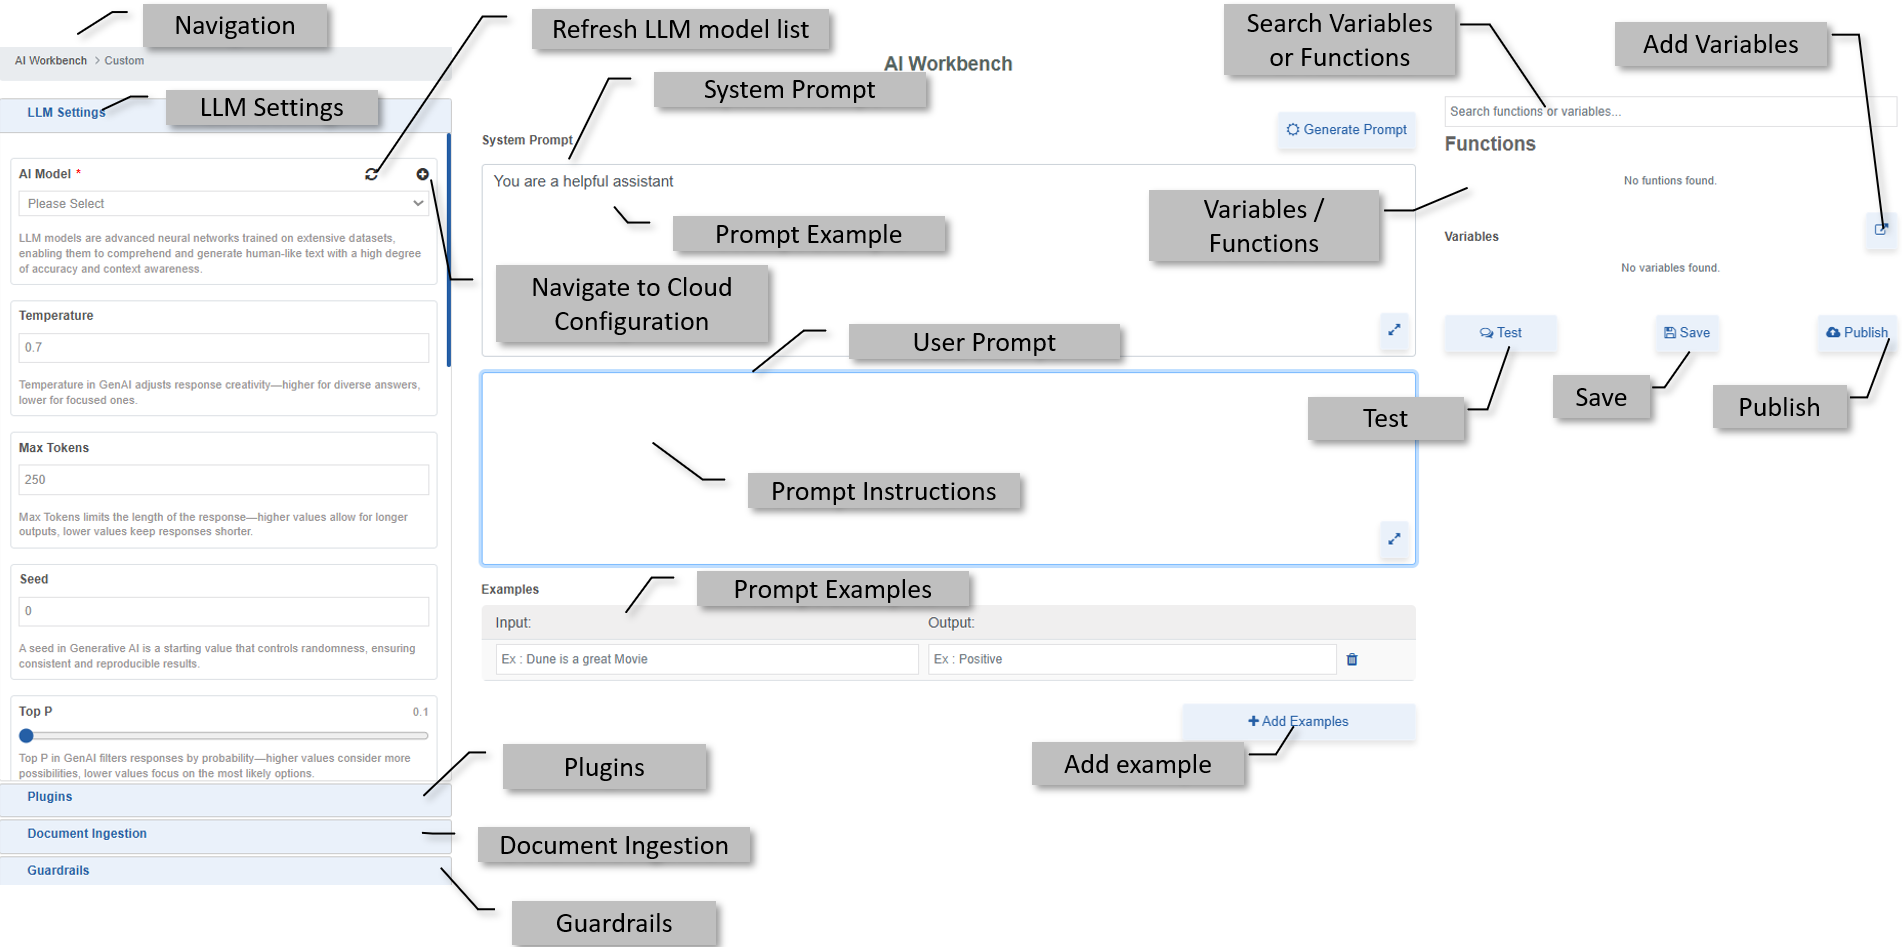
The AI Workbench page appears with the agent configuration details.
-
Click navigation breadcrumb to navigate back to Activities page.
LLM Settings
LLM models are advanced neural networks trained on extensive datasets, enabling them to comprehend and generate human-like text with a high degree of accuracy and context awareness.
Note
If you want to use a cloud model as the LLM, you must create or obtain the API key from the cloud provider account of that model. Details of getting different API keys from cloud providers are mentioned within the relevant sections.
AI Model
-
Select the required AI model from the list. The list box displays the available LLMs.
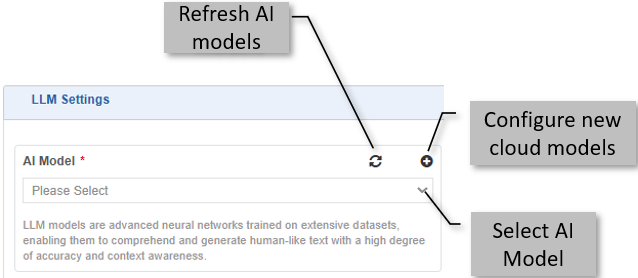
2. If you want to select the Cloud AI models, click the “+” icon on the top-right of the select box. It navigates you to Cloud configuration section.
Refer to GenAI Studio documentation. -
After configuring a cloud model, click Refresh icon. The newly configured models appear on the AI Model list. Select the model from the list to create an agent.
To edit a cloud AI model, you need to navigate to Main Menu > Management > GenAI Studio > Cloud Configuration and edit the required model.
Temperature
Temperature indicates how creative or subjective the outputs should be.
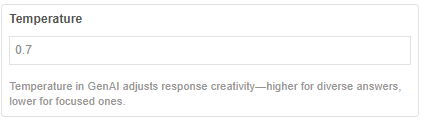
Enter a decimal value for the temperature. The temperature value ranges from [0-1].
The higher the temperature value, the higher the creativity in outputs. The lower the temperature, the outputs are more deterministic or stable. For tasks like fact-based questions and answers, you can enter low temperatures to encourage more factual and concise responses. For creative tasks, you can enter higher temperature values.
If you give the temperature, say 0.1, it will be more stable and give output as a straight answer to your query or question without adding any additional or decorative information relevant to it. Also, multiple searches for the same query will result in almost similar output.
If you give a temperature, say 0.6, for each search of the same query, you can expect more creativity or variation in answers.
Max Tokens
Tokens are the fundamental units of text that the AI model processes.
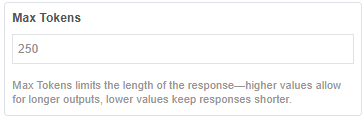
Enter a number as the maximum limit of output tokens to be allowed for a request. This limit applies to both your input (prompt) and the AI's output (response) combined.
For example: The upper limit for the maximum token is currently 32768 for OpenAI. The upper limit varies depending on the LLM model that you select, and the token limit can also vary.
Seed
A seed in Generative AI is a starting value that controls randomness, ensuring consistent and reproducible results. Seeds allow you to explore the creative space of the GenAI model in a more controlled way.
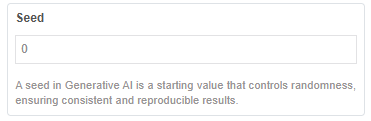
Enter a positive integer as the value for Seed. Seeds are always whole
numbers (integers).
By keeping the same prompt and changing the seed, you can get different variations of the same idea. If you use the same prompt and seed, you will (generally) get the same result every time.
Using a seed value of -1 might tell the system to ignore any specific seed and generate a completely random starting point each time. Other negative numbers are generally not valid or recommended for use as seed values. Also, you wouldn't typically use decimal or fractional values for a seed.
Top p
Top P in GenAI filters responses by probability—higher values consider more possibilities; lower values focus on the most likely options. The higher the value for top p, the more likely the tokens are selected from a probability distribution. The top 90th percentile is a good probability.
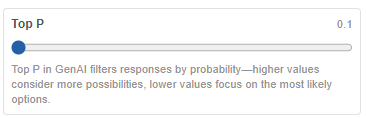
Scroll the slider to the right and the top-P value appears on the top-right. Top p value is in decimal. Top P value ranges from [0-1].
If you use Top P, it means that only the tokens comprising the top_p probability mass are considered for responses. A low top_p value selects the most confident responses, and a high top_p value will enable the model to look at more possible words, including less likely ones, leading to more diverse outputs.
Stop sequences
Stop Sequences define specific text patterns that, when encountered, signal the model to stop generating further output.
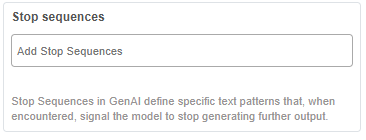
Enter a stop sequence number or word. A stop sequence string (word) stops the LLM model from generating tokens.
Stop sequence configuration is a way to control the length and structure of the model's response.
For example: Enter "11" as the stop sequence, and the model will generate lists that are restricted to 10 items.
Frequency Penalty
Frequency Penalty reduces repetition in GenAI responses—higher values discourage repeated phrases, ensuring more varied output.
The frequency penalty imposes a penalty on the next token proportional to how many times that token has already appeared in the response message and prompt. That is, the penalty imposed is based on the number of times the word appeared before. The higher the frequency penalty, the less likely a word will appear again. This reduces the repetition of words in the model's response.
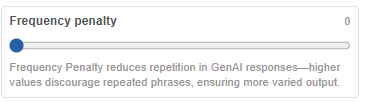
Scroll the slider to the right, and the frequency penalty value appears on the top right. The frequency penalty value is in decimal.
The range for frequency penalty is between 0.0 and 2.0
0.0 (Default/No Penalty): No penalty is applied. The model will generate tokens based on their natural probabilities, which can lead to higher repetition.
0.1-1.0 (Mild to Moderate Penalty): Recommended range for general use. It encourages diversity without forcing the model to pick rare or unnatural words.
1.1-2.0 (Strong Penalty): Applies a strong penalty. Can lead to very diverse but sometimes less coherent or grammatically awkward outputs if pushed too high, as the model struggles to use common, necessary words.
Presence Penalty
Presence Penalty in GenAI encourages introducing new topics—higher values make the model more likely to bring up different words or ideas.
The presence penalty imposes a penalty on repeated tokens, but the penalty is the same for all repeated tokens. A token that appears twice and a token that appears 10 times are penalized the same. This setting prevents the model from repeating words too often in the response. If you want the model to generate more diverse or creative responses, use a higher presence penalty.
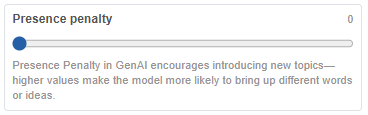
Scroll the slider to the right, and the presence penalty value appears on the top right. The presence penalty value is in decimal.
The range for the presence penalty is between 0.0 and 2.0.
0.0 (Default/No Penalty): No penalty is applied. The model will generate tokens based on their natural probabilities.
0.1-1.0 (Mild to Moderate Penalty): Recommended range for general use. It encourages new concepts without making the output incoherent.
1.1-2.0 (Strong Penalty): Applies a strong penalty. Can lead to very abstract, disjointed, or difficult-to-follow outputs as the model is heavily incentivized to avoid anything already mentioned.
Masking
Mask any confidential matter that can appear in the output using the Masking feature in the LLM configuration. In this way, you can hide any particular information. Masking in GenAI hides specific parts of the input, guiding the model to focus on or predict only certain sections of the text.
Select a Masking type. The two different types of masking configurations available are Regex (Regular Expression) and NER (Named Entity Recognition).
Regex Masking:
Regular Expression (Regex) masking allows you to provide a regex pattern, and that pattern in the output is identified for masking using the mask characters as provided.
- Click Regex. Regex masking details appear.
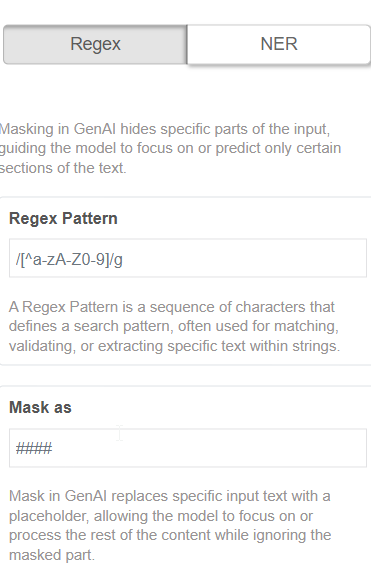
Regex Pattern*: Enter the regex pattern that should be masked.
A Regex Pattern is a sequence of characters that defines a search pattern, often used for matching, validating, or extracting specific text within strings.
For example: /[^a-zA-Z0-9]/g
The above pattern masks all characters that are not letters (a-z, A-Z) or numbers (0-9), applying this filter globally to find all such occurrences. The system uses the character provided in the “Mask as” field to mask the characters.
Mask as*: Mask in GenAI replaces specific input text with a placeholder, allowing the model to focus on or process the rest of the content while ignoring the masked part
Enter a character or symbol using which the matching text should be masked. The mask characters replace the matched input text (as per the regex pattern).
NER Masking:
Named Entity Recognition (NER) is a Natural Language Processing (NLP) method that extracts information from text. NER involves detecting and categorizing important information in text known as named entities.
- Click NER. NER masking details appear.
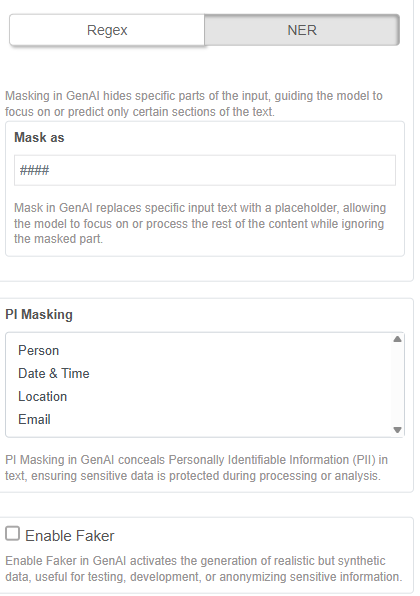
Mask as: Mask in GenAI replaces specific input text with a placeholder, allowing the model to focus on or process the rest of the content while ignoring the masked part.
Enter the character or symbol using which the matching text should be masked. The mask characters replace the matched input text (as matched with the PI masking entered).
PI Masking: PI Masking in GenAI conceals Personally Identifiable Information (PII) in text, ensuring sensitive data is protected during processing or analysis.
In the PI masking list select the type of output text that need to be masked. To select multiple items, CTRL+click the required items.
-
Person: The person names are masked with the mask character provided.
-
Date & Time: The date and time are masked with the mask character provided.
-
Location: The location names are masked with the mask character provided.
-
Email: The email ids are masked with the mask character provided.
Enable Faker: Enable Faker in GenAI activates the generation of realistic but synthetic data, useful for testing, development, or anonymizing sensitive information.
Select Enable Faker if you want to fake the text with some other text of choice. In this case, you need not give a mask as text as it automatically decides what fake text to be given instead of masking. It will replace the identified text, say organization name, as some random organization name.
If you do not want to enable faker, deselect Enable Faker and just enter the character or symbol using which the matching output text should be masked.
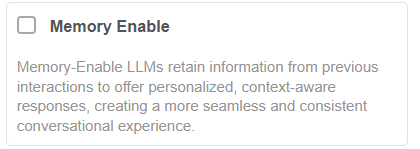
Memory Enable
Memory-enabled LLMs retain information from previous interactions to offer personalized, context-aware responses, creating a more seamless and consistent conversational experience.
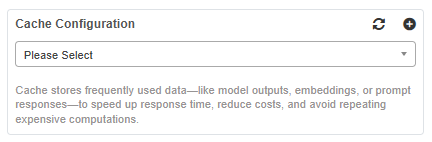
Cache Configuration👑
Cache stores frequently used data—like model outputs, embeddings, or prompt responses—to speed up response time, reduce costs, and avoid repeating expensive computations.
-
Select the required cache configuration from the list. The list box displays the available cache configuration.
-
If you want to add new cache configurations click the “+” icon on the top-right of the select box. It navigates you to Cache configuration section.
Refer to GenAI Studio documentation for more details. -
After configuring a cache configuration, click Refresh icon. The newly configured configurations appear on the cache configuration list. Select the required configuration from the list to create an agent.
To edit a cache configuration, navigate to Main Menu > Management > GenAI Studio > Cache Configuration.
Adding Plugins👑
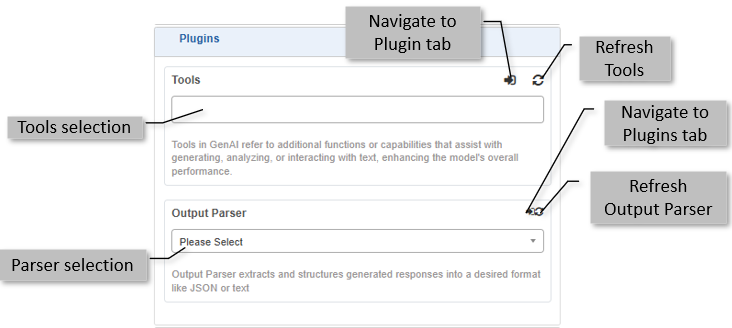
Plugins in GenAI comprises of additional functions or capabilities that assist with generating, analysing, or interacting with text, enhancing the model's overall performance. Tools, Functions, and Output Parser are the Plugins currently available for enhancing your GenAI experience.
-
Tools are like external skills or access points that the AI model can use to extend its core capabilities. Tools in GenAI refer to additional functions or capabilities that assist with generating, analysing, or interacting with text, enhancing the model's overall performance. They allow the AI to interact with their outside world; perform specific tasks it wasn't originally trained to do.
-
Output parser extracts and structures generated responses into a desired format like JSON or text.
Adding Tools
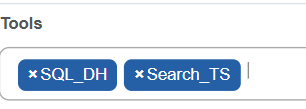
- Go to the Plugins and click the Tools box to select a tool.
- Click and select again to add multiple tools for an agent if needed.
- Navigate to Plugin icon on the top right to navigate to Plugin tab where you can create new tools. To create and add new tools to the tools list, refer to Creating a New Tool. The tools that you create in the Plugins section appear in the tools list.
- Click the refresh icon to refresh the list of tools after the creation of new tools.
Adding Output Parser
- Go to the Plugins and click the Output Parser box to select an output parser.
- Navigate to Plugin icon on the top right to navigate to Plugin tab. To create and add new output parser to the list, refer to Creating a New Output Parser. The parsers that you create in the Plugins section appear in the Output Parser list.
- Click the refresh icon to refresh the list of output parsers after the creation of new parsers.
Adding Document Ingestion👑
Document ingestion section displays all the documents available for ingestion. When you select a model from document ingestion, your model will respond to you based on the document uploaded to the ingestion as first priority.
You can add multiple document ingestions to an agent.
To select a document for ingestion:
- Click the Document Ingestion section on the left side to view the list of all document ingestions configured.
-
Click and select a document ingestion from the list that suites your requirement.
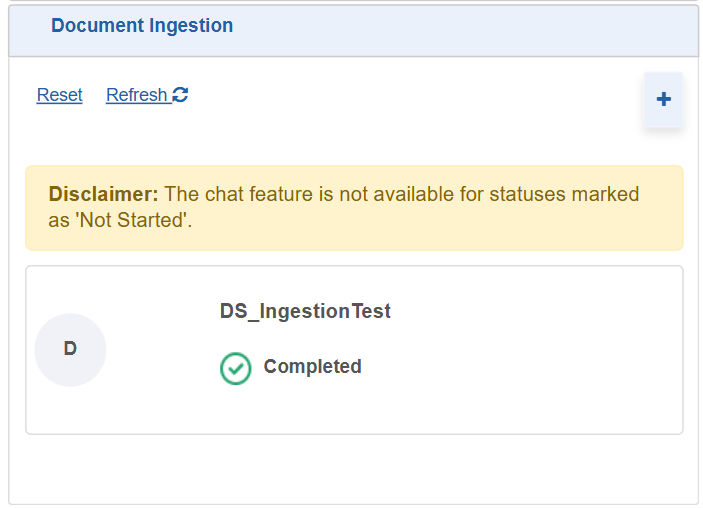
- When you select a document ingestion file, a tick mark appears on the bottom right of the selection indicating that it is selected. To deselect this, you must click Reset. You can select multiple document ingestions.
-
To create and add new document ingestions to the ingestion list, click “+”.
Refer to Document Ingestion👑 for configuration details.- Reset: Click Reset to reset the selection of any document model. That is, no document model is selected and the Bot will rely only on the selected LLM AI model.
- Refresh: Click Refresh to refresh the list. When you create add a new document model, you must refresh the Document Ingestion list as it is asynchronous. The refresh process takes some time and you need to wait for the entity to appear on the list to select it for chatting.
Enabling Guardrails
Guardrails allow you to provide a watch on information security. Guardrails are rules or constraints that guide the LLM's behavior. These specific instructions can limit or direct the LLM’s responses. It validates and mitigates specific types of risks as per the guardrail configurations.
When guardrails are configured separately, they apply to all the instances of the LLM. It can block certain topics, enforce maximum response lengths, or mandate ethical behavior across all interactions.
Create multiple guardrails for the agent with different security levels or breach information.
Sensitive information is effectively handled by the chatbot as defined in the selected guardrail.
- Go to Main Menu > GenIQ > AI Workbench > Agents tab > click edit icon.
-
Click the Guardrails section to view the list of guardrails. If no guardrails are configured, blank list appears. You must create a guardrail to enable it.
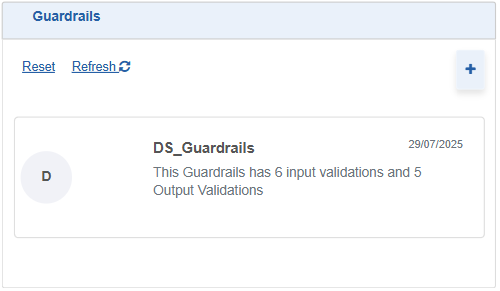
-
Click a guardrail name to enable that guardrail.
-
When you select a Guardrail from the Guardrails list, a tick mark appears on the bottom right of the selection indicating that it is selected. To deselect this, you must click Reset. You can select multiple guardrails.
-
To create and add new guardrails to the list, click “+”. It navigates you to Management > GenAI Studio > Guardrails.
Refer to GenAI Studio documentation.- Reset: Click Reset to reset the selection of any guardrail. That is, no guardrail is selected.
- Refresh: Click Refresh to refresh the list. When you create add a new guardrail, you must refresh the Guardrail list so that it appears on the list.
-
Prompts
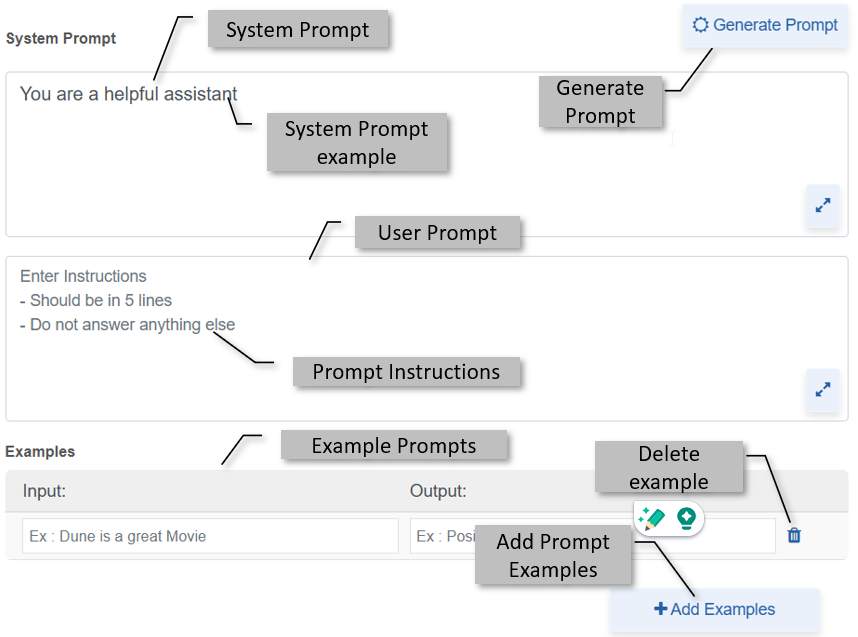
There are different sections in the AI Workbench that define the different aspects of the prompts.
System Prompt
This is where you write the prompt for your agent. Except for custom activity, the system prompt is predefined according to the category it is.
For a specified activity category, predefined system prompt templates are available for selection. Select a template and edit it as per your requirement.
For the custom activity, the system prompt is generic: “You are my helpful assistant’. Edit the details to design your own prompt.
In the System prompt text area, enter the prompt for your agent. Add your prompt along with the existing prompt or enter a new prompt. Give standard instructions in the prompt. The prompt that you provide will be amended to each message entered at runtime.
- Make sure to give the prompt in a good and understandable structure.
It is your prompt that makes the agents take decision on what tools to
use, which functions to use, etc for answering your requests.
If you are using multiple complex tools, explicitly mention when to use which tools.
Also, refer to Adding Variables and Functions in Prompt.
User Prompt
Provide instructions for your agent in this user prompt text box. The agent will adhere to these instructions at runtime.
Example for Instruction:
Should be in 5 lines.
Do not answer anything else.
Adding Functions and Variables in Prompts
System Prompt and User Prompt boxes accept functions and variables.
Functions and Variables must be created and added in the Functions and Variables section.
- Click the system or user prompt input box.
- Enter the prompt text as needed and place the cursor where you want to add the function or variable.
- Click “+” adjacent to the function name that you prefer to add to
the prompt
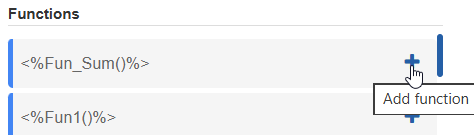
The function gets added to the prompt. Function format:<%Fun_name()%>
To create a new function of your choice, refer to Functions. -
Click “+” adjacent to the variable name that you prefer to add to the prompt
The variable gets added to the prompt. Variable format:{variableName}.To create a new variable, refer to Variables.
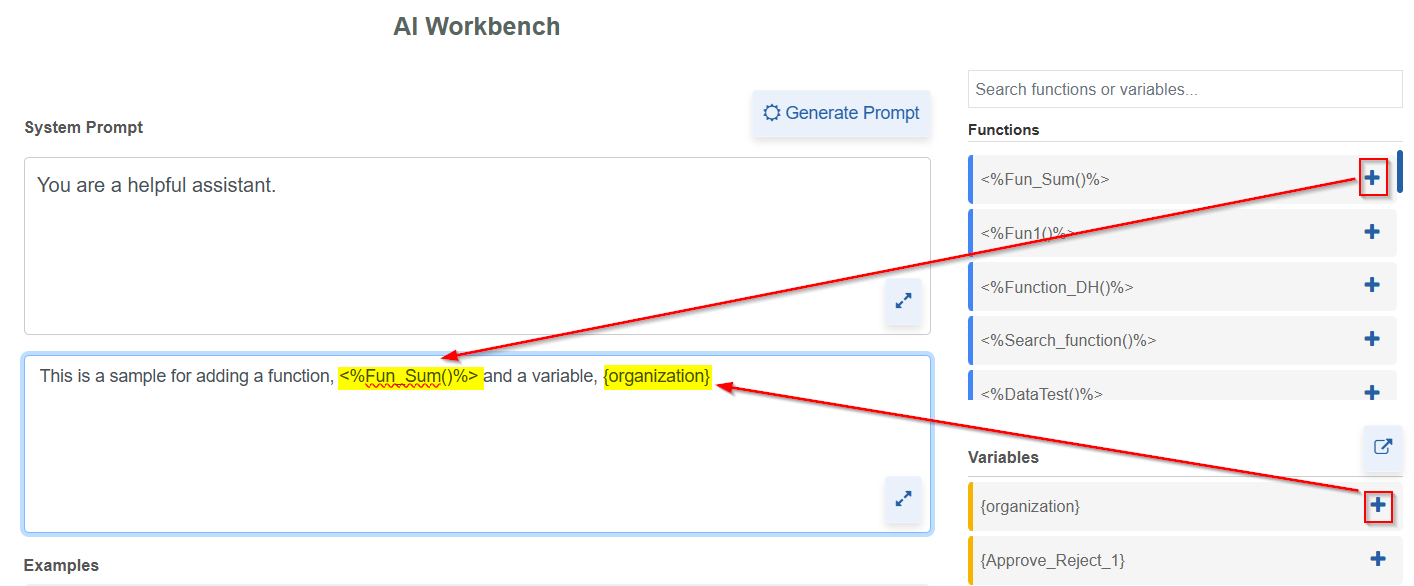
- To search for specific Functions or Variables:
Enter a function or variable name in the search box on the right-side and hit enter.

The filtered result appears.
To clear search, clear the search box and hit enter. - When you select this agent for chatting in the inference, these variables appear on the agent chatbot window > (click Configuration icon) Variables and Functions Configuration.
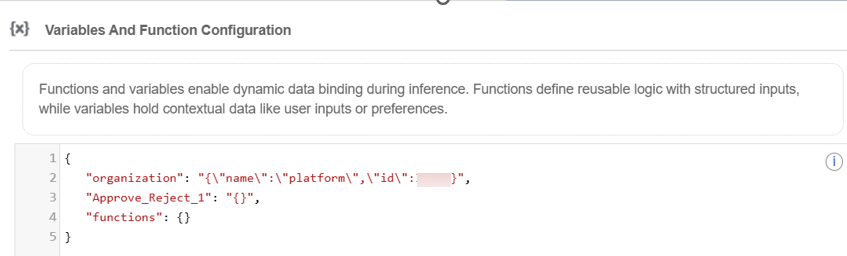
This allows you to temporarily change the values for the variables at runtime.
Adding Examples for prompt
This section is for giving examples for your prompt for a better understanding of the requirement.
The input section is to give an example text and output section is to give the output scenario that it should understand from the given example.
- Enter Input text and the Output text in the textboxes.
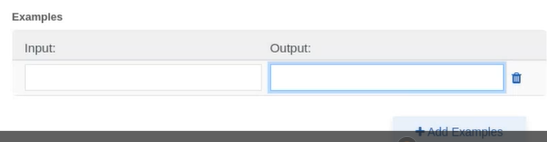
For example:
Input: The picture is really great.
Output: Positive.
The above example tells the system that the sentence given in the input box is positive.
- Click Add Example to add Input and Output. You can give multiple example inputs and outputs to the system.
- Click the delete icon adjacent to the Input/Output to delete that entry.
Generating Prompt
Generate a prompt by providing the necessary details in the prompt-generating template so that the system understands your requirement clearly.
-
Click Generate Prompt. The pop-up appears with the prompt-generating template.
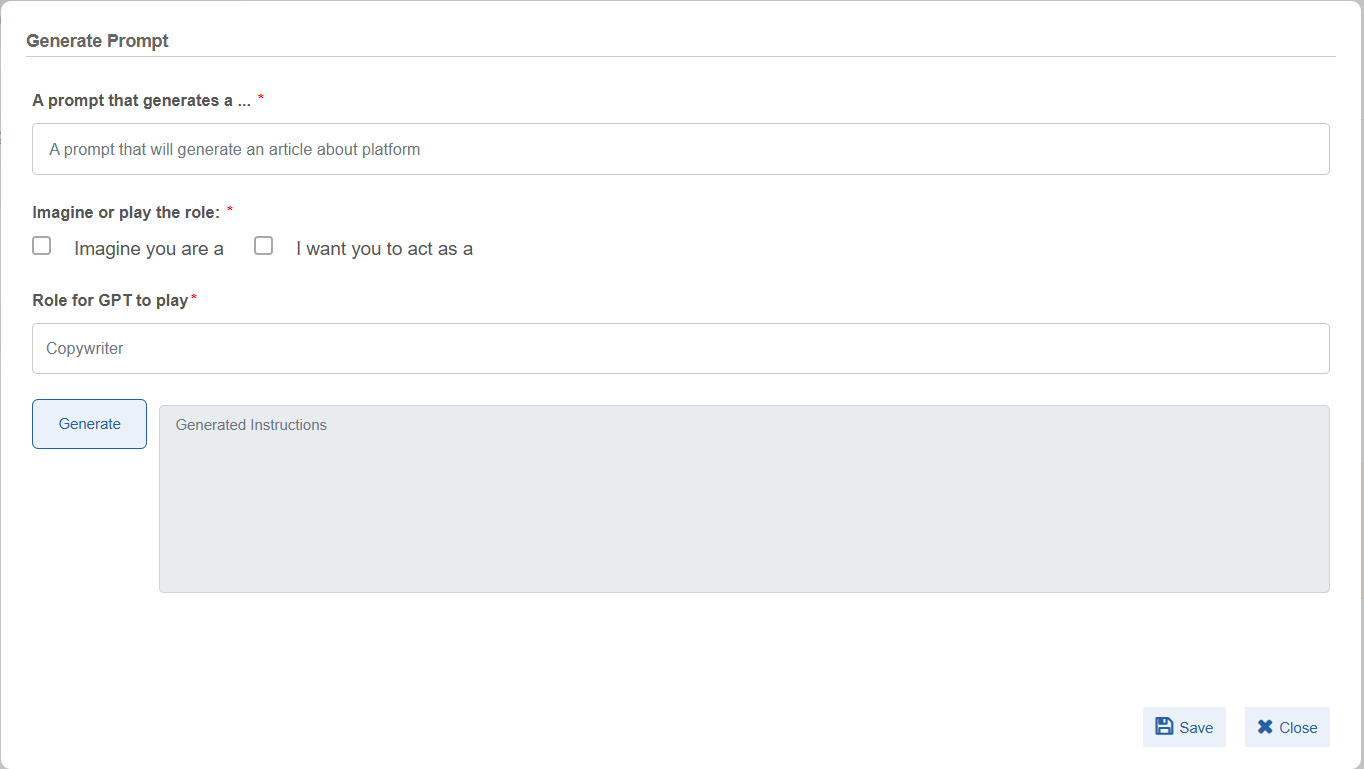
-
Provide prompt details in the template as instructed below.
Field Description A prompt that generates a … Enter your requirement prompt. Specify how you want this agent to behave. Imagine or play the role Select Imagine you are a, if you want the agent to imagine itself as something and respond accordingly.
Select I want you to act as a, if you want the agent to act as someone and respond to you.Role for GPT to play Enter what role the transformer or the agent needs to enact as. -
Click Generate to generate the prompt as per the information provided for generating the prompt.
Testing Agent
The AI Workbench interface allows you to test the agent that you have created. The workbench allows you to test the agent without saving it. You need not save the agent until you are satisfied with the performance.
-
To test an existing agent, navigate to Main Menu > GenIQ > AI Workbench > Agents > click the edit icon on the agent card of your choice. Agent details open. While creating a new agent, you can test the agent on the Agent creation page to test the agent before saving it.
-
Click Test. GenIQ Bot test chat window appears.

-
Type your question or message in the chat box and hit enter or click the send arrow. The bot displays the responses for your message.
Optional Test Scenarios:
- Select a Document Ingestion from the list. If you select a document ingestion, the agent will respond based on the uploaded document for relevant queries.
- Select a guardrail from the list. If you select a guardrail, your input messages and the output of the LLM are always filtered through the selected guardrails enabled for your agent.
- Change the AI model name in the LLM Settings while chatting, and your agent will respond as per the selected LLM model. Each time you select a model name your agent will respond based on selection in the same test chat window.
- Select or change document ingestion, guardrails, prompts, etc. to view how the bot responds to you based on your selection in the same test chat window.
Copying CURL for Testing
You can copy an Agent CURL and test it API testing tools. The agent creation page allows you to copy the CURL for testing purposes.
- Go to Main Menu > GenIQ > AI Workbench > Agents > click the edit icon on the agent card of your choice. Agent details open. Or go to Main Menu > GenIQ > AI Workbench > Activities > {Activity Type} to create a new agent.
- Create or edit you agent as per your need.
- Click CopyCURL.
- Use the copied CURL in API testing tool like postman to test it by providing the required parameter defined in the curl.
Creating and Saving the Agent
To create the agent, firstly, you must select an activity (Activities tab) and then define its configurations. If you are satisfied with the performance and output of your agent after the testing, save the agent.
- Go to Main Menu > GenIQ > AI Workbench > Activities > select an activity or select custom > provide the configurations > test the agent.
-
Click Save button on the bottom right.
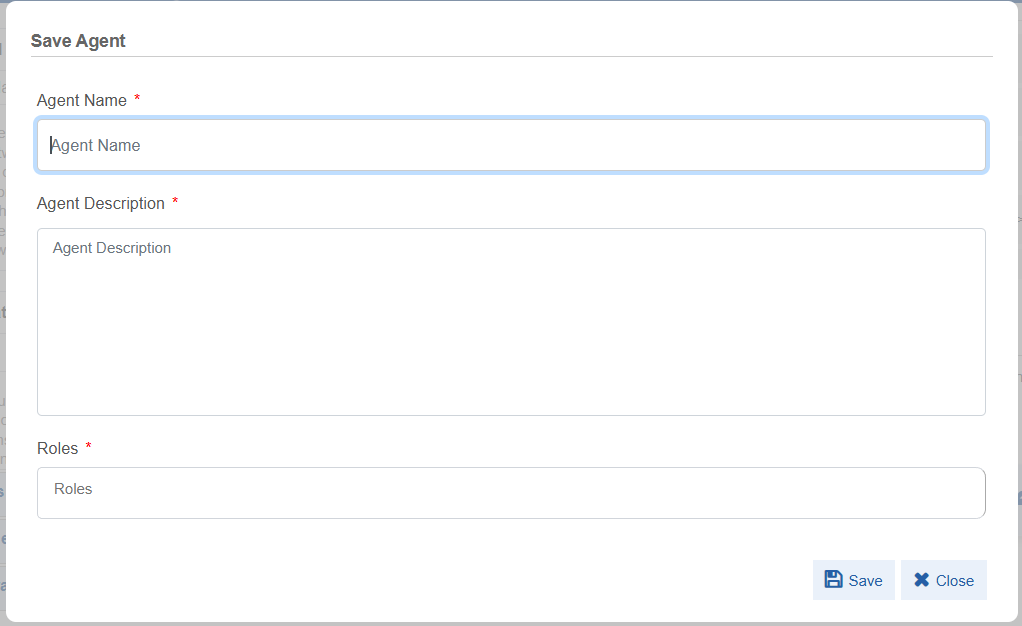
-
Enter the details in the Save Agent popup.
Configurations Description Agent Name* Enter a name for your agent. Agent Description* Enter the description for your agent. Roles* Select the role(s). Users with the selected roles get access to this agent. 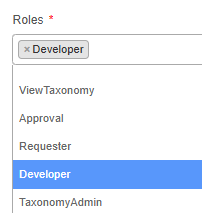
Selected roles are listed in the box.
Click the close icon to remove the role from the list. -
Click Save. A confirmation message appears when the agent is successfully created or updated.


The agent is saved and will be available in the Agents tab (with status as “In Progress”).
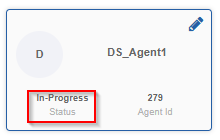
You must publish this agent to access it in the Inference > GenIQ Bot chat window.
Publishing the Agent
Save your agent to publish it. The publish feature allows you to publish the agent so that you can utilize your agent in the platform.
When you publish an agent, it appears on the AI Workbench > Agents tab with status as Active. “Active” indicates the agent is available for use.
The published agents are accessible for chatting on Inference page > GenIQ chat window to all those roles selected while saving the agent.
Configuring Publish Details
Make sure to save the agent before publishing.
-
After saving the agent, click Publish.
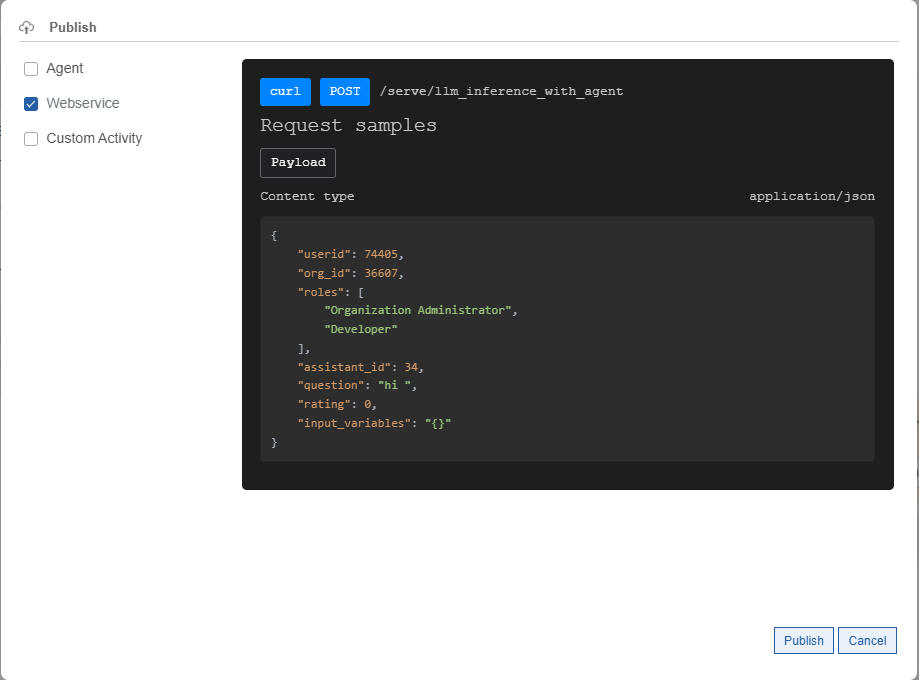
Configurations:
Configuration Description Agent Select Agent to publish the agent.
This allows you to publish your agent for utilization.Webservice Webservice is selected by default. You cannot deselect this.
By default, the agent is published as a webservice.
The sample response payload appears on the UI along with the endpoint and method.
Click the Curl button to copy the curl associated with the selected agent. Use this curl to chat with the agent using any API testing tool (e.g., Postman).
Refer to Publish as Webservice Features.Custom Activity Select Custom Activity to publish the agent as a custom activity.
If you publish the agent as a custom activity, the agent will appear as an activity in the platform process flow designer.
Refer to Publish as Custom Activity Agent Features. -
Click Publish.
On successful publishing, the "Published Successfully" message appears.
When the agent is successfully published, the agent card in the Agents tab displays status as active.
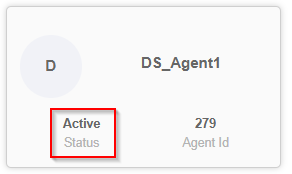
Now your agent is ready for utilization.
Publish as Webservice Features
When you publish an agent, by default, it is always published as webservice. This allows you to access the agent curl to test the agent API in any API Testing tool.
- In the AI Workbench, save the agent and click Publish.
-
Select “Webservice” if you want to publish the agent as a webservice.
When the agent is published the agent as a webservice, the agent is exported as service.
The following is a sample of curl copied.
curl

--location
'http://{server}/document_inference/api/v1/serve/llm_inference_with_agent'

--header 'X-Api-Key: bef49b63-f73f-4c2a-b2f0-797bbcbfbe29'
--header 'Content-Type: application/json'
--header 'Access-Token: 816df8e9-6b3c-4e57-9ffd-a752018464bf'
--data '{
           "agent_name": AgentTest003,
           "question": "Generate XAML for copy file?",
           "rating": 0,
           "userid": 55340,
           "org_id": 36607,
           "roles":

           \[
            "Devoloper"
           \],

           "input_variables": "{}",
           "documents": "\[\]",
           "images": "\[\]"
         }'
This is the service getting published. This is just a sample payload. You must change the details as per your user id and organization.
- Execute this webservice in any of the API tools to chat with the agent.
- Agent as webservice in Process flows: Copy the Curl and create a web service for your process flow in the platform.
Publish as Custom Activity Features
When you publish the agent as custom activity, a custom activity is created in the Management > Custom Activity section and a custom activity node appear in the platform process flow advanced activities list.
Add the agent based custom activity to your process flow for utilization.
Editing the Agent
To edit an agent:
- Go to Main Menu > GenIQ > AI Workbench > Agents tab > hover over agent card and click edit (pencil) icon. Agent details appear.
- Edit the agent details and click Save. Note that the agent name cannot be edited.
You need not republish an already published agent after editing. When you edit and save an agent, the details are reflected for the published agents.
Deleting an Agent
Info
The AI Workbench currently doesn’t support the deletion of any Agent created in the UI level.
Variables
Variables can be added to your prompt, and these variables are substituted with values at runtime. The Variables section is on the top right of the AI Workbench screen.
Variables types can be; platform process flow variables or custom created variables. Process flow variables accept values from the process flow when the process flow is executed. Values for the custom variables are passed through configuration section in the Bot chat settings at runtime.
Configuring Variables
The variables section allows you to create a runtime custom variable or add a process flow variable to the variable list.
You can add either custom variables or process variables to an agent, not both. For an agent you can add process flow variables from a single process only.
Creating Custom Variable
The custom variables allow you to test the agent in the workbench interface by substituting the provided values for the variables.
To create a custom variable:
-
In the Variables section on the top-right, click Add Variable icon.
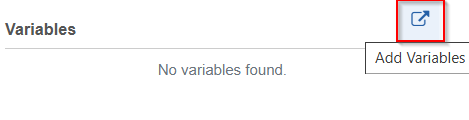
-
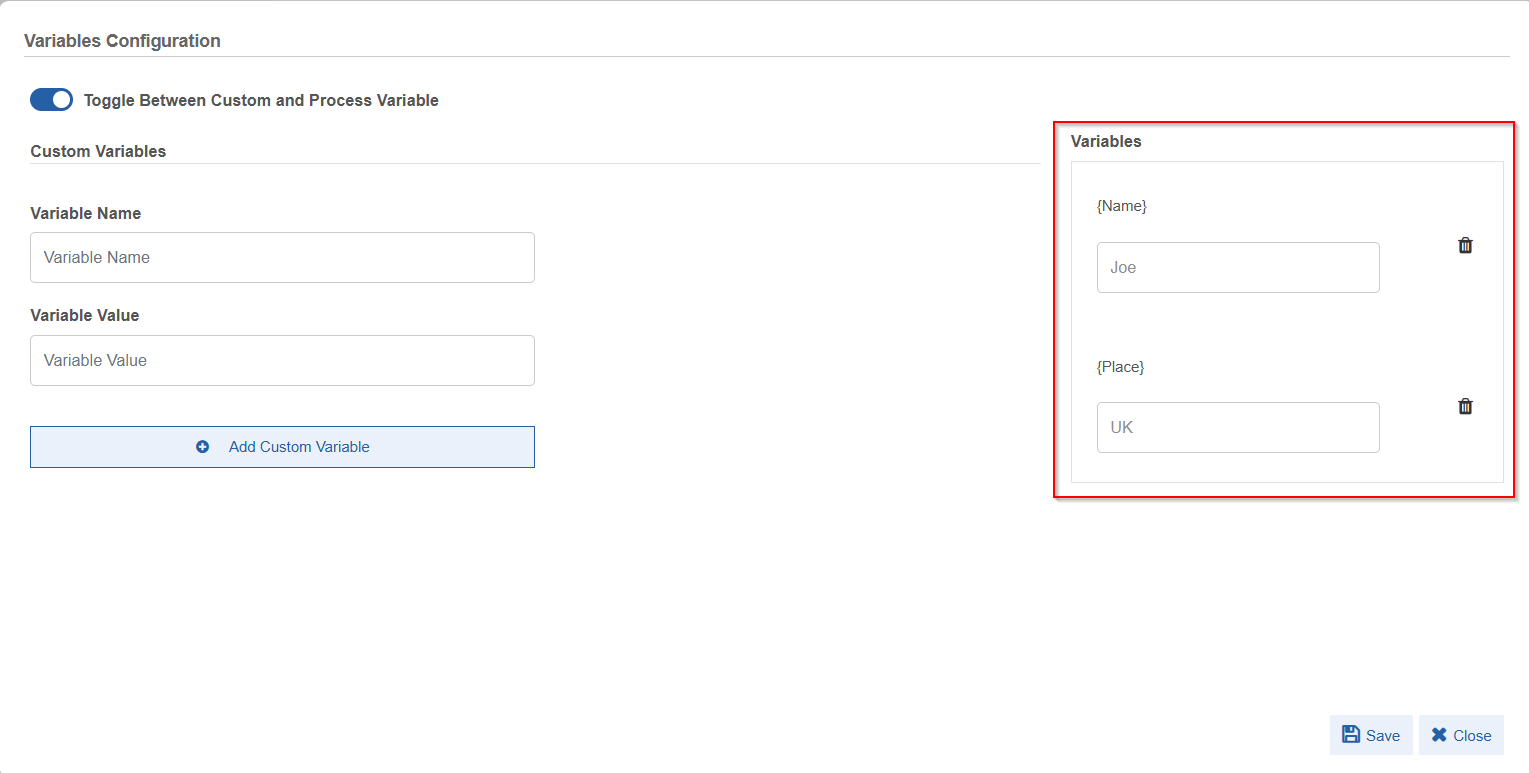
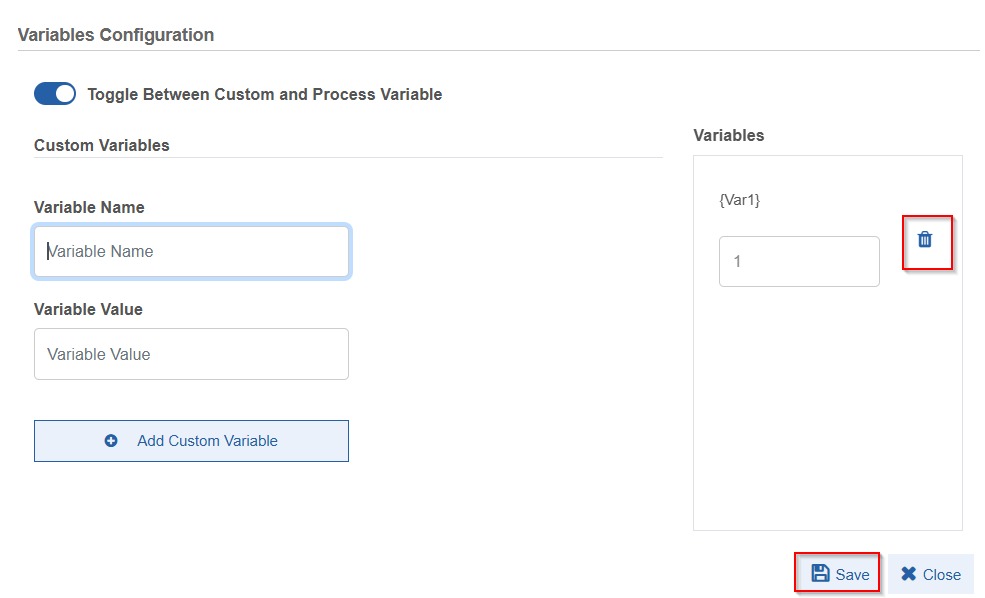
In the Variables Configuration pop-up, enable Toggle between Custom and Process Variable. When you enable this, Custom Variable configuration is enabled.
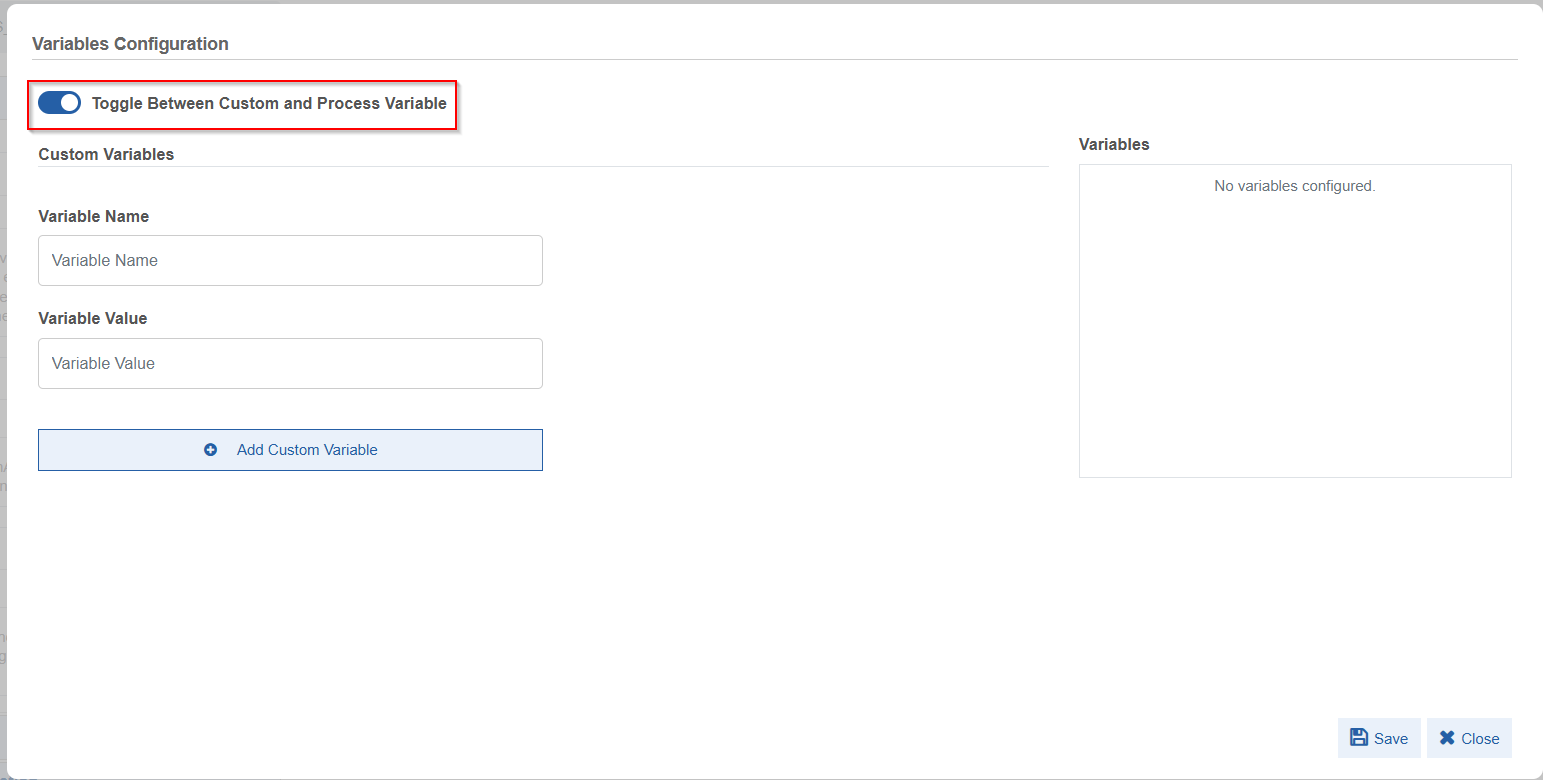
-
Provide the details for the custom variables.
- Variable Name: Enter your variable name.
- Variable Value: Enter a default value for your variable.
-
Click +Add Custom Variable. The configured custom variable (along with its value) gets listed on the right-side Variables box.
-
Click the delete icon adjacent to the variable name if you want to delete the variable created.
- Click Save in the pop-up to save the variables.
Or Click Close to discard the changes.
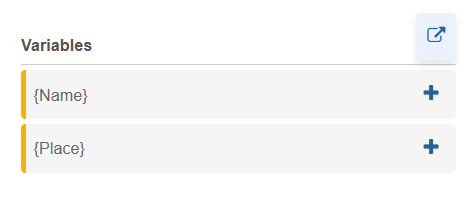
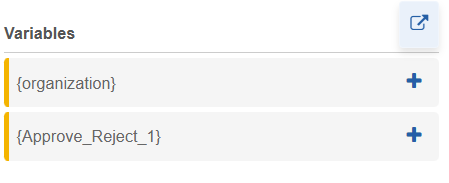
On the agent configuration page, the variables appear on the variable section.
Adding Process Variables
The variable list is associated with the platform process flows when you enable the process flow variables.
To add a process variable:
-
In the Variables section on the top-right, click add variable icon.
-
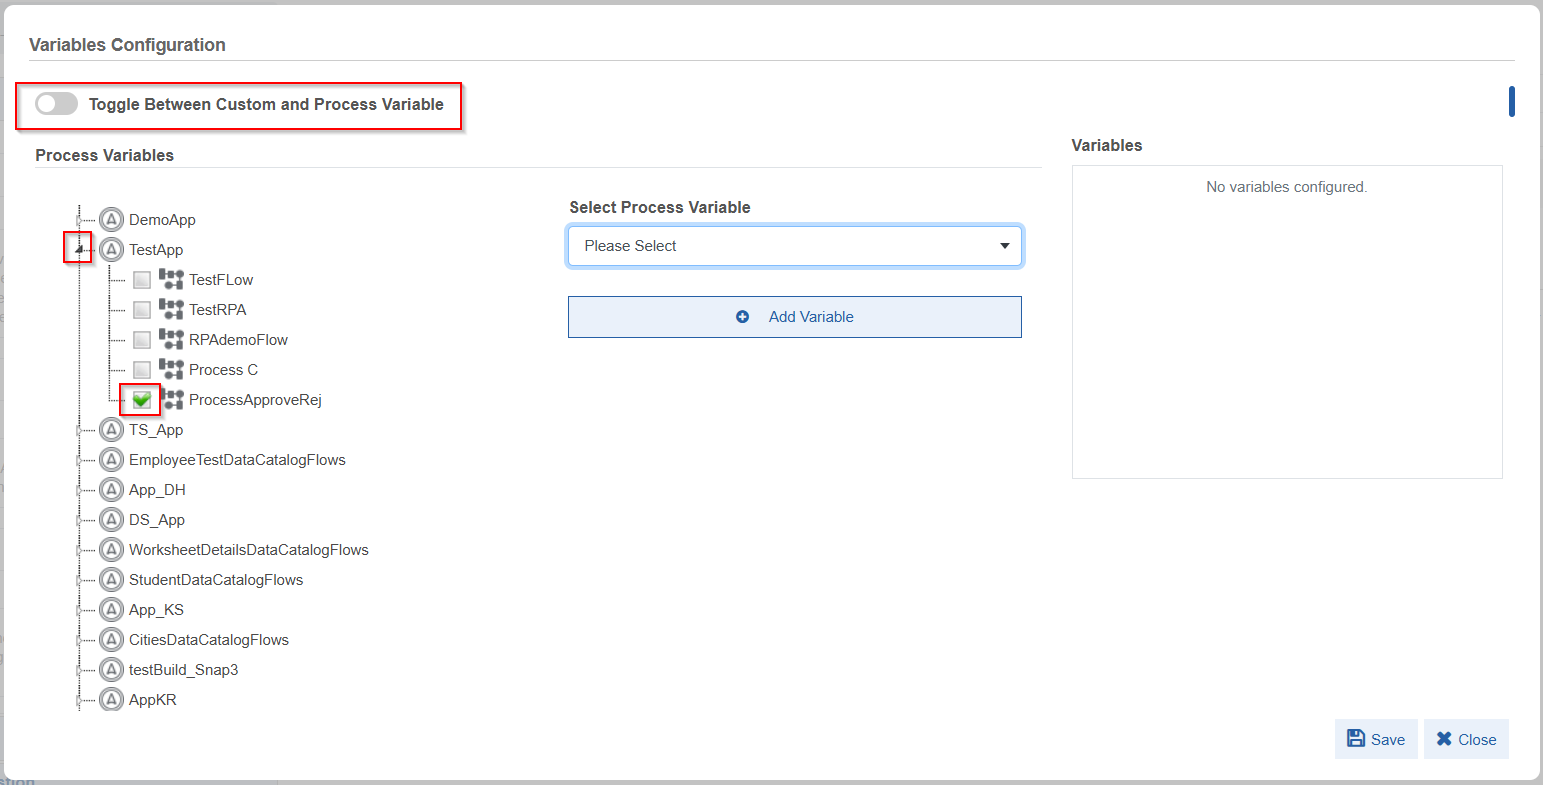
In the Variables Configuration pop-up, disable Toggle between Custom and Process Variable. When you disable this, Process Variable configuration details appear.
-
Click the arrow on the left of application name to expand the application and view the process flows.
- Select the process flow name from which you want to add the variables.
-
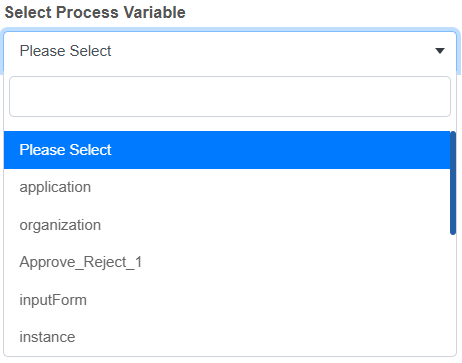
Click Select Process Variable on the center. The list of all variables in the selected process flow appears.
-
Select the required variable and click +Add Variable. The selected process flow variable gets listed on the Variables box.
Note
Note that you can add process variable from only a single process to the variable configuration of an agent.
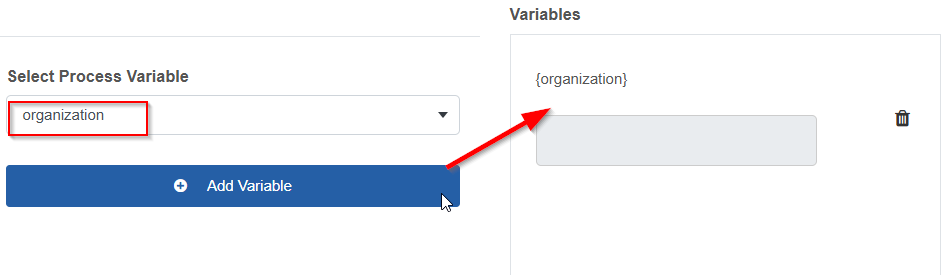
Click the delete icon adjacent to the variable name if you want to delete the variable added.
-
Click Select Process Variable and add multiple variables as per your need.
-
Click Save in the pop-up to save the variables added.
Click Close to discard the changes.On the agent configuration page, the variables appear on the variable section.
Editing Variables
You can edit the variable configuration details. You can create new variables, edit the value of an existing variable, or delete variables.
-
On the Variables section click the add variable icon.
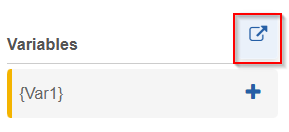
Variables Configuration pop-up appears. Variables section on the right-side displays the already configured variables.
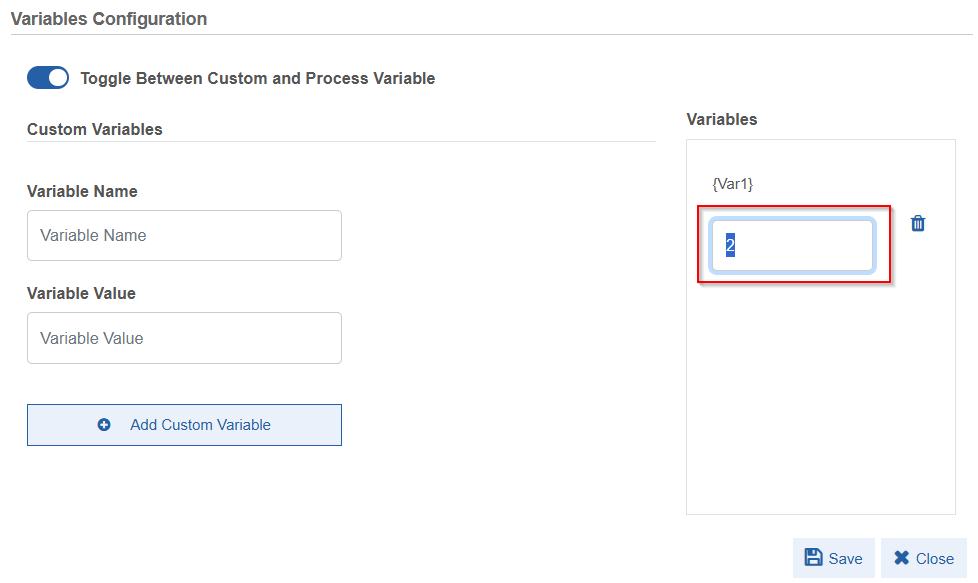
For Custom Variables:
- To edit an existing custom variable value, click the value box on the right side and type the new value.
- To add a new custom variable, provide Variable Name, Variable Value and then click Add Custom Variable.
- To delete a custom variable, click delete icon adjacent to it.
For Process Variables:
- To add new process variables, select new process variable names from the same process and then click Add variable. If you add variables from another process, the existing process variables get removed form configuration.
- To delete a process variable, click delete icon adjacent to it.
-
Click Save after editing the details. The variable gets updated with the new value and details in the Variable list.
Deleting Variables
-
On the Variables section click the add variable icon.
-
In the Variables Configuration pop-up, click the delete icon for the variable that you want to delete.
-
Click Save. The variable gets deleted from the Variable list.
Document Ingestion👑
The document ingestion section allows you to upload documents for ingestion and select those document ingestions for the agent. The agent responds to your requests, aligning with the content in the document ingestion source. Your model will respond to you based on the uploaded document as first-priority.
Once you select a file for ingestion, its content is converted into embeddings (small and manageable segments of large texts) and stored in vector databases. Vector databases allow you to store and retrieve embeddings efficiently.
RAG (Retrieval-Augmented Generation) pipelines are used for document ingestion.
Viewing and Editing Document Ingestions
You are allowed to view the details of document ingestion; however, you cannot edit any details.
- On the AI Workbench, click the Document Ingestion tab. The document ingestion list appears.
- Hover over a document ingestion card and click the view icon.
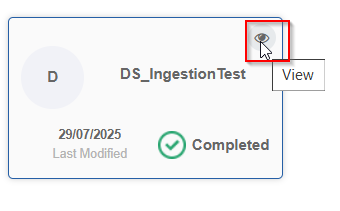
Document Ingestion pop-up appears where you can view the configuration details of the document ingestion.
Creating a New Document Ingestion
You must configure the Vector Store Configurations in the Management > GenAI Studio before creating the Document ingestion.
To add new files for Document Ingestion
- On the AI Workbench, click the Document Ingestion tab.
-
Click Create New. The Choose Documents pop-up appears. It displays the sources where to find the documents.
Currently, the Workbench supports “Local File System”. This is selected by default. A tick mark on the bottom right indicates selection.
When your knowledge base documents are stored directly on your personal computer or a network drive accessible from your machine, “Local File System” is ideal for quick testing or while using sensitive documents that cannot be uploaded to cloud services.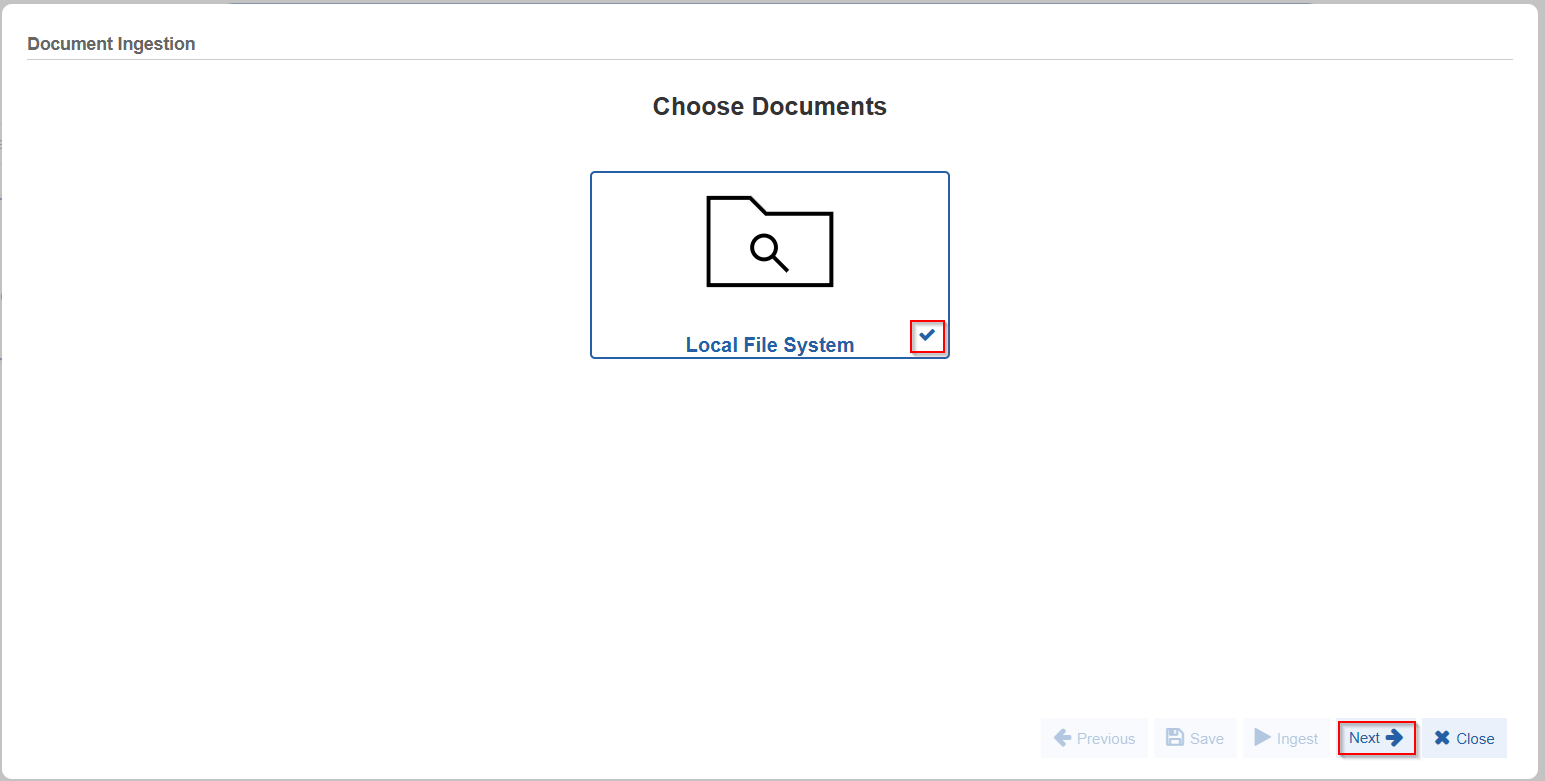
-
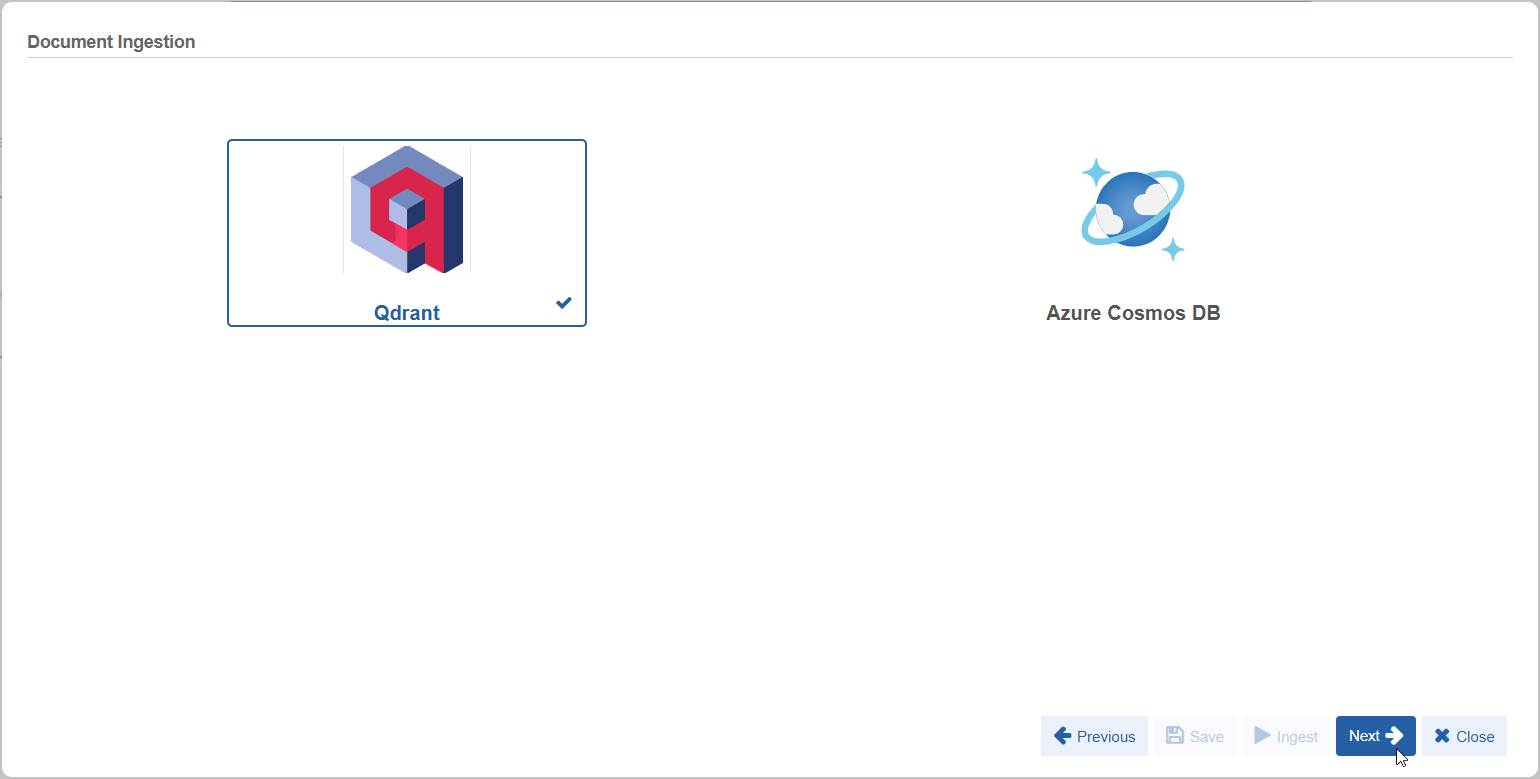
Click Next.
-
Click the required document loader
- Click Next and configure the Document Loader Details.
Refer to Document Loader Configurations👑. - Click Next and configure the Embedding details.
Refer to Embedding Configurations. - Click Ingest. The document ingestion process starts.
The doument ingestio process takes few minutes time. To check if the ingestion is created or not click the refresh icon on the Document ingestion tab.
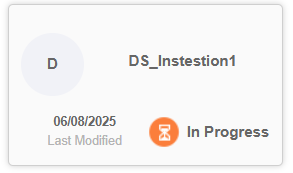
If it is in process, the card appears with In Progress status.
If the process is completed, the card appears with Completed status.
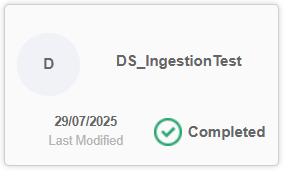
Wait for the process to get completed so that the document ingestion name lists on your Agent configuration > Document Ingestion section. Click the refresh icon in the Document Ingestion section in the Agent Configuration page to list the document ingestion name on the list.
If the process fails, the card appears with Failed status.
Note
If you want to save your configuration without starting ingestion process, refer to Saving Document Ingestion Configuration.
Document Loader Configurations
- Go to Main Menu > GenIQ > AI Workbench > Document Ingestion > Create New > Local File System > Select Qdrand or Azure Cosmos DB
-
Click Next. Once you select a vector store, the Document Loader details appear.
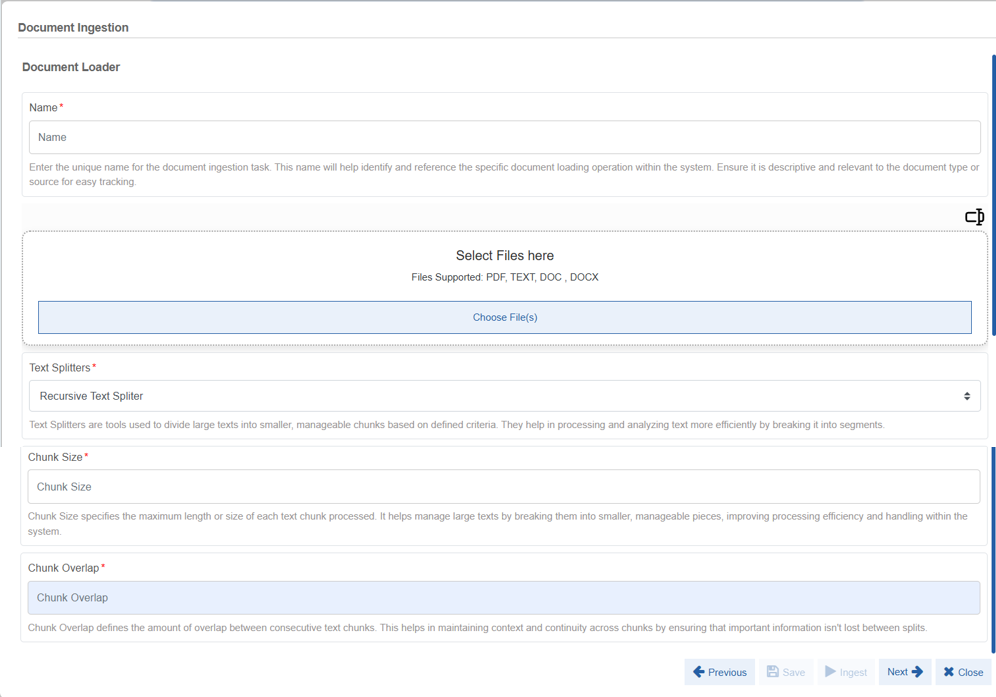
-
Provide the document loader configuration details.
| Configurations | Description |
|---|---|
| Name* | This name helps you to identify and reference the specific document loading operation within the system. Ensure it is descriptive and relevant to the document type or source for easy tracking. Enter a name for your document ingestion. |
| Select Files Here | Click Choose File and select the required files for ingestion from your local system. Select multiple files if needed. Files Supported: PDF, TEXT, DOC, DOCX, PPI, PPTX, MD, HTML, CSV, XLSX |
| Text Splitters* | This defines the type of text splitting to perform on the content. Select the text splitter type. 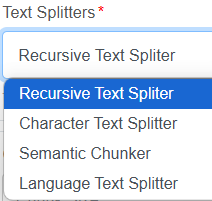 Refer to Text Splitters for more explanation on each type of splitter. |
| Chunk Size* | Chunk Size specifies the maximum length or size of each text chunk processed. It helps to manage large texts by breaking them into smaller, manageable pieces. This improves processing and handling within the system. Enter the chunk size in numbers. While chunking the content, the system breaks down larger texts into smaller, manageable segments (embedding), and each chunk takes a specified size. The number of chunks created is based on the specified chunk size. |
| Chunk Overlap* | Chunk Overlap specifies the amount of overlap between consecutive text chunks. This helps in maintaining context and continuity across chunks by ensuring that important information isn't lost between splits. Enter the chunk overlap number. The chunk overlap feature ensures a connection between chunks. For example, a connecting chunk may contain the ending detail of the previous chunk and the starting detail of the next chunk. |
Text Splitters
Text Splitters are tools used to divide large texts into smaller, manageable chunks based on defined criteria. They help in processing and analyzing text more efficiently by breaking it into segments.
The text splitter type defines what type of text splitting it needs to perform. This process is essential in the RAG workflow due to the token limitations imposed by LLMs.
Recursive Text Splitter:
This splitter attempts to maintain the structural integrity of the text by recursively splitting it based on a hierarchy of delimiters (e.g., first by paragraphs, then by sentences if chunks are still too large, then by words).
This allows you to create chunks that are as large as possible and fit within a specified size limit, prioritizing the preservation of context by splitting at natural breakpoints.
Select this when you need a general-purpose document splitting, especially for structured documents that maintains logical blocks (like paragraphs or sections), this is important for retaining context. It's often a good default choice.
Character Text Splitter:
Character Text Splitter breaks the text into chunks based on a fixed number of characters if the chunk exceeds a certain size using an optional single delimiter (like a newline or space).
Select Character Text Splitter when you need to split very unstructured text that needs strict control over chunk size, or as a fallback when other methods don't yield satisfactory results. However, note that it can often cut words or sentences in half, potentially losing context.
When you select Character Text Splitter, Character Separator field appears.
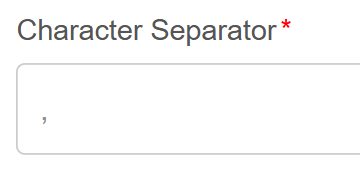
Enter a delimiter for character separation. This allows you to create fixed-size chunks of text.
Character Separator is used to define a delimiter for separating text segments or chain components. It helps in organizing and parsing data by clearly delineating different parts.
Semantic Text Splitter:
Semantic Text Splitter attempts to understand the meaning or topic shifts within the text. It uses embedding models (or other linguistic analysis) to identify where the semantic meaning of the text changes significantly, and then splits chunks at those points.
Semantic Text Splitter allows you to create chunks that are semantically coherent and focused on a single topic or idea, aiming to capture complete thoughts or concepts within each chunk.
Select Semantic Text Splitter when preserving the semantic meaning and topical integrity within each chunk is paramount, even if it means varying chunk sizes. This can lead to highly relevant retrievals for complex queries.
When you select Semantic Text Splitter, Threshold Type field appears.
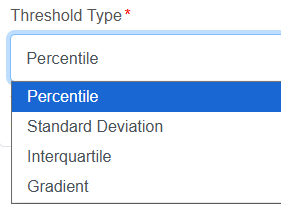
- Select a threshold type.
Threshold Type defines the criteria or method for determining when a particular action or condition is met based on a threshold value. It helps in setting limits or boundaries for processing, such as when to trigger a new chunk or stop processing. That is, a threshold defines a cutoff value used to decide whether a text chunk is kept or discarded during preprocessing.
Each thresholding method provides a way to improve embedding quality by removing noisy, irrelevant, or unusually small/large text segments before indexing.
Percentile: Retains only the top N% of chunks based on score.
It filters chunks based on their relative position in a distribution. It sorts all chunks based on a scoring metric (like token count, similarity score, etc.), then removes those below a specified percentile. It is useful when you want to retain only the "most important" parts of the data.
Standard Deviation (SD): Excludes chunks that deviate too far from the average score.
It filters chunks that are a certain number of standard deviations away from the mean score. It calculates the mean (average) and standard deviation of all chunk scores, and excludes those falling outside the accepted range.
Interquartile: Filters out chunks outside the central 50% of score distribution.
Interquartile Range (IQR) Threshold filters chunks using the middle 50% of the data (between the 25th and 75th percentiles). It is useful for keeping text chunks that are “typical” in size or score.
For example, the chunks outside the interquartile range are excluded to reduce noise from extreme values.
Gradient: Discards chunks with abrupt or flat changes in scoring pattern.
It filters based on the change rate (gradient) of values in a sequence—often used when scores change gradually or sharply between chunks. It measures the slope or rate of change in chunk scores; filters where the change is too small (flat) or too steep (spiky). This is useful when chunk scores are generated from signal-like data (e.g., relevance over time) and you want to remove low-information plateaus or anomalies.
For example, chunks with minimal or excessively steep gradient in relevance scores are removed.
Note
Chunk size and Chunk overlap configurations are not applicable to semantic text splitter.
Language Text Splitter:
Language Text Splitter is designed to understand the specific rules and structures of different programming or natural languages. This setting ensures that language-specific processing rules and models are applied, enabling accurate analysis and handling of text in the specified language. Language Text Splitter allows you to produce chunks that are syntactically and logically coherent based on the rules of a specific language.
Select Language Text Splitter when the splitter specifically targets natural language's nuances. When you select Language Text Splitter, Language field appears for selection.
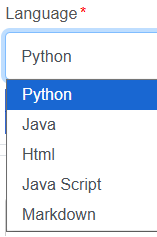
For coding languages, this means not breaking apart functions or classes.
For natural language, it's often more sophisticated than a simple character splitter.
Embedding Configurations
- Go to Main Menu > GenIQ > AI Workbench > Document Ingestion > Create New > Local File System > Select Qdrand or Azure Cosmos DB
- Click Next. Once you select a vector store, the Document Loader details appear.
-
After configuring Document Loader details, click Next. Embedding details appear.
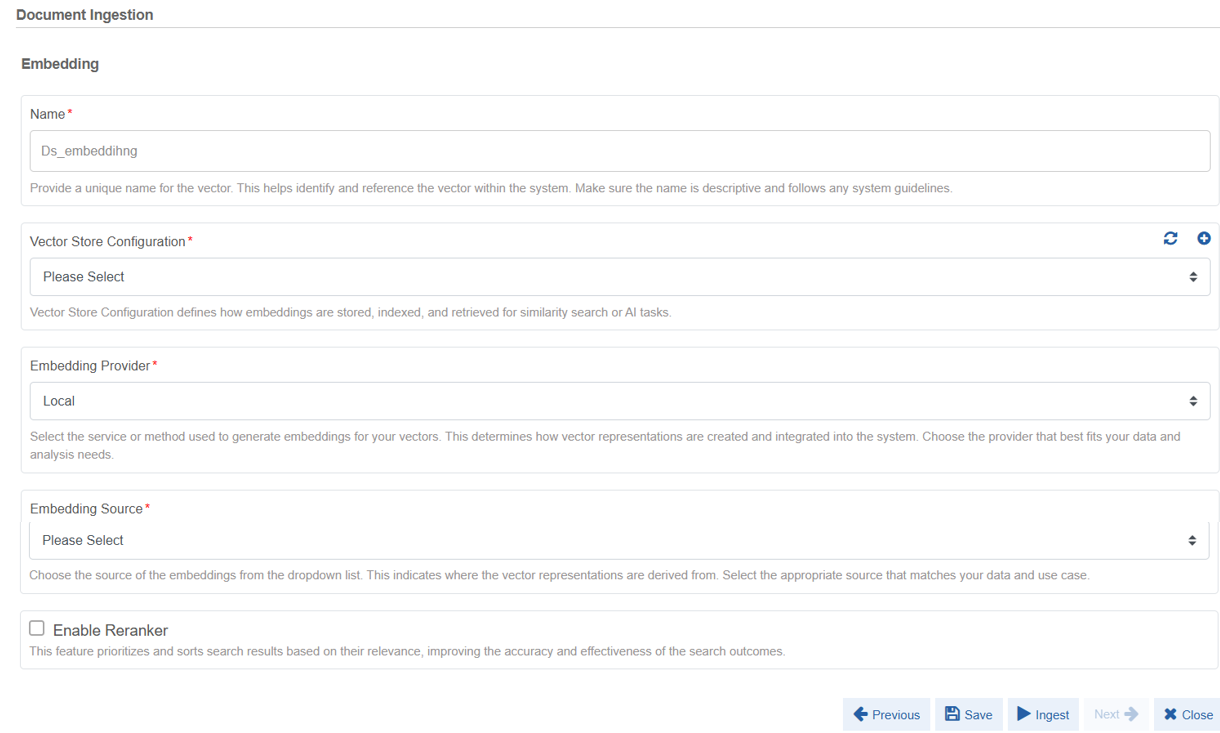
- Name: Enter a name for your embedding. Naming should be as per standards.
-
Refer to: Vector Store Configuration, Embedding Provider, Enable Reranker and configure the details.
- Click Ingest start the ingestion process or click Save to save the details configured. Once the ingestion gets started, status will be “In Progress” and when the ingestion is completed the status will be “Completed”.
Vector Store Configuration
Vector Store Configuration defines how embeddings are stored, indexed, and retrieved for similarity search or AI tasks.

- Select the Vector store configuration name.
The configurations created in Management > GenAI Studio > Vector Store Configurations lists here.
If you have selected Qdrand as vector store, Qdrant vector store
configurations get listed for selection.
If you have selected Azure Cosmos DB as vector store, Azure Cosmos DB
vector store configurations get listed for selection.
- If you want to create a new vector store configuration, click “+” icon and navigate to the relevant section for creating the same.
- Once the configuration is created in the Mangement section, navigate back and click the refresh icon in the Vector Store configuration pop-up to refresh the details.
Embedding Provider
- Select the required embedding provider.
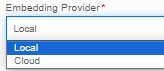
Based on the selected embedding provider further configuration details
appear.
Embedding Provider = Local
Select Local if you want to select an available AI model from the local server. Local indicates that the embedding models are available on the same server where the platform is hosted.
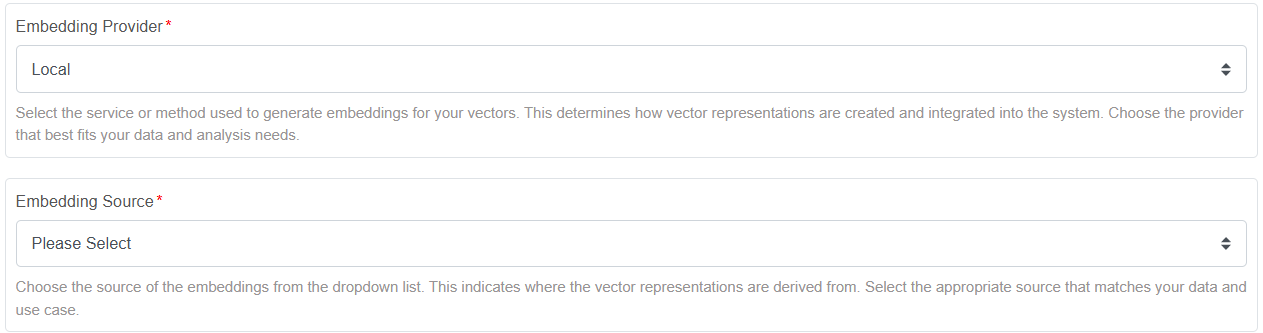
Embedding Source:
Embedding source list displays the list of embedding models available on the local server.
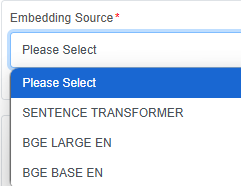
Select the appropriate source from the list that matches your data and use case.
Embedding Provider = Cloud
Select Cloud if you want to select a cloud model. Select the cloud type to generate embeddings that best meet your needs for accuracy, performance, and integration.
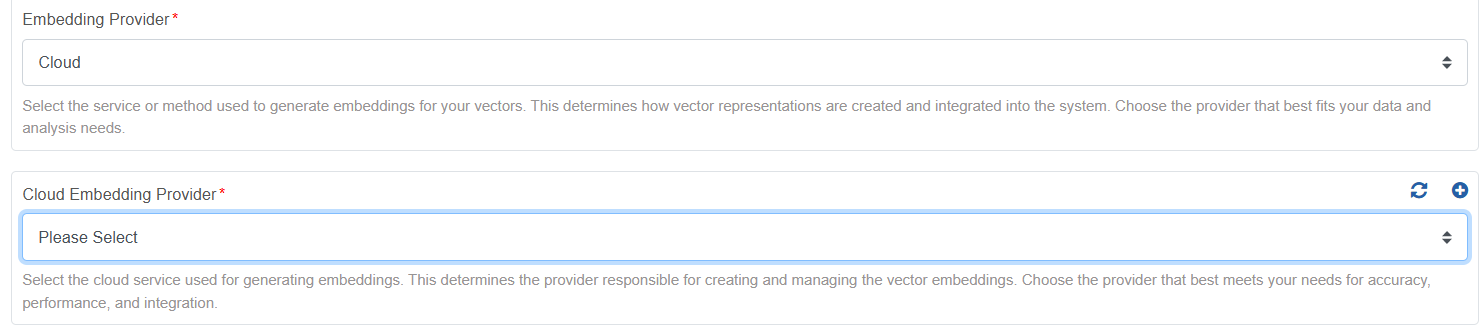
Cloud Embedding Provider
Select an embedding provider for your vector store. That is, select the cloud service to be used for generating embeddings. This determines the provider responsible for creating and managing the vector embeddings. Choose the provider that best meets your needs for accuracy, performance, and integration.
- Select a cloud embedding provider from the list.
The configurations created in Management > GenAI Studio > Cloud Information are listed for selection. - If you want to create another cloud configuration from any other provider, click the “+” icon and navigate to Management section for creating the same.
- Once the configuration is created in the Management section, navigate back and click the refresh icon in the configuration pop-up to refresh the details
Embedding Model Name
When you select a cloud embedding provider, the embedding models available for that cloud configuration appear in the Embedding model name list.
- Select the required embedding model name. This embedding model is
responsible for creating the embeddings that go into the vector
store.
Embedding model name list is dynamic based on the cloud provider selected.
For example: If you have selected OpenAI Cloud configuration as the Embedding Provider, the following embedding models for the OpenAI appears for selection.
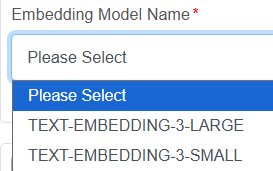
The cloud configuration that you select in the Cloud Embedding Provider is associated with an LLM. This LLM is responsible for pre-processing activities before embeddings are created.
Enable Reranker
A reranker is a smaller, often more computationally intensive, model that takes the initial set of documents/chunks retrieved from the vector store and re-sorts them based on a deeper understanding of their relevance to the original query.
This feature is used to refine the ranking of retrieved documents, improving the precision of the RAG system. Rerankers are often specialized Transformer models that can provide a more nuanced relevance score than simple vector similarity.
Reranker prioritizes and sorts search results based on their relevance, improving the accuracy and effectiveness of the search outcomes.
When you select Enable Reranker, relevant configuration details appear.
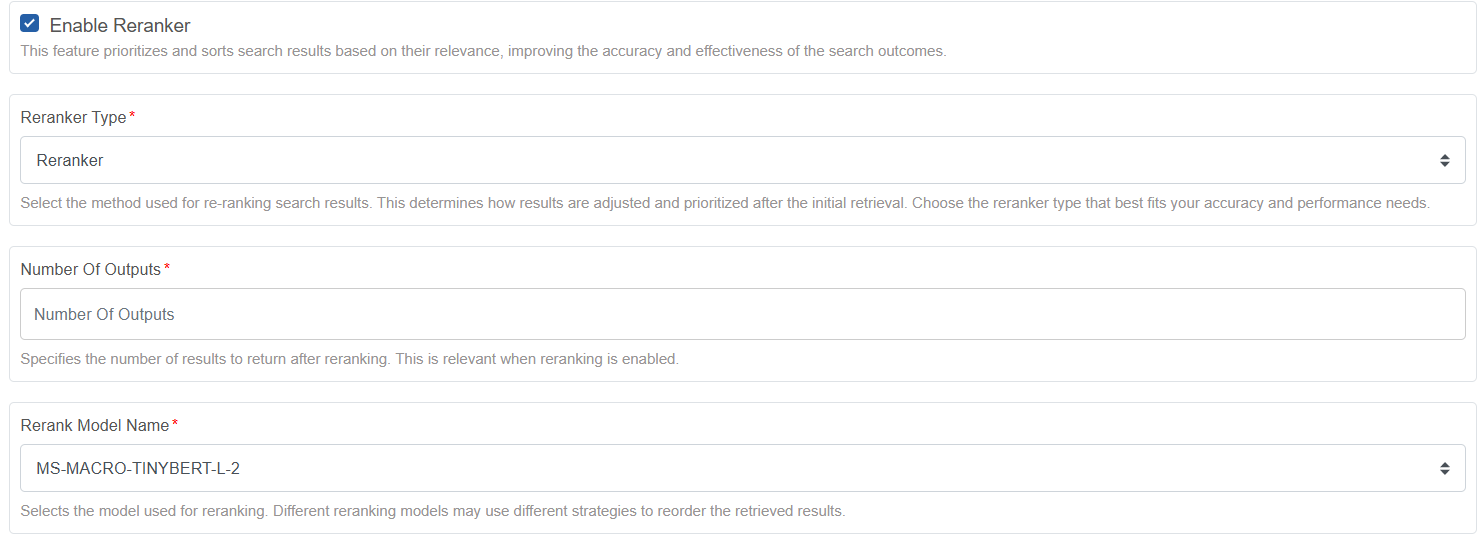
Reranker Type*: This allows you to select a re-ranking model provider.
- Select a re-ranker type or provider from the list.
Number of Outputs*: This specifies the final number of top-ranked document chunks that the Reranker will output after it has re-evaluated the initial set of retrieved documents. This determines how results are adjusted and prioritized after the initial retrieval.
Enter the number of chunks (results) to return after reranking. This enables you to control the final size of the context provided to the LLM.
Rerank Model Name*: The Rerank model name displays the available models for reranking based on the reranker type or provider selected.
Select a model to use for reranking.
For example: The Reranker models for the Flashrank_Reranker provider are:
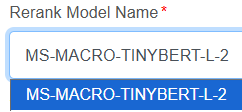
Different reranking models use different strategies to reorder the retrieved results.
Saving Document Ingestion Configuration
Saving a document ingestion configuration allows you to save your configuration details for the document ingestion. Currently, it does not allow you to edit the details.
Note that saving your ingestion configuration do not allow you to trigger the ingestion later through the UI.
To add new files for Document Ingestion:
Refer to Creating a new Document Ingestion and follow Steps 1 to 6 and then click Save.
This saves the configuration but ingestion process will not be initiated. The document ingestion page will display the configuration name with status as “Not Started”.
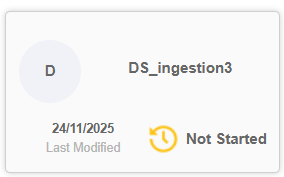
To start the Document Ingestion process for the saved configuration:
Run the Document Ingestion API to start the document ingestion process.
Once the process starts, the status appears on the Document Ingestion page.
Deleting Document Ingestion
Info
The AI Workbench currently doesn’t support the deletion of any document ingestion created at the UI level.
Plugins👑
Plugins are extra capabilities defined in the form of tools, functions, or output parsers.
In the AI Workbench module, create your Tools, Functions, and Output Parsers in Plugins tab.
Map or associate the plugins to the agents as needed.
When an agent needs to respond to a specific requirement that is beyond its defined configuration or capacity, it selects or invokes the most appropriate Tool or function or output parsers from its available source to fulfill the requirement.
The Tools, Functions, and Output Parsers execute its configured function and returns a result. The agent then receives this output. The agent can then use this information, combined with its language model capabilities, to generate a relevant and accurate response to your query.
Viewing and Editing Plugins
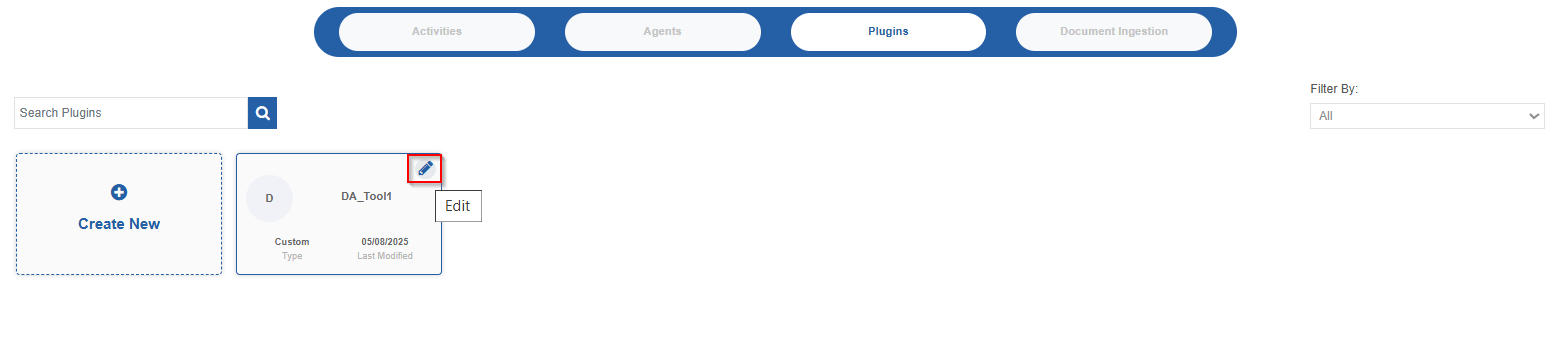
- In the AI Workbench, select Plugins. The Plugins list appears. The page displays the plugins created by the logged-in user only.
-
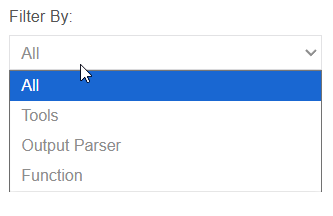
On the right-side filter, select the required plugin category: Tools, Functions, or Output Parsers. The filtered result appears.
-
Hover over the tool card and click the edit icon (pencil). The tool configuration details appear. The editable fields are enabled, and non-editable fields are disabled.
-
Modify the applicable fields or selections and click Save to update the changes.
-
In the LLM Settings, click the refresh icon adjacent to the Plugins to reflect the updated configurations.
Filtering the Plugins
The Filter by option on the right side of the Plugin page allows you to filter the plugins by tools, functions, or output parsers.
## Deleting Plugin
Note
The AI Workbench currently doesn’t support the deletion of any Plugin created in the UI level.
Tools👑
A Tool is an external capability or resource that the LLM agent can use to perform a specific action. It is the "what" the agent can do. Tools are the actual code or service that executes an action. The LLM itself doesn't have these capabilities; it just knows how to call them.
The tools adhere to the features and capabilities of the selected source. The tool interacts with and utilizes the data or functionalities from the selected resource.
Creating a Tool
- In the AI Workbench, select Plugins tab. Plugin list appears.
-
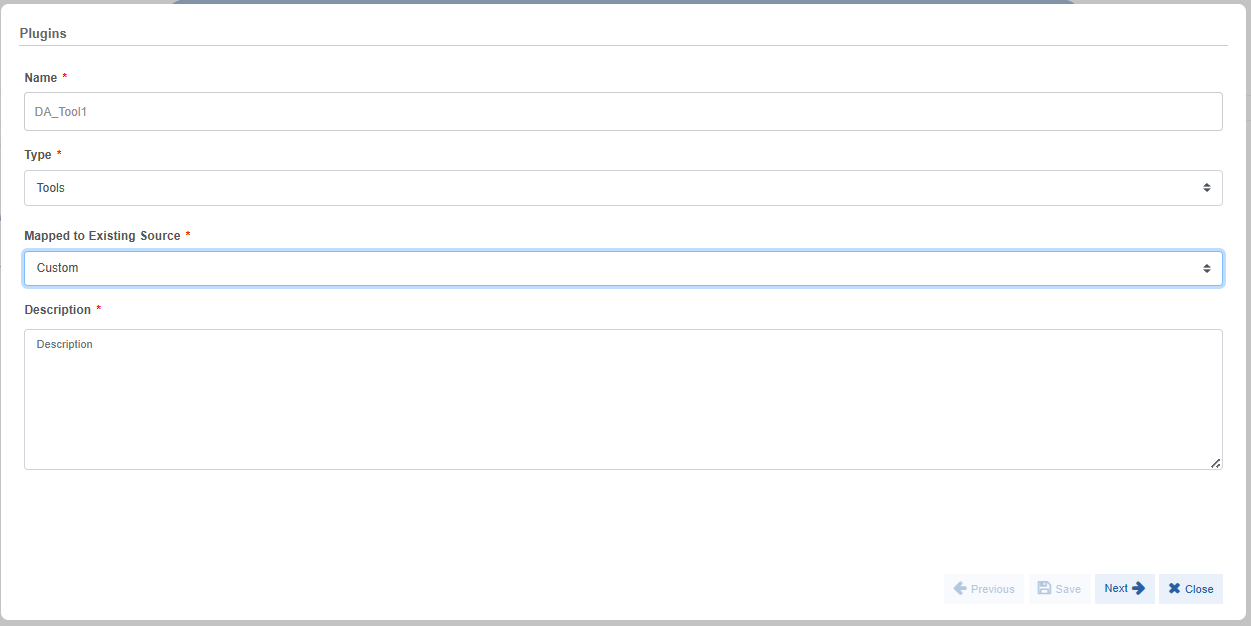
Click the Create New card. The Plugin creation page appears.
-
Provide details.
Property Description Name* Enter a name for your tool. This is a non-editable field. Type* Select Type = Tools to create a tool. Mapped to Existing Source* This field lists different types of pre-existing features that you can use for your tools.
Select a source to which you want to map the tool. This is a non-editable configuration.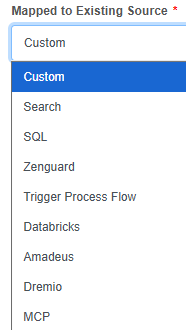
Custom: If you want to define a custom tool without mapping to any source, select Custom.
Others: If you want to select a specific tool from a specified source, select any of the available sources.
Once you select the source, the configuration details of that source appear.
Refer to Tool Sources and Configurations.Description* Enter a description about your tool like what this tool is about or when to use it. This helps the agent make quick decisions on when to use the tool. -
Click Next after providing the required configuration details as applicable. The code window appears. This is not applicable for Plugin Type = Tools.
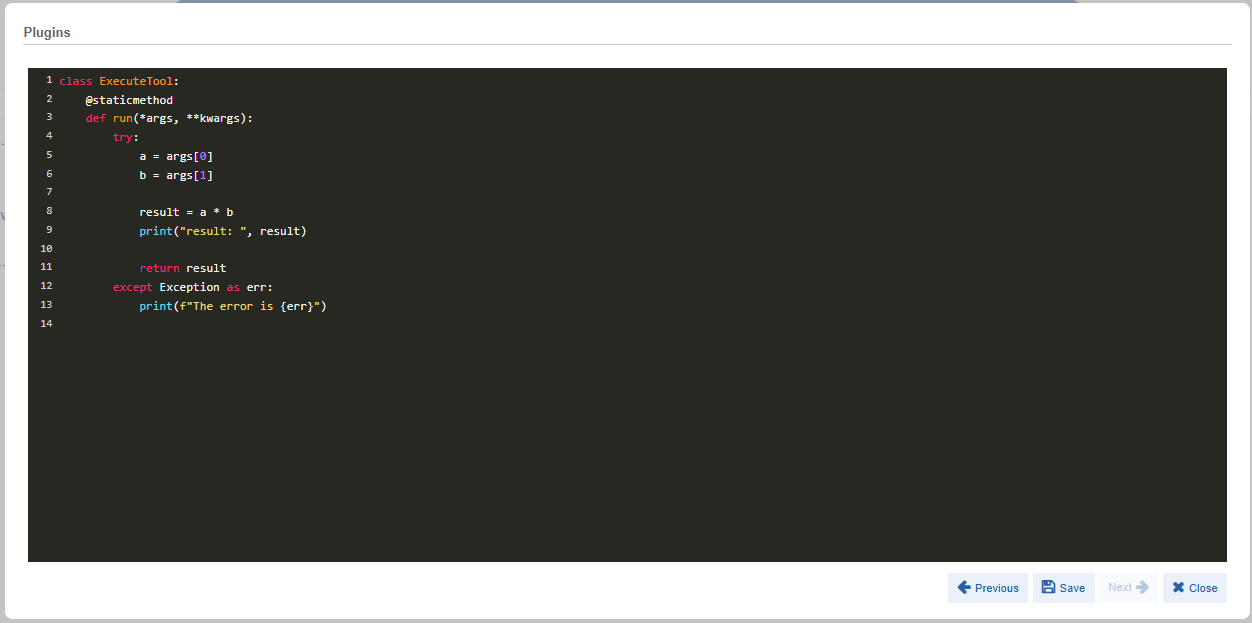
-
Edit or modify the details as per your requirement.
- Click Save to save your plugin.
Click Previous if you need to modify any data in the previous screen.
Click Close to discard the details and close the Plugins popup.
Tool Sources and Configurations
Custom
There are no predefined sources associated with this configuration item. This allows you to create a tool with custom code.
- Select Mapped to Existing Source = Custom.
- Click Next. The code window appears.
-
Enter Python code based on your need. Sample code is provided in the following screen.
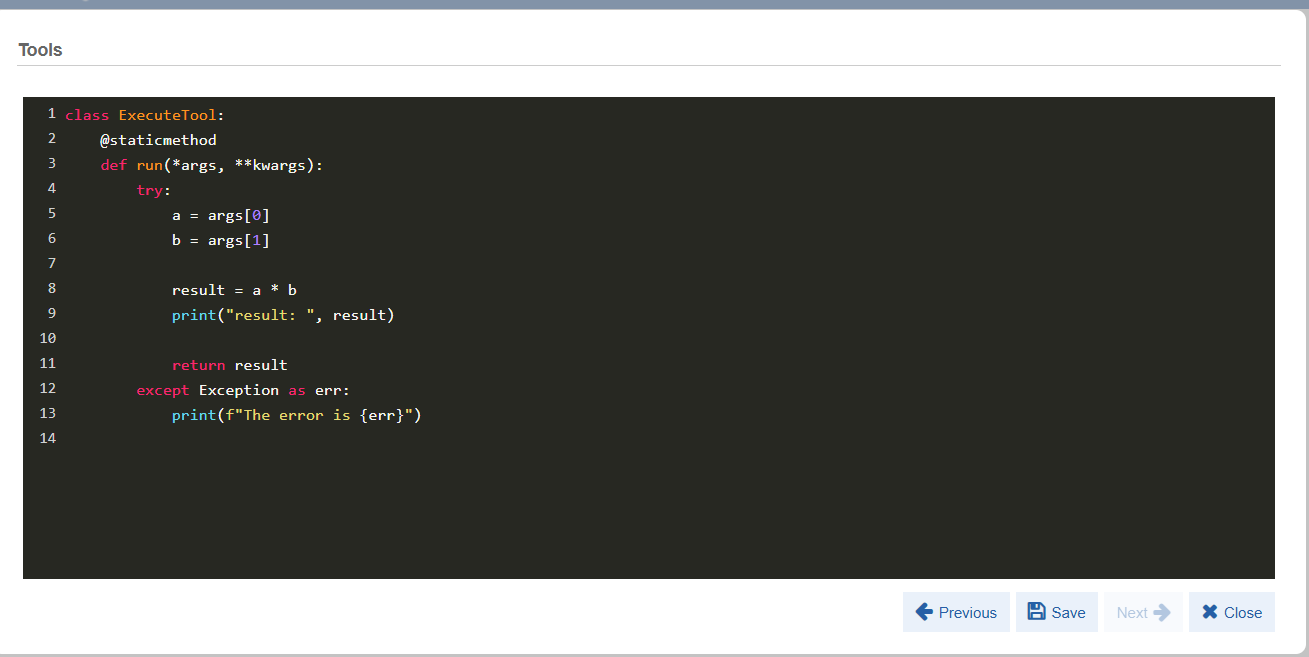
-
Click Save (or click Close to discard the tool creation)
-
Click Close to close the tool popup. The saved tool appears on the Tools tab.
Search
Search allows to map your tool to the Google Search Engine. Mapping with Search Source allows your Tool to perform searches using Google's Custom Search Engine (CSE). This enables your AI agent associated with this tool to retrieve information from the web based on search queries.
When this Tool is invoked, the AI agent can send search queries to Google CSE and process the returned results to answer user questions, gather information, or perform other tasks that require web-based knowledge.
You must have a Google account to get input for the Search configuration.
- Select Mapped to Existing Source = Search
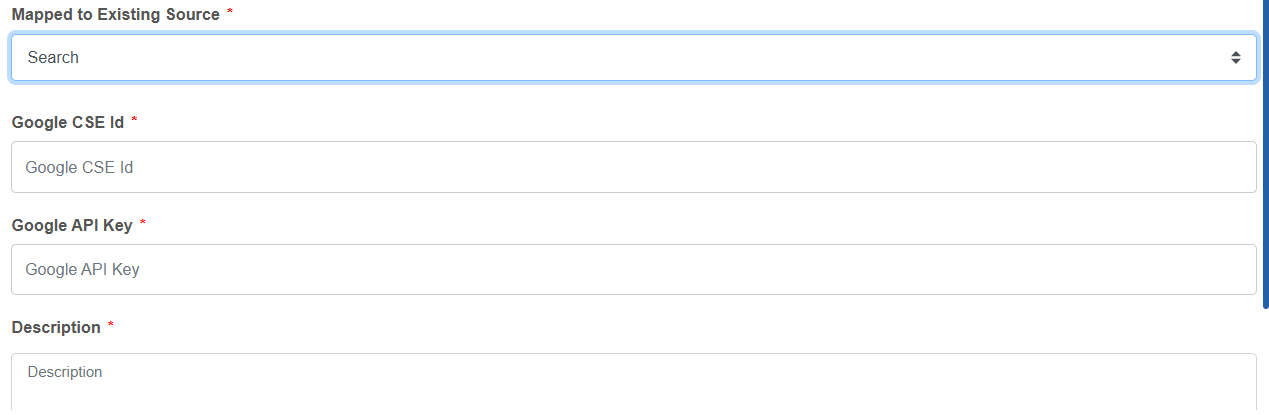
Provide details for the Google Search associated configurations.
| Configuration | Description |
|---|---|
| Google CSE Id* | Enter the Google CSE Id. This is a unique identifier for the specific Google Custom Search Engine. A CSE allows you to define the scope of your search (e.g., the entire web, specific websites, or a collection of sites). |
| Google API Key* | Enter the Google API key. This is a credential that allows your tool to access Google's services, including the Custom Search Engine API. It is used for authentication. |
SQL
SQL mapping to the tool indicates a connection to a relational database that uses SQL (Structured Query Language) for querying and manipulating data. SQL enables your Tool to interact with SQL databases.
- Select Mapped to Existing Source = SQL
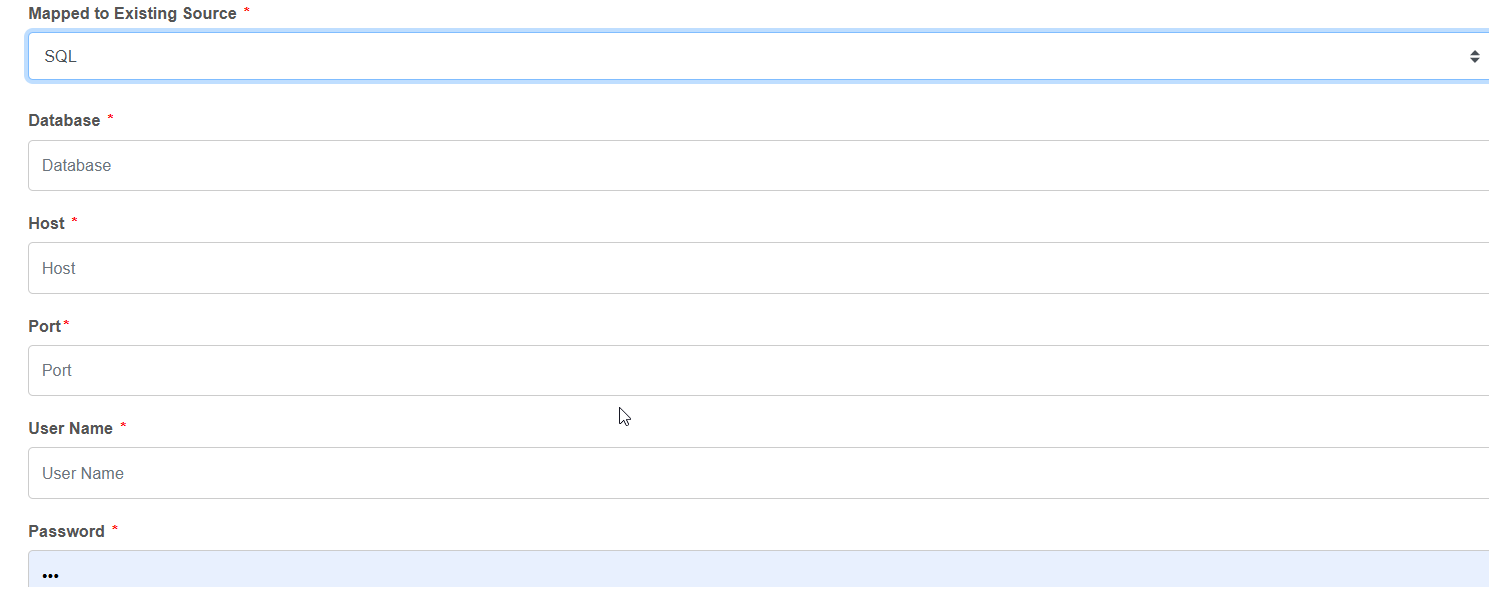
Provide details for the SQL associated configurations.
| Configuration | Description |
|---|---|
| Database* | Enter the database name that you want to access within the SQL server. |
| Host* | Enter the host name or the location (IP address) of the SQL server. If the database is on the same machine as the application, you shall use localhost as the hostname. |
| Port* | Enter the port number to which the SQL server should point to. |
| User Name* | Enter your username to authenticate with the SQL Server. You must have the necessary permissions to access the specified database. |
| Password* | Enter the password associated with the provided username. |
ZenGuard
Zenguard allows the Tool to connect to the ZenGuard. ZenGuard is a real-time trust layer (guardrails) for AI agents. It protects AI agents during runtime from prompt attacks, data leakage, and misuse.
You must have ZenGuard AI account to generate the API key.
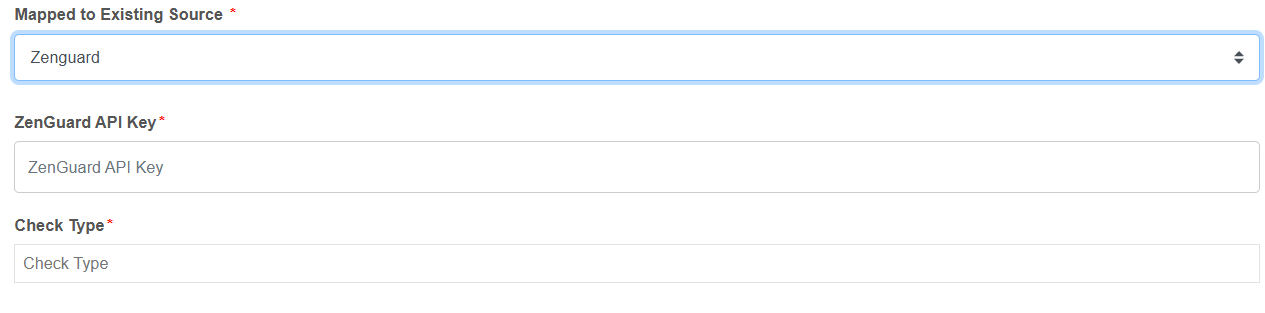
- Select Mapped to Existing Source = ZenGuard and provide details for the ZenGuard associated configurations.
Provide details for the ZenGuard associated configurations.
| Configurations | Description |
|---|---|
| ZenGuard API Key | Enter the Zenguard API Key. |
| Check Type | ZenGuard AI offers a suite of "Check Types" (detectors) designed to safeguard LLMs and GenAI applications from various security threats. Select the required check type from the list. 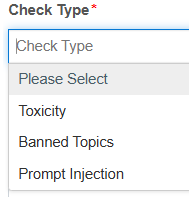 - Prompt Injection: Detects attempts to manipulate or hijack an AI agent's behavior by inserting malicious instructions or data into user input, often overriding system prompts. - Toxicity: Identifies and flags language that is rude, disrespectful, harmful, or likely to make someone leave a discussion. - Banned Topics: Determines if AI outputs or inputs discuss subjects explicitly prohibited by predefined policies or guidelines. |
Trigger Process Flow
Trigger Process Flow allows the Tool to execute a predefined process flow in the platform.
-
Select Mapped to Existing Source = Trigger Process Flow.

-
Enter Description and click Next. The Application and Process Flow-related configuration appears.

-
In the Application And Process List, click the arrow on the left of the Application name. The Application tree expands and process flows in that application appear.
- Select a process flow. You can select only one process flow. This process flow gets triggered when your tool is active.
-
Scroll down the pop-up to configure Request Variables and Output Mapping.
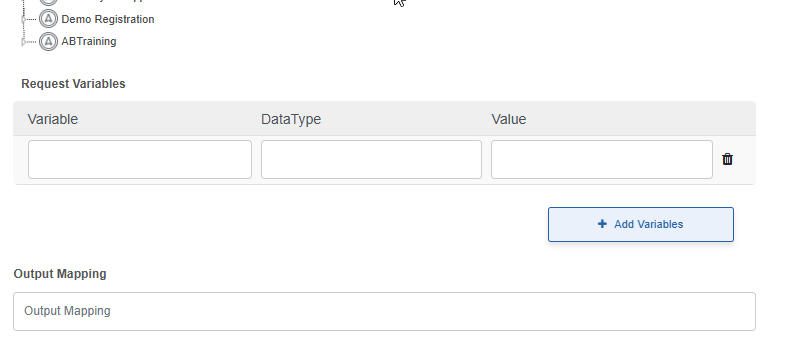
Provide details.
| Configuration | Description |
|---|---|
| Request Variable | This variable section provides input for the process flow variable. Variable: Enter the process flow variable name (alphanumeric). You must create a variable in the process flow and then enter the same variable name here. For example, input.Data Type: Enter the data type of the variable. Value: Enter a value for the variable defined above. In the Value box, can add variables from the workbench in the format {question}.To add a variable in values, you must create an agent variable in the Variables section in the AI Workbench and provide this variable as a value here. At runtime, this variable receives value from the GenIQ chat window and it is passed to the process flow variable. That is, chat request content --> {question} --> inputClick +Add Variables to add more variables. Click the delete icon adjacent to the variable to delete a variable entry. |
| Output Mapping | Enter a variable name. This must be an alphanumeric process variable. This variable receives a value from the output variable of the process flow. This value appears as the response in the chat. |
Databricks
Databricks enables the Tool to interact with the Databricks environment. Databricks integration is used for big data processing and analytics.
You must have a Databricks account to obtain the Databricks configuration details needed.
- Select Mapped to Existing Source = Databricks.
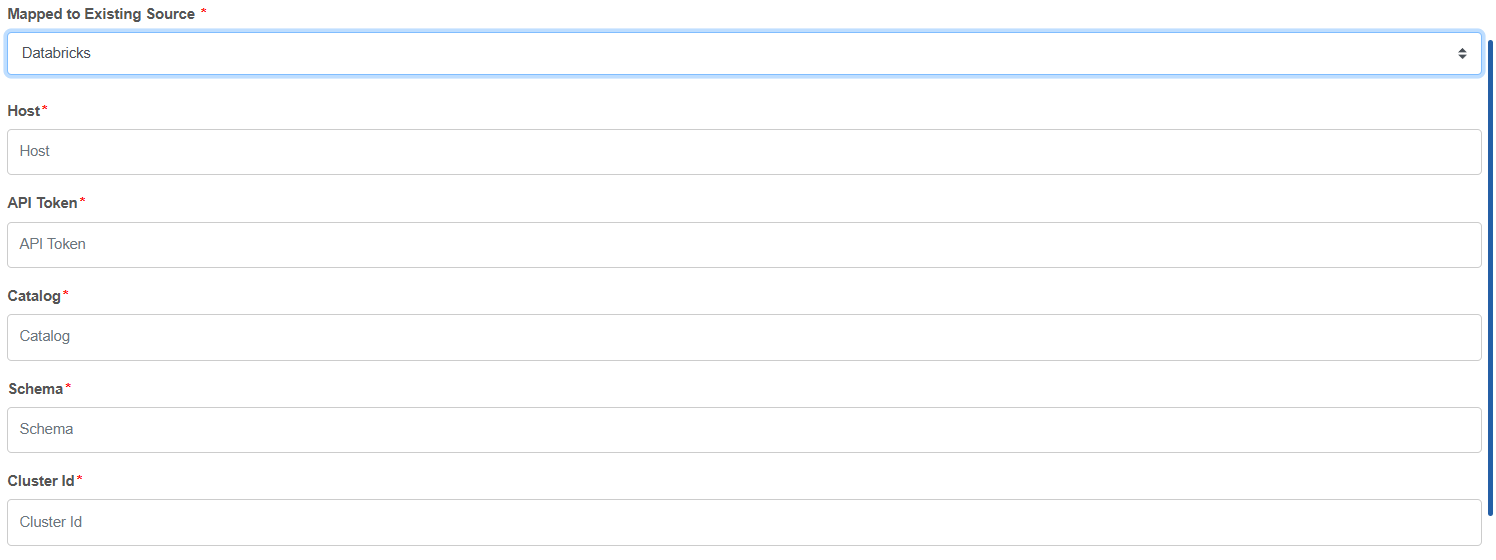
Provide details.
| Configuration | Description |
|---|---|
| Host* | Enter the host name or the location (IP address) of your Databricks workspace. Example Input: https://adb-1234567890123456.7.azuredatabricks.net/ (Azure Databricks) or https://workspace-id.cloud.databricks.com/ (AWS Databricks). |
| API token* | Enter the Databricks API token. API token is a highly secure authentication credential that allows your application to programmatically access and perform actions within your Databricks workspace. It acts as a secret password for API calls, verifying your application's identity. |
| Catalog* | Databricks uses a Unity Catalog for centralized data governance across workspaces. The Catalog acts as the highest-level container for data objects (schemas, tables, views). Specifying the Catalog tells your application which top-level data environment to access. Enter the name of the Unity Catalog you wish to access. Example Input: main, dev_catalog, customer_data_catalog |
| Schema* | Within a Catalog, data is organized into Schemas. Enter the name of the Schema within the chosen Catalog. Example Input: default, customer_segmentation, finance_reports |
| Cluster Id* | This field specifies the unique identifier of the particular cluster that your AI Agent's Tool should use to execute its operations. Enter the unique ID of the Databricks cluster. |
Dremio
Dremio provides a semantic layer, which acts as a virtual catalog that makes all your data—regardless of where it lives—look like simple, standard SQL tables. This allows users and applications, including LLM agents, to query diverse data sources quickly without needing to move or copy the data.
You must have a Databricks account to obtain the Databricks configuration details needed.
- Select Mapped to Existing Source = Dremio and provide details for the Dremio associated configurations.
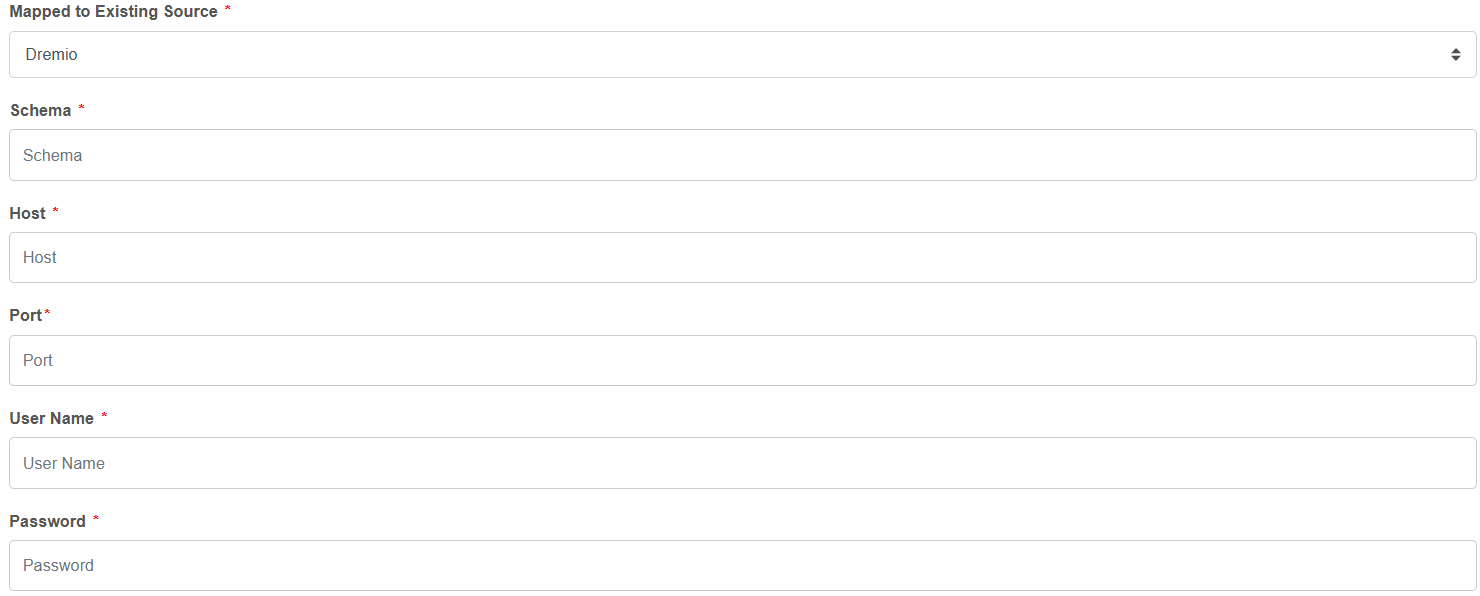
| Configuration | Description |
|---|---|
| Schema* | Enter the name of the Schema name. |
| Host* | Enter the host name or the location (IP address) of your Dremio cloud. Example Input: For Dremio Cloud, the host is typically data.dremio.cloud (US) or data.eu.dremio.cloud (EU). |
| Port* | The port is almost always 443 for the cloud service. |
| Username* | Enter your username (email address) used for Dremio registration. |
| Password* | Enter the password you set up during the sign-up process. |
MCP
MCP Tools are the specific external capabilities that an LLM agent is designed to use via the Model Context Protocol (MCP) standard.
MCP server mapping to the agent allows you to access the MCP tools available in that server for querying and manipulating data.
You can add multiple MCP server tool configuration to the same tool.
- Select Mapped to Existing Source = MCP and provide details for the MCP associated configurations.
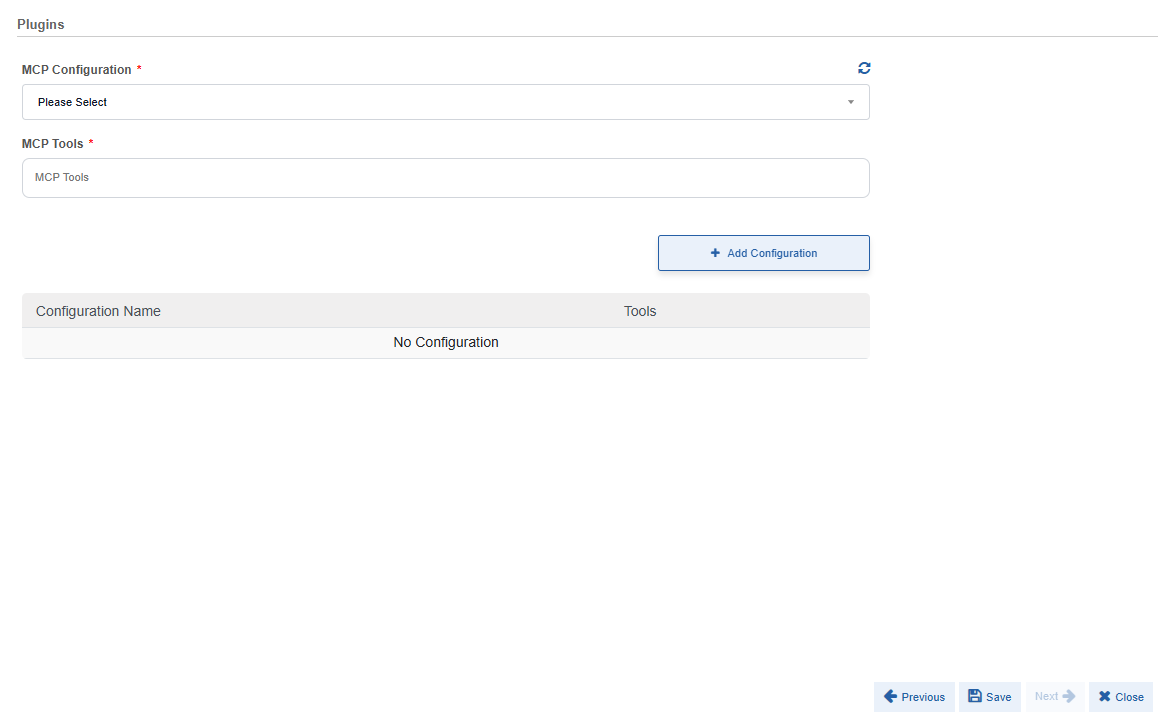
Provide configurations:
| Configuration | Description |
|---|---|
| MCP Configuration* | Select the MCP server configuration name that you created in Management > GenAI Studio > MCP. Click the refresh symbol on the top-right to reflect the recently created configurations. |
| MCP Tools* | The MCP Tools field lists the individual, named tools (functions or actions) that are made available by the selected MCP Configuration (Server). Select the specific tools you want the current LLM agent to use. You can select multiple tools from the list. |
| Add Configuration | Click Add Configuration to add the selected MCP tools to the configuration. You can again select another MCP configuration and click Add Configuration to add it. The list of added MCP configurations will be listed below. |
Functions👑
Functions define reusable logic with structured inputs. Functions are created in the Plugin tab.
The functions allow you to call specific functions at runtime through the input prompt. Map the functions created to the system or user prompt textboxes to achieve any specific requirement.
Functions are user specific. Functions created by the logged in user in the Plugin section appears in the Functions list of the Agent creation UI.
Creating a Function
- In the AI Workbench, select Plugins tab. Plugin list appears.
-
Click the Create New card. The Plugin creation page appears.
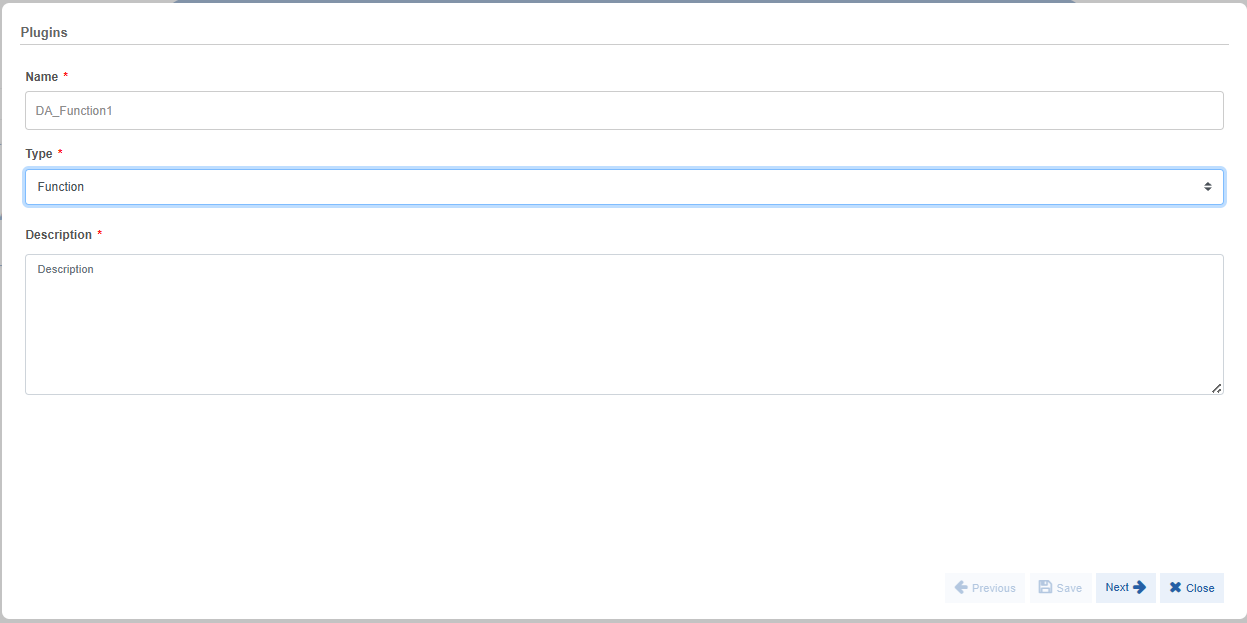
-
Provide details.
Property Description Name* Enter a name for your function. This is a non-editable field. Type* Select Type=Function to create a function. Description* Enter a short description about your function. -
Click Next after providing the required configuration details. The tool code appears.
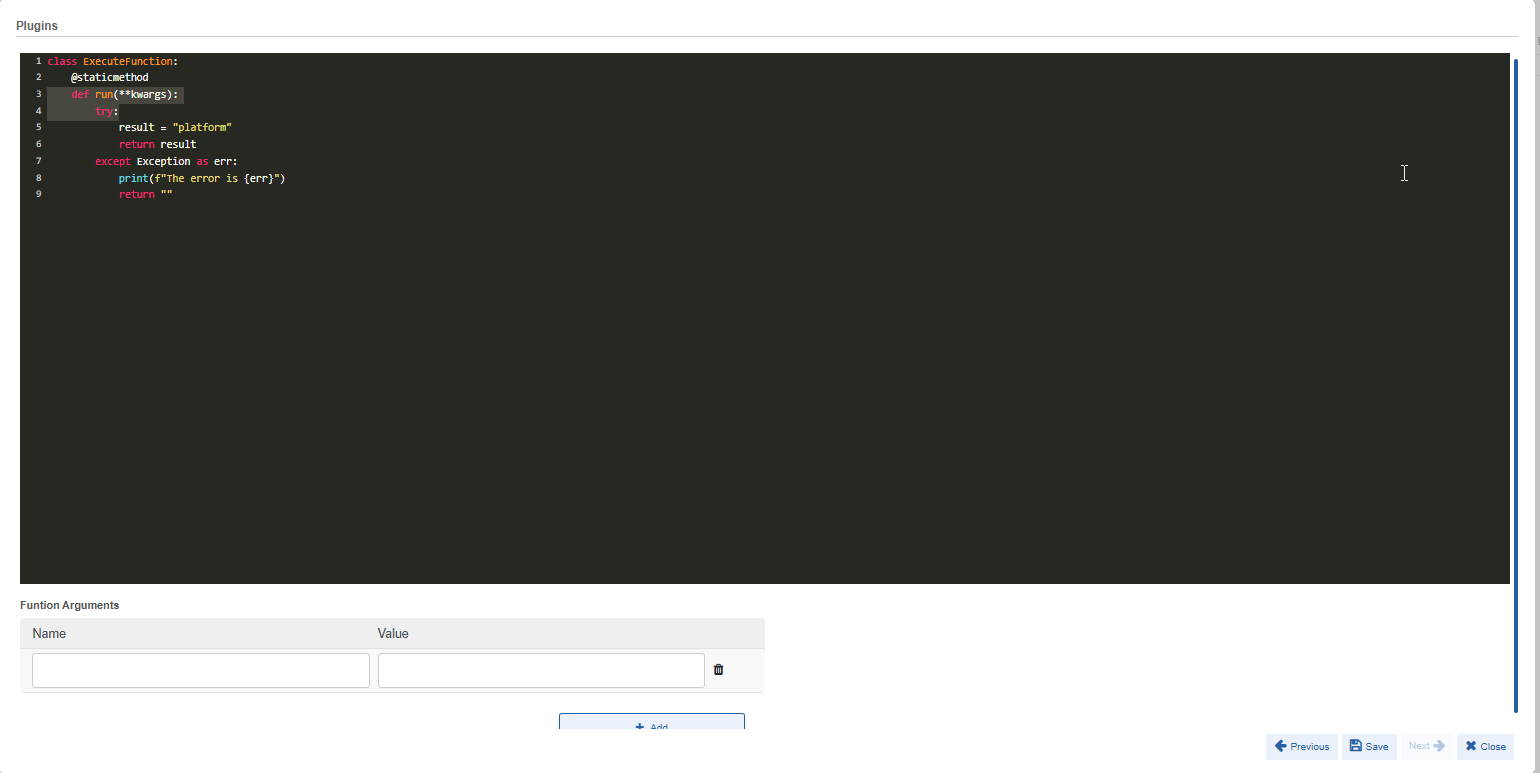
-
Edit or modify the details as per your function requirement.
- In the Function Arguments, add name and values.
Name: Enter the argument name.
Value: Enter a default value for the argument.
Click “+Add” to add multiple arguments. - Click Save to save your function.
Click Previous if you need to modify any data in the previous screen.
Click Close to discard the details and close the function popup.
All the functions that you create will appear for selection in the Functions section in the agent configuration page.
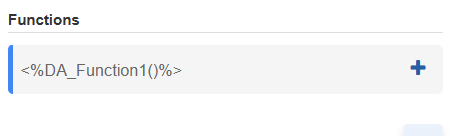
You can add these functions to the already existing agents or new agents.
Output Parser👑
An Output Parser is a component that acts as a translator. It processes the raw text output from the LLM and converts it into a structured, machine-readable format that the rest of the application can understand and use. Its purpose is to ensure the LLM's response is consistent and can be acted upon reliably.
The output parser created is mapped to the agent to achieve any specific requirement.
Creating an Output Parser
- In the AI Workbench, select Plugins tab. Plugin list appears.
-
Click the Create New card. The Plugin creation page appears.
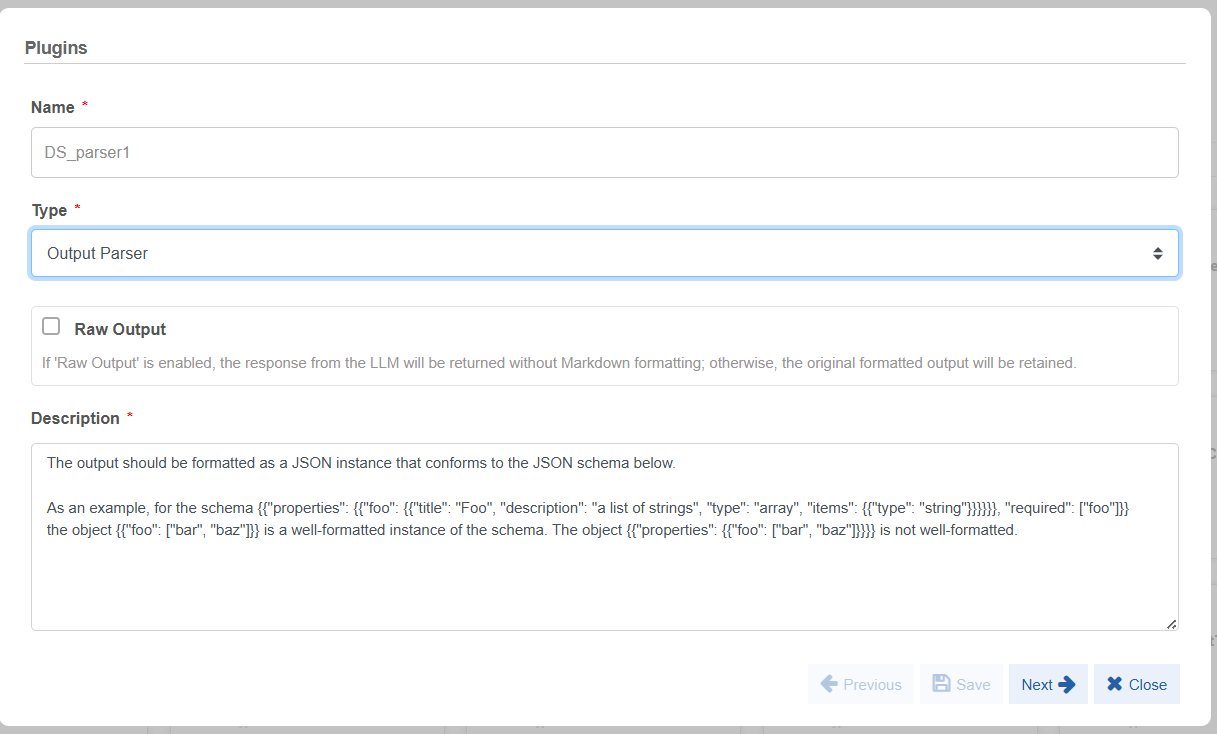
-
Provide details.
Configuration Description Name* Enter a name for your function. This is a non-editable field.
Only alphanumeric and underscore are allowed in this field.Type* Select Type = Output Parser to create a function. Raw Output If Raw Output is enabled, the response from the LLM will be returned without Markdown formatting.
Else if disabled, the original formatted output will be retained. That is, the output adheres to strict validation of the structure. The output is parsed and validated, and then rendered accordingly. If any error occurs during validation, the output response from the LLM is provided to the user.Description* Enter a short description about your parser.
By default, it displays sample data.
This system reads this data and adheres to the provided details while responding. -
Click Next after providing the required configuration details. The tool code appears.
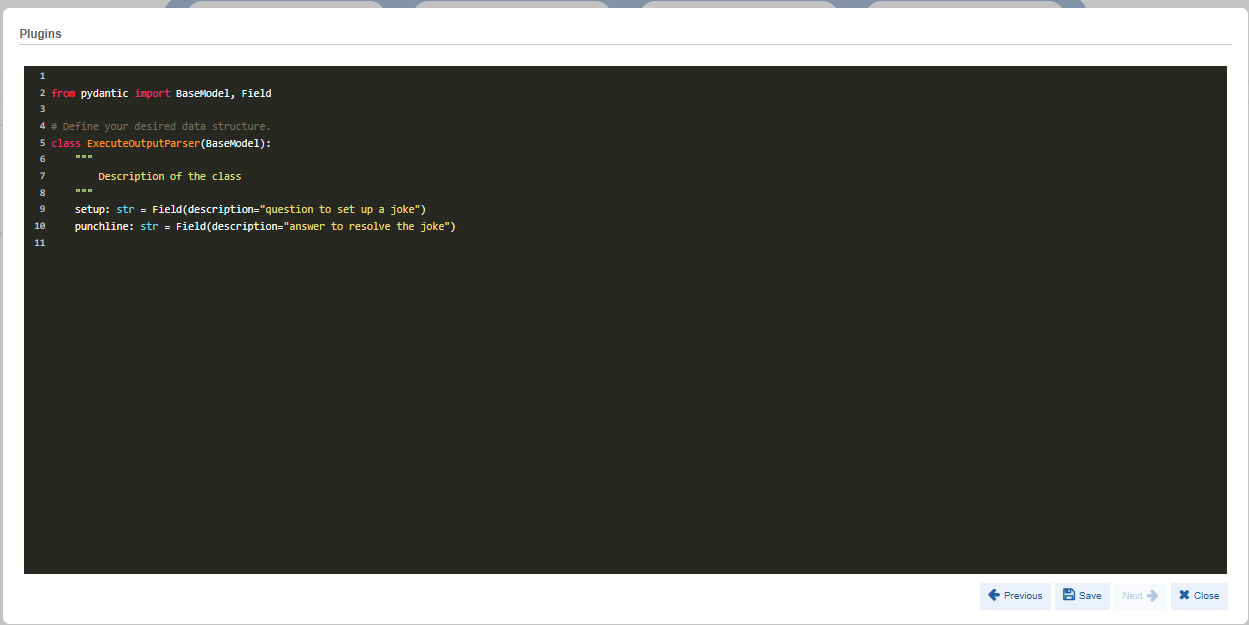
-
Define your data structure as per your requirement.
The output should be formatted as a JSON instance that conforms to the JSON schema below.
As an example, for the schema{{"properties": {{"foo": {{"title": "Foo", "description": "a list of strings", "type": "array", "items": {{"type": "string"}}}}}}, "required": \["foo"\]}}The object
{{"foo": \["bar", "baz"\]}}is a well-formatted instance of the schema. The object{{"properties": {{"foo": \["bar", "baz"\]}}}}is not well-formatted. -
Click Save to save your output parser.
Click Previous if you need to modify any data in the previous screen.
Click Close to discard the details and close the function popup.