User Settings
General User Settings
User settings are configured after logging into the Platform. The general settings include Profile, Change Password, and Access Token. The settings page is common to all users.
Passwords and secret keys are encrypted at UI and database levels. Hence, it does not pose any security issues.
Profile
User profile details for the logged-in user aappear. Users can edit and save the details.
-
In the Main menu (burger menu on the left of the logo), click Settings.
-
Click Profile.
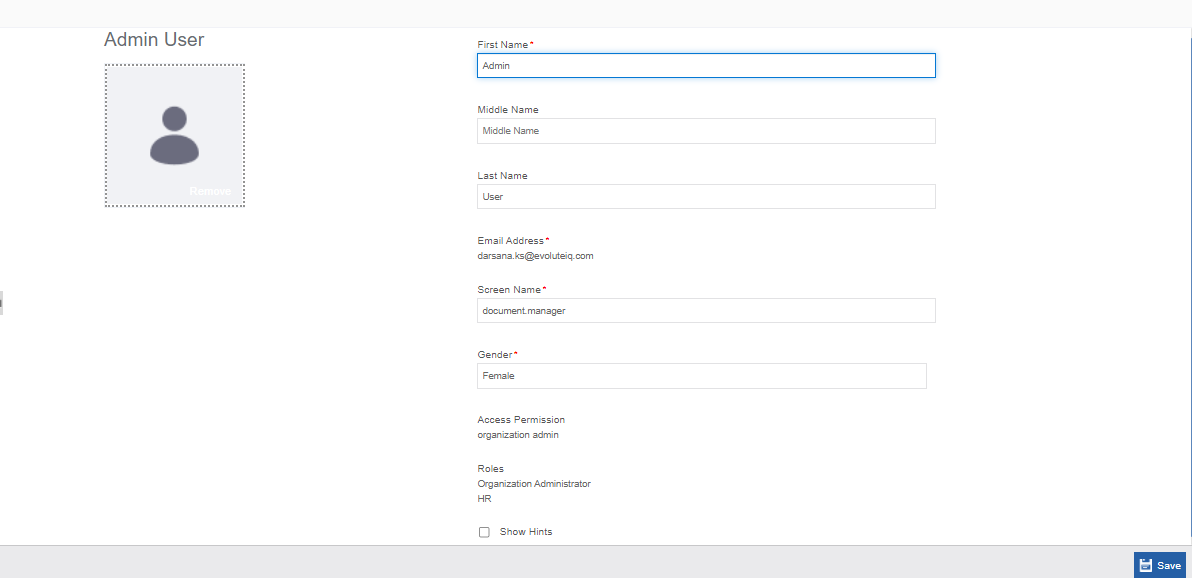
Figure 1: The Profile page -
Enter the profile details as explained below.
| Field | Description |
|---|---|
| First Name* | The first name of the user is populated. You can modify the name details. |
| Middle Name | Enter the middle name of the user. |
| Last Name | Enter the last name of the user. |
| Email Address* | The email address appears as provided by the administrator. The user cannot edit it. |
| Screen Name* | Enter the screen name. You can sign in using the screen name if you have defined to use the
username for |
| Gender* | Enter the gender of the user. |
| Access Permission | Access permission appears as set by the administrator. Users cannot edit it. |
| Roles | Roles appear as set by the administrator. Users cannot edit it. |
| Show Hints | Click the checkbox to show hints. |
Changing Password
When you sign in to the platform for the first time, Change password page appears after successful sign in. Later also you can change the password by following the steps below.
-
Sign in to the Platform.
-
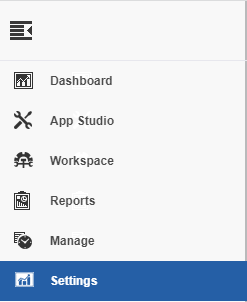
Navigate through the Main Menu > Settings.
-
Click Change Password.
Or
On the top-right of the Platform, click the User icon > Click Change Password.
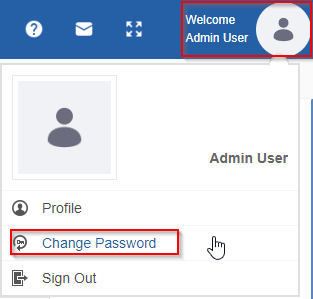
The Change Password screen appears.
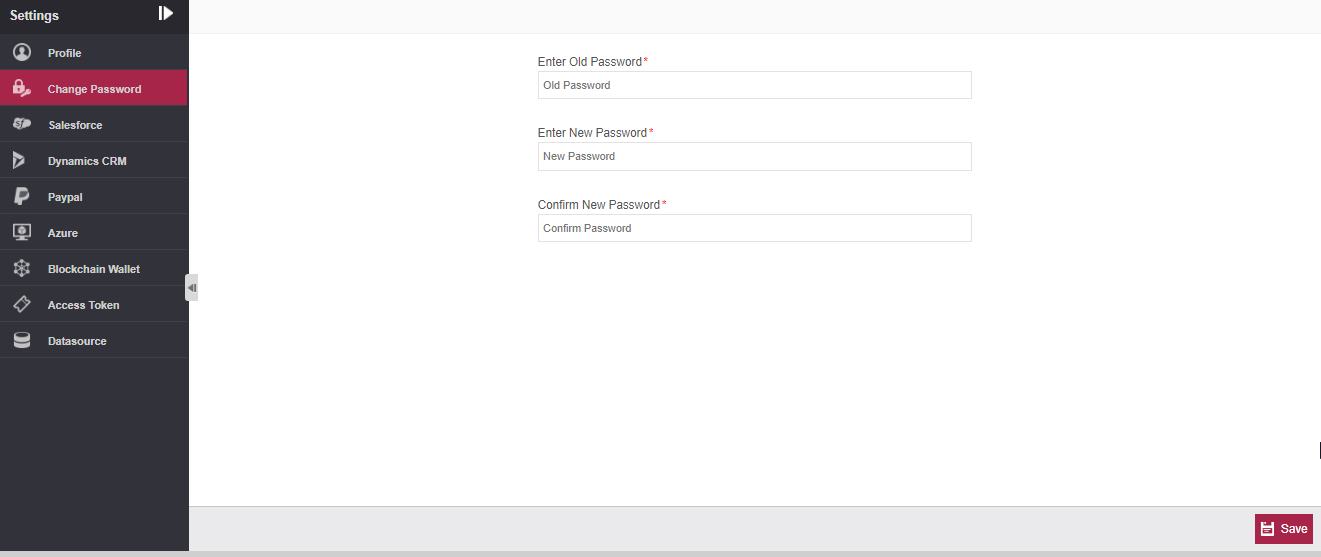
Figure 2: Change Password page
-
Enter Old Password.
-
Enter New Password and Confirm New Password by re-entering the new password.
-
Click Save. The new password is saved. Now you can sign in with the registered email address and new password.
Access Token
An access token is used to generate Access Token for accessing APIs of any third-party application. The access token created here gets listed in the Management > Configuration Management > Access Token section.
- In the Main menu (burger menu on the left of the logo), click Settings.
-
Click Access Token.
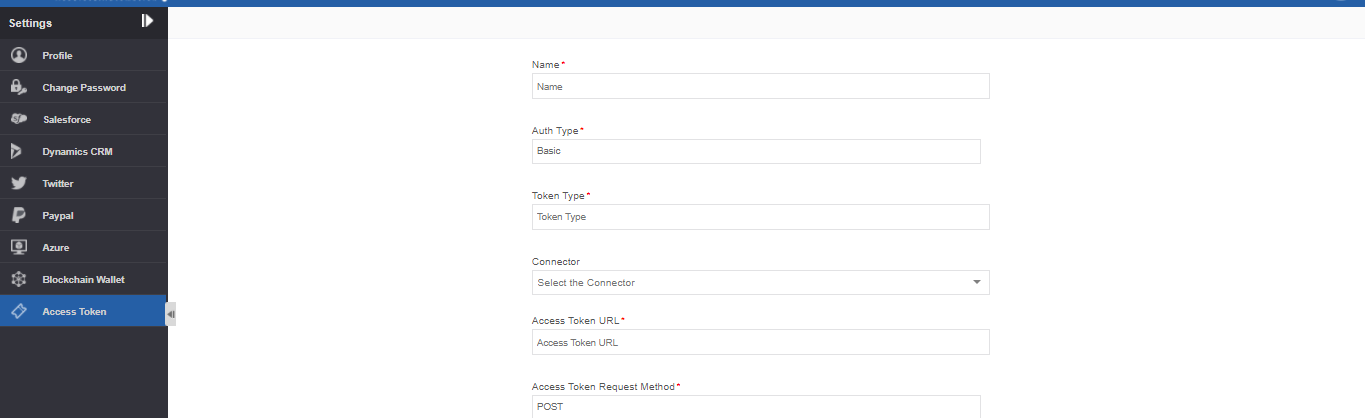
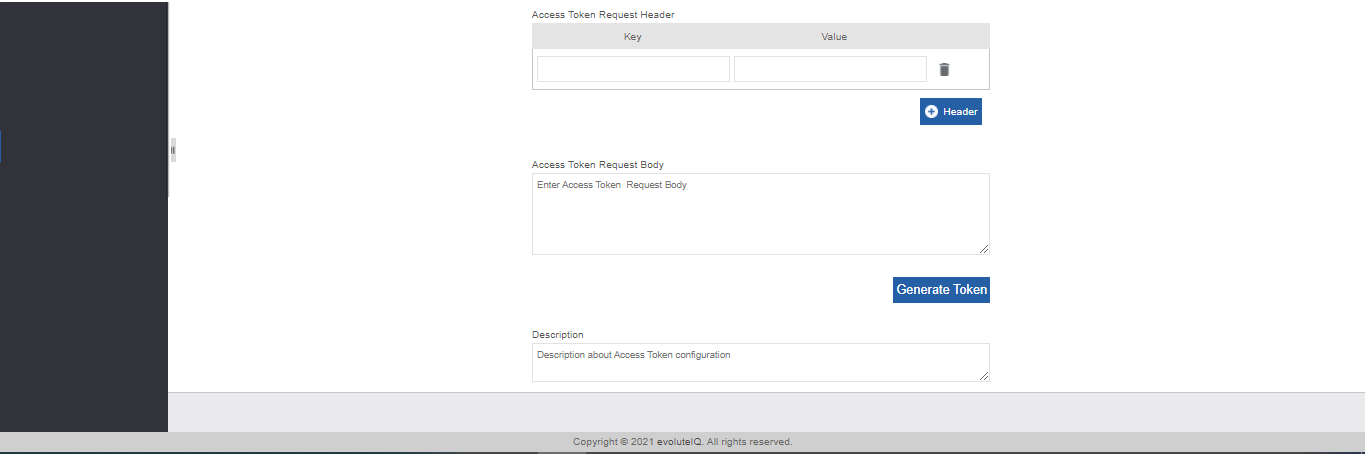
Figure 3: Access Token details
-
Enter the details as explained below.
Field Description Name* Enter the name for the access token. This is the reference name
that gets listed in the web service entity.Auth Type* Select the Auth type.
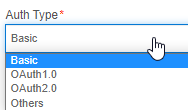
Token Type* Enter the Token type. Connector Select the Connector required.
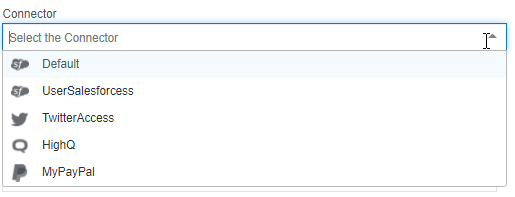
Access Token URL* Enter the Access Token URL. Access Token Request Method* Select the access token request method (GET/POST).
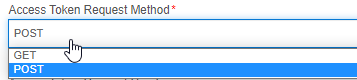
Access Token Request Header Enter the Key and Value in the respective fields.
Click +Header for adding Key and Value fields.
Click the delete icon to remove any added header.Access Token Request Body Enter the access token request body. Click Generate Token. Description Provide a description of the access token configuration.
Advanced User Settings
Azure
The user should have a valid account registered in Azure.
- In the Main menu (burger menu on the left of the logo), click Settings > Datasource.
-
Click Create New.
-
Enter name of the Account.
-
In the Type drop-down, click Azure. Azure configuration details appear.
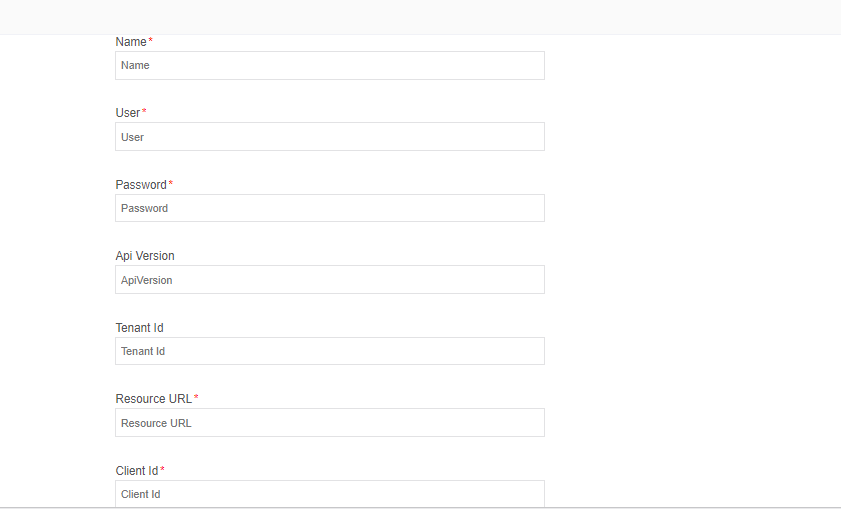
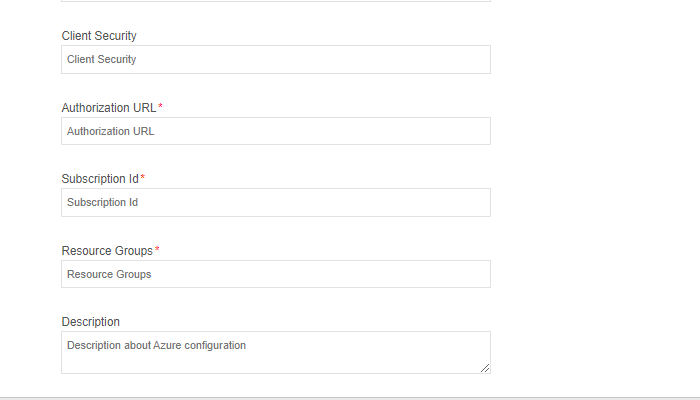
Figure 4: Azure User Settings
-
Enter the details as explained below.
| Field | Description |
|---|---|
| Type | Select Azure as the type of the account. |
| User* | Enter the Username of the Azure account. |
| Password* | Enter the Password of the Azure account. |
| Api Version | Enter the API version of the Azure account. |
| Tenant Id | Enter the Tenant ID of the Azure account. |
| Resource URL* | Enter the Resource URL of the Azure account. |
| Client Id* | Enter the Client Id of the Azure account. |
| Client Security | Enter the Client Security of the Azure account. |
| Authorization URL* | Enter the Authorization URL of the Azure account. |
| Subscription Id* | Enter the Subscription Id of the Azure account. |
| Resource Groups* | Enter the Resource Groups of the Azure account. |
| Description | Provide a description of the Azure configuration. |
Blockchain Wallet
The user should have a valid account in Blockchain Wallet.
- In the Main menu (burger menu on the left of the logo), click Settings > Datasource.
-
Click Create New.
-
Enter name of the Account.
-
In the Type drop-down, click Blockchain Wallet. Blockchain Wallet configuration details appear.
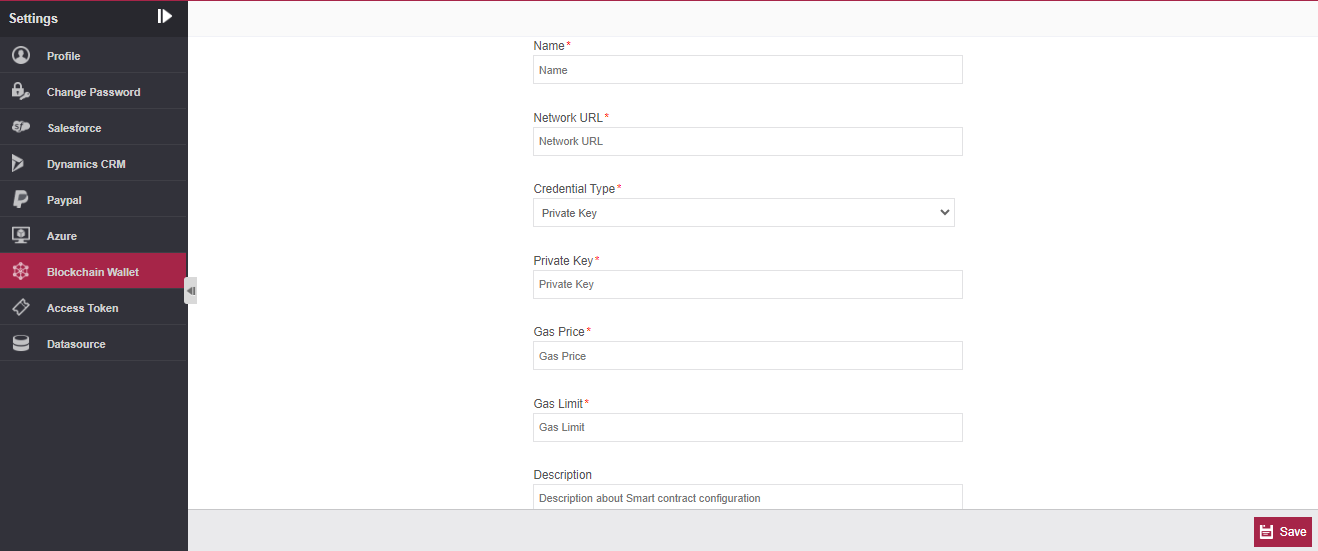
Figure 5: Blockchain Wallet User Settings
-
Enter the details as explained below.
| Field | Description |
|---|---|
| Type | Select type as the Blockchain Wallet as the account. |
| Network URL* | Enter the Network URL for the Blockchain account. |
| Credential Type* | Enter the Credential Type for the Blockchain account. |
| Private Key* | Enter the Private Key for the Blockchain account. |
| Gas Price* | Enter the Gas Price value for the Blockchain account. |
| Gas Limit* | Enter the Gas Limit value for the Blockchain account. |
| Description | Provide a description of the Blockchain wallet configuration. |
Dynamics CRM
The user should have a valid salesforce account registered in Dynamic CRM.
- In the Main menu (burger menu on the left of the logo), click Settings > Datasource.
-
Click Create New.
-
Enter name of the Account.
-
In the Type drop-down, click Dynamic CRM. Dynamic CRM configuration details appear.
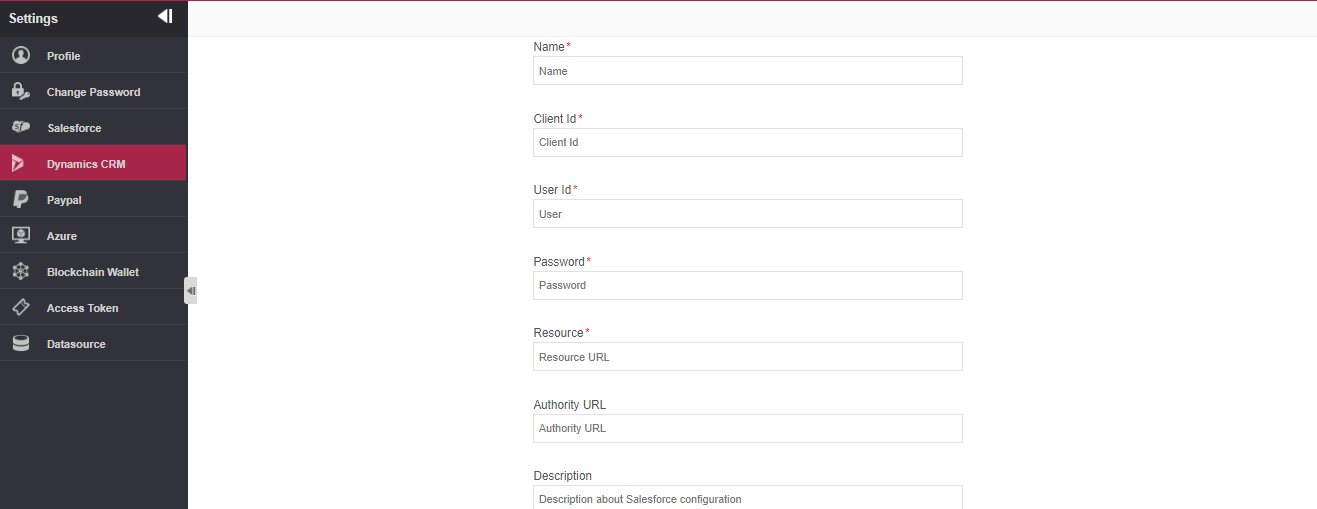
Figure 6: Dynamic CRM User Settings
-
Enter the details as explained below.
| Field | Description |
|---|---|
| Type | Select Dynamic CRM as the account type |
| Client Id* | Enter the Client Id of the Dynamic CRM account. |
| User Id* | Enter the User Id of the Dynamic CRM account. |
| Password* | Enter the Password of the Dynamic CRM account. |
| Resource* | Enter the Resource of the Dynamic CRM account. |
| Authority URL | Enter the Authority URL of the Dynamic CRM account. |
| Description | Provide a description of the Dynamic CRM configuration. |
Paypal
The user should have a valid account registered in Paypal.
- In the Main menu (burger menu on the left of the logo), click Settings > Datasource.
-
Click Create New.
-
Enter name of the Account.
-
In the Type drop-down, click Paypal. Paypal configuration details appear.
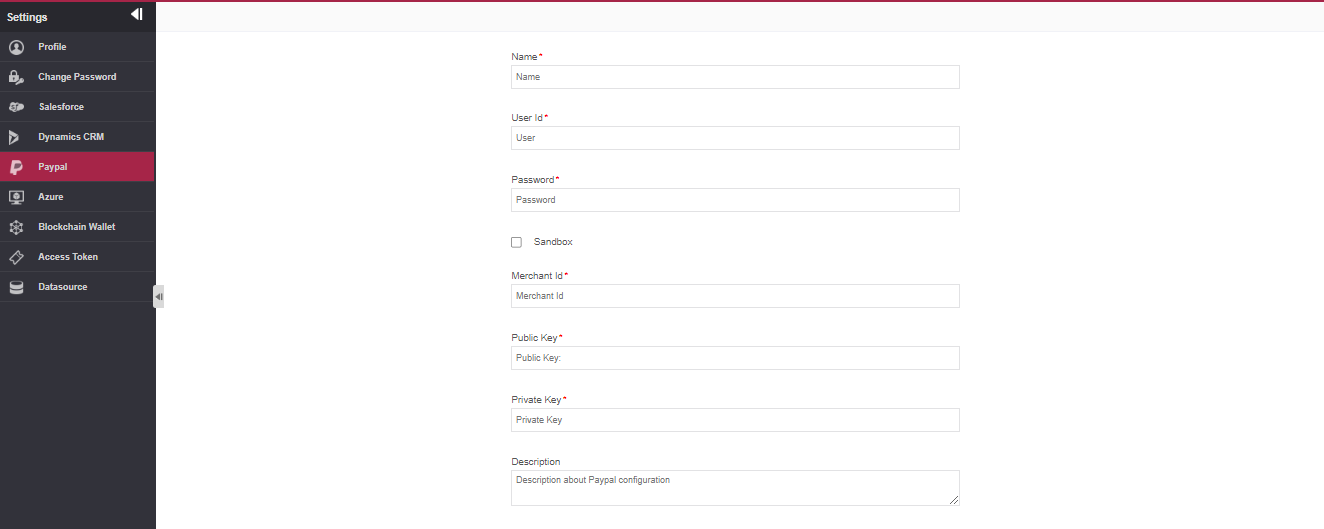
Figure 7: Paypal User Settings
-
Enter the details as explained below.
| Field | Description |
|---|---|
| Type | Select Paypal as the type of the account. |
| User Id* | Enter the user Id of the Paypal account. |
| Password* | Enter the password of the Paypal account. |
| Sandbox | Check the sandbox as per the requirement |
| Merchant Id* | Enter the merchant id of the Paypal account. |
| Public Key* | Enter the public key of the Paypal account. |
| Private Key* | Enter the private key of the Paypal account. |
| Description | Provide a description of the Paypal configuration. |
Salesforce
The user should have a valid salesforce account registered in Salesforce.
- In the Main menu (burger menu on the left of the logo), click
-
Click Create New. Configuration details appears.
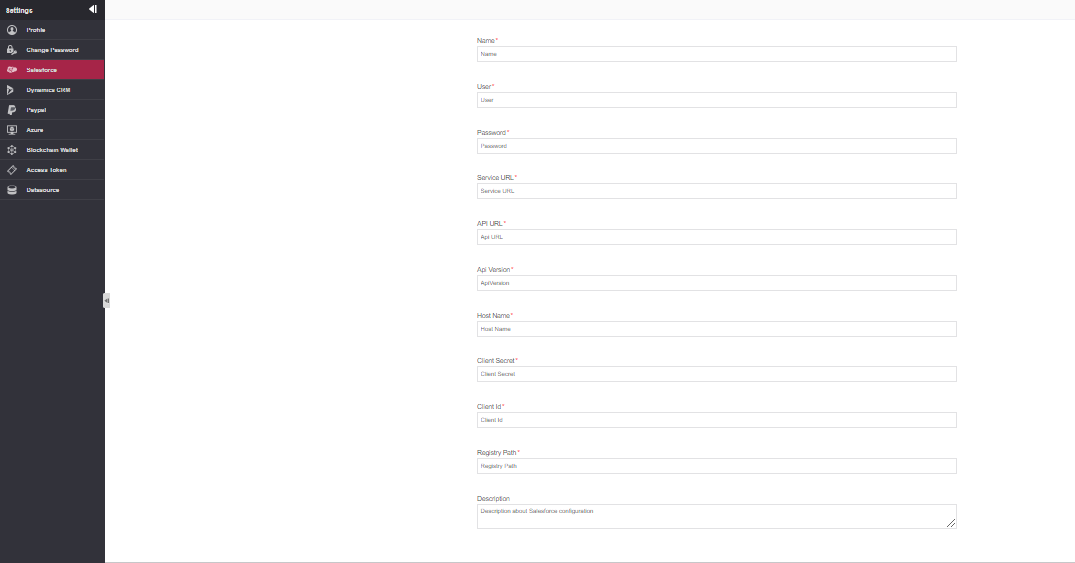
Figure 8: Salesforce User Settings
-
Enter the Basic details as explained below. Basic tab will be active by default.
Field Description Name Enter the name of the datasource account. Type Select Salesforce as the type of account. Description Provide a description of the Salesforce configuration. -
Click Next and in the Authorization tab, enter the details as explained below.
Field Description Auth Type* Select the required Auth Type. User* Enter the username of the Salesforce account. Password* Enter the password of the Salesforce account. Security Token Enter the security token for the salesforce account. -
Click Next and in the Objects tab, enter the details as explained below. When you select Salesforce as the external connector, Object tab appears dynamically.
Field Description {Object_name} Click an object name to view all the methods defined under
that category.The details in this section will appear as per the External Connector
configuration (YAML file configuration) done in the
Manage > Configuration Management > SalesforceService URL Enter the Service URL of the Salesforce account. API URL Enter the API URL of the Salesforce account. API Version Enter API Version of the Salesforce account. Host Name Enter the Host Name of the Salesforce account. Client Secret Enter the Client Secret of the Salesforce account. Client Id Enter the Client Id of the Salesforce account. Registry Path* Enter the Registry Path of the Salesforce account.
Datasource Settings (User Specific)
The Platform offers external connector-based user settings apart from general settings; a bunch of configurations that are applicable/relevant to various connectors utilized in the Platform. The Datasource section in the Settings allow you create personalized user account configuration for the external connectors opted by the user during the purchase of the product. The “Type” drop-down in the datasource configuration will display only the external connectors.
The datasource configurations that are defined in the user settings for a user will be applicable or accessible for that user only.
All the configurations done in the Settings for the logged in user are applicable when a user is mapped to relevant activity within the flow.
Configuring Datasource (User Specific)
-
In the Main menu (burger menu on the left of the logo), click Settings
-
Click Datasource. List of the existing datasources appear.
-
Click Create New. Basic details of the datasource configuration appears
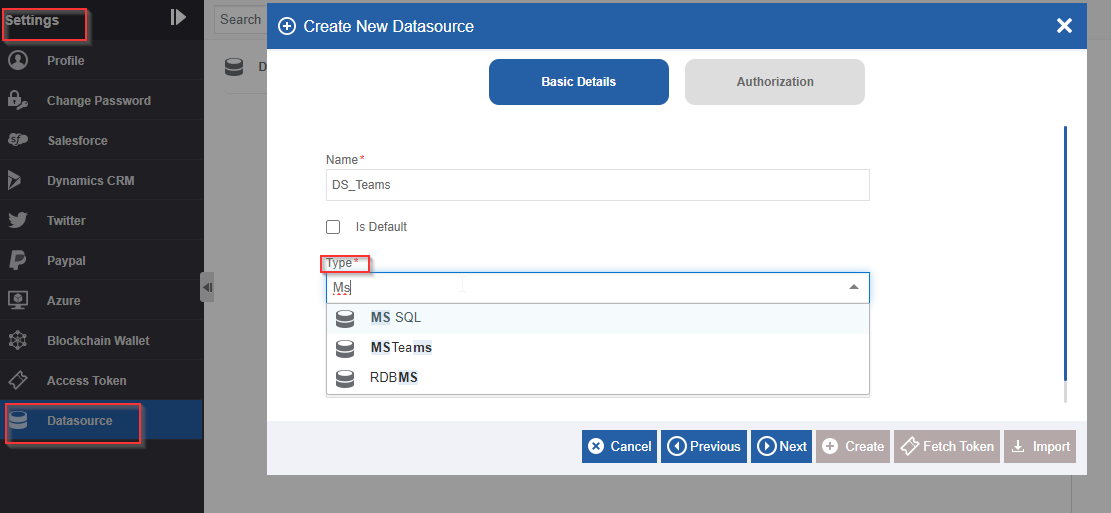
Figure 9: Selecting the Datasource type
-
Enter name of the datasource.
-
In the Type drop-down, select the datasource type. The “Type” drop-down displays the list of connectors.
-
Click Next. The Authorization details of the selected connector appears.
-
Enter the authorization details for the selected connector. Refer Specific Connector Configuration document for details of configuration.
-
Click Create. The account is connected to the selected datasource. The datasource that you create here will be accessible only to the particular user who has configured this.