Creating and Configuring Datamodels
Creating a New Datamodel
The Datamodel configuration is dependent on the Datasource that you select. You can create a Datamodel from a Datasource as per the requirement.
Prerequisites:
Datasource (Main Menu > Management > Configuration Management > Datasource)
To create a new datamodel:
-
Go to Main Menu > App Studio > Applications > open [Application_Name] > Data Flow > Datamodel
or
Go to Main Menu > App Studio > Datamodel
The Datamodel list appears.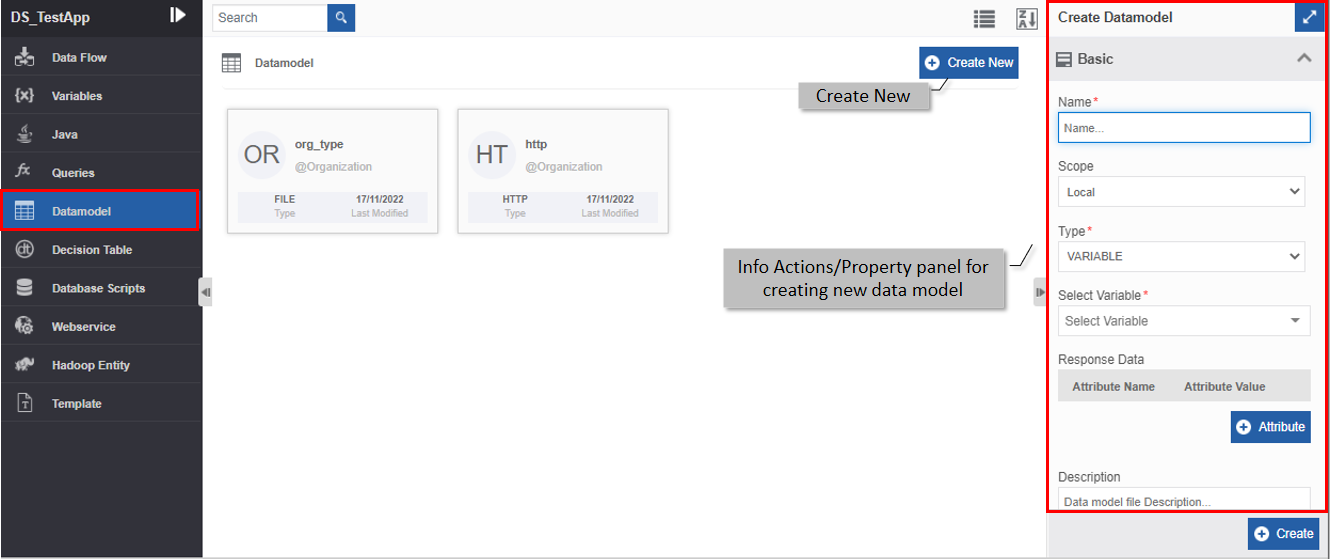
-
Click Create New and enter the Basic details in the Create Datamodel properties panel on the right side.
Field Description Name* Enter the name of the Datamodel.
Character limit: 50.
Characters allowed: Alphanumeric, underscore.
Whitespace is not allowed.Scope* Select the required scope – Local or Organization .
- If you create the datamodel within the flow module, you can select Local or Organization scope.
- If you create the datamodel at the organization level, you can select only Organization scope.
You cannot edit the scope of an entity.Type* Type indicates the input data type for the Datamodel.
Select a datasource type from the drop-down.
Based on the Type selected, the details appear. Refer to Types of Datasources for the Datamodel for configuring different types of Datasources.Description Enter a description for the Datamodel. -
Click Save.
Types of Datasources for the Datamodel
It is mandatory to select the type of datasource for creating a Datamodel. At the Organization level, the type of Datasources is limited as compared to the data flow level.
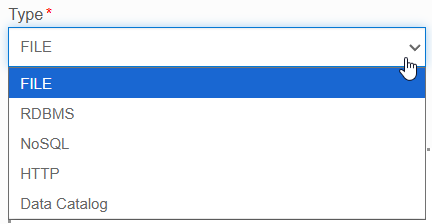
At the organization level, the following types of datasources are accepted.
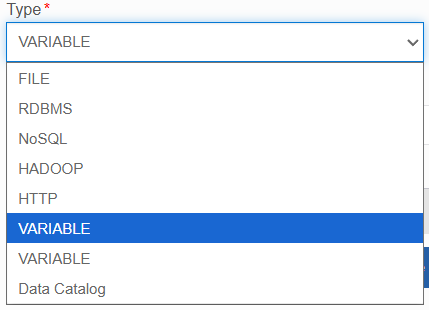
At the data flow level, the following types are accepted.
Configuring FILE Type Datasource
FILE type allows you to upload Excel or CSV files. You can upload Big Data or Small data files.
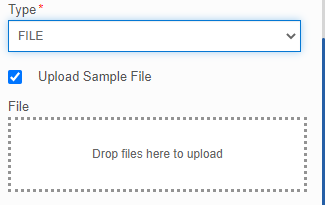
- In the Datamodel configuration, select Type = FILE
-
Select Upload Sample File checkbox (checked by default when you select type as file and click the dotted rectangle for selecting a file or drag a file (excel or CSV) to the box. Response Data details appear as per the data in the uploaded file.
Or
deselect the Upload Sample File checkbox for providing the response data details manually.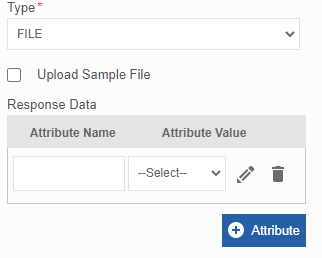
In the Response Data, enter the response (Attribute Name and Attribute Type) that you need.
- In the Response Data, click +Attribute to add more attributes.
- Click pencil icon to configure attribute with more details.
- Click delete icon adjacent to an attribute to delete that attribute.
- Refer to Configuring Attributes
Configuring Hadoop Type Datasource
Hadoop allows you to connect to the Hadoop file system for the datasource.
Prerequsites:
- HADOOP connector (in Manage > Configuration Management > Hadoop)
- DMS of Hadoop type (in Manage > Configuration Management > DMS)
- Hadoop Business entity (in App Studio > Hadoop) with Action Type as Read
To configure a HADOOP type datasource to a datamodel, create and configure a HADOOP connector, a DMS of Hadoop type, and a Hadoop Business entity with Action Type as Read.
To configure Hadoop type in datamodel:
-
In the Datamodel configuration, select Type = RDBMS.
-
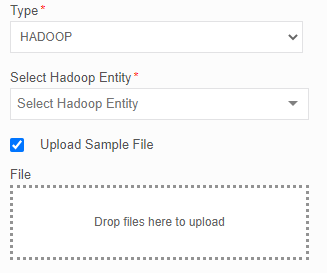
Click the Select Hadoop Entity, and select the Hadoop Entity required.
-
Select Upload Sample File checkbox (checked by default) and click the dotted rectangle for selecting a file or drag a file to the box.
Accepted file fomats: .XLS,.XLSX, or CSV
Response Data details appear in the header details of the uploaded file.
Or
deselect the Upload Sample File checkbox for providing the response data details manually.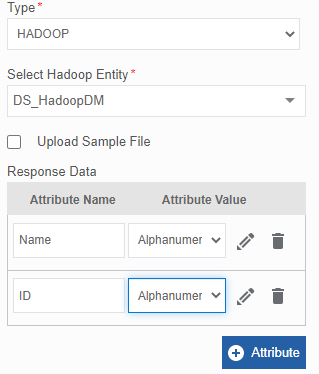
In the Response Data, add/remove the responses (Attribute Name and Attribute Value) that you need.
- In the Response Data, click +Attribute to add more attributes.
- Click pencil icon to configure attribute with more details.
- Click delete icon adjacent to an attribute to delete that attribute.
- Refer to Configuring Attributes
Configuring HTTP Type Datasource
HTTP-type Datasource allows you to connect to a rest API service and get the data/information by performing a Rest API call.
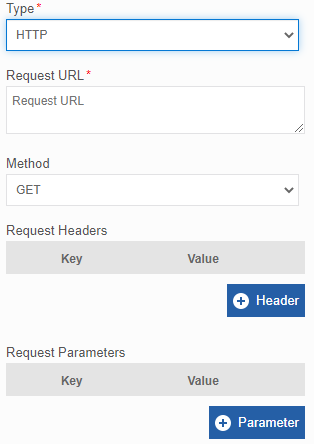
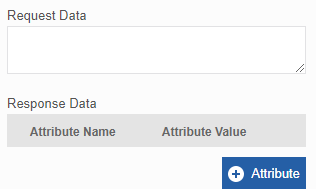
- In the Datamodel configuration, select Type as HTTP. Web service details appear.
- In the Request URL, enter the URL for accessing a resource on the server.
-
Select the required Method (GET/POST).
- GET: This method retrieves (gets) a resource from the server. It offers read-only access to the resources.
- POST: This method creates (posts) a resource on the server. It is for creating a new resource.
-
In the Request Headers, click Header and enter the Key and Value for the header as required.
- In the Request Parameters, click Parameter, and enter the Key and Value for the Parameter to be provided as per your requirement.
- In the Request Data, enter the request body.
-
In the Response Data, enter the response (Attribute Name and Attribute Type) that you need.
- In the Response Data, click +Attribute to add more attributes.
- Click pencil icon to configure attribute with more details.
- Click delete icon adjacent to an attribute to delete that attribute.
- Refer to Configuring Attributes
Configuring Data Catalog Type Datasource
The Datasource type, Data Catalog allows you to provide data entity details as a Datasource.
Prerequisites:
If you need to provide a Data Catalog type source, then it is mandatory to create a data entity with the required attributes (in Manage > Data Catalog > Data Entity).
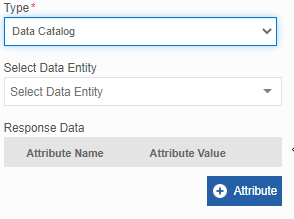
- In the Datamodel configuration, select Type as Data Catalog.
- Select the Data Entity name from the drop-down as needed. The Response Data section displays the Attribute name and details as provided for the selected data entity.
-
In the Response Data, add/remove the responses (Attribute Name and Attribute Value) that you need.
- In the Response Data, click +Attribute to add more attributes.
- Click pencil icon to configure attribute with more details.
- Refer to Configuring Attributes
Configuring NoSQL Type Datasource
NoSQL allows you to provide a nonrelational Datasource like Cassandra.
Prerequisites:
If you need to provide a NoSQL type, the required Datasource should be created in the Manage > Configuration Management > Datasources.
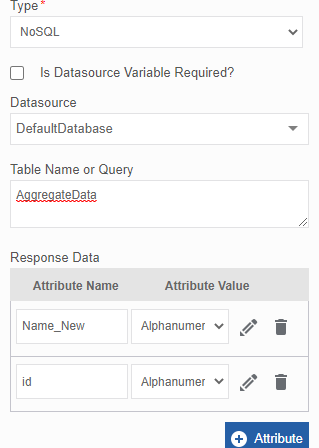
- In the Datamodel configuration, select Type as NoSQL.
-
Select a database from the Datasource drop-down.
Or
if you need to dynamically pass the Datasource name through a variable, select the Is Datasource Variable Required? and select a variable (variable should be of alphanumeric type) from the Select Variable drop-down. -
Enter the table name or query below the Table Name or Query.
You must specify the correct table name as appearing in the database or enter the query string to extract the required data from the table. -
In the Response Data, add/remove the responses (Attribute Name and Attribute Value) that you need.
- In the Response Data, click +Attribute to add more attributes.
- Click pencil icon to configure attribute with more details.
- Click delete icon adjacent to an attribute to delete that attribute.
- Refer to Configuring Attributes
Configuring RDBMS Type Datasource
RDBMS allows you to choose any RDBMS Datasource.
Prerequisites:
It is mandatory to create RDBMS or MySQL type Datasource in the Manage > Configuration Management > Datasource (RDBMS or MySQL types) to create a Datamodel from an RDBMS type source.
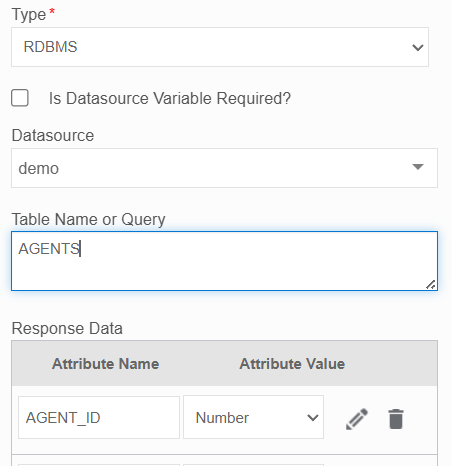
- In the Datamodel configuration, select Type as RDBMS.
- Select a database from the Datasource drop-down.
Or
if you need to dynamically pass the Datasource name through a variable, select the Is Datasource Variable Required? and select a variable (variable should be of alphanumeric type) from the Select Variable drop-down. - Enter the table name or query below the Table Name or Query.
You must specify the correct table name as appearing in the database or enter the query string to extract the required data from the table. -
In the Response Data, add/remove the responses (Attribute Name and Attribute Value) that you need.
- In the Response Data, click +Attribute to add more attributes.
- Click pencil icon to configure attribute with more details.
- Click delete icon adjacent to an attribute to delete that attribute.
- Refer to Configuring Attributes
Configuring Variable for Datasource
The Variable type is mapped as a Datasource for passing the JSON data as input. The variable value is always an array of JSON.
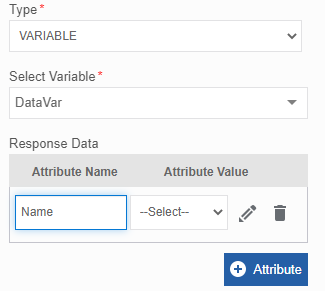
- In the Datamodel configuration, select Type as Variable.
- In the Select Variable, select the variable name. The variable should be of type alphanumeric.
-
In the Response Data, add/remove the responses (Attribute Name and Attribute Value) that you need.
- In the Response Data, click +Attribute to add more attributes.
- Click pencil icon to configure attribute with more details.
- Click delete icon adjacent to an attribute to delete that attribute.
- Refer to Configuring Attributes
Configuring Attributes in Response Data
In the datamodel configuration, for the applicable category of datasource type, Response Data section appears with the attribute details.
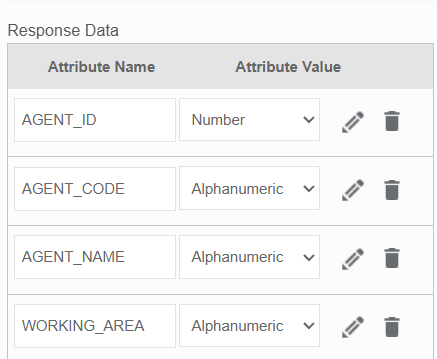
- Attribute Name: The attribute name extracted from the datasource table.
- Attribute Value: Displays, attribute type, configure attribute icon (pencil icon), delete icon.
- Click configure icon (
 ) to configure details for the attribute.
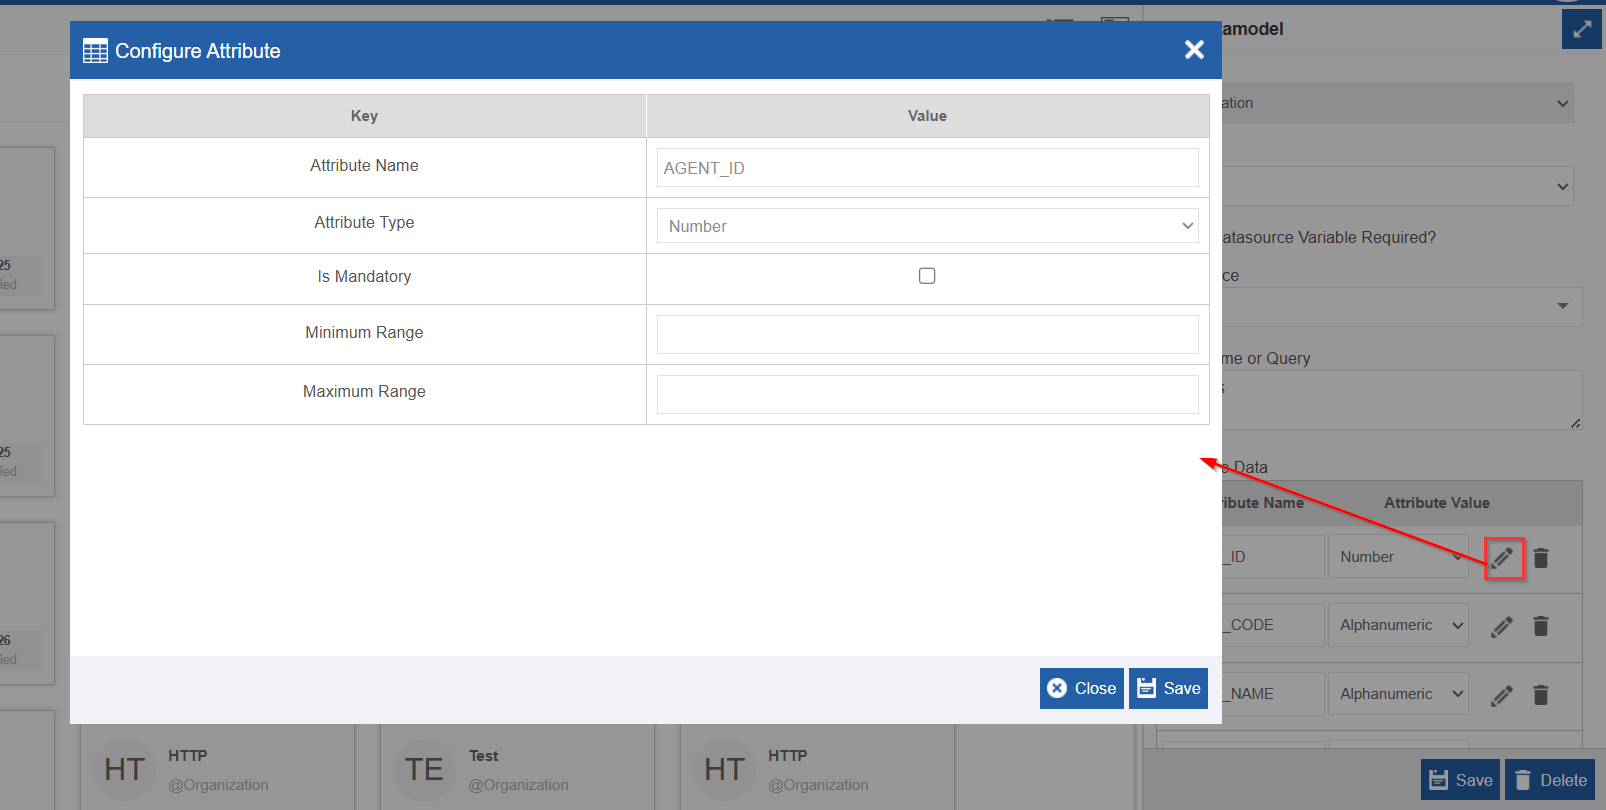
Provide the details:
| Key / Field | Description |
|---|---|
| Attribute Name | Name of the attribute or the column name in the table. |
| Attribute | Select a datatype applicable for the attribute. The UI displays custom fields based on the data type selected. Refer to Attribute Types. |
| Is Mandatory | Select Is Mandatory if you want to make this attribute as a mandatory item. |
- Click delete icon adjacent to an attribute to delete that attribute.
Attribute Types
Attribute types appear on Datamodel configuration > Response Data > Configure Attribute (pencil icon) > Attribute types.
Attribute types are datatypes applicable for an attribute.
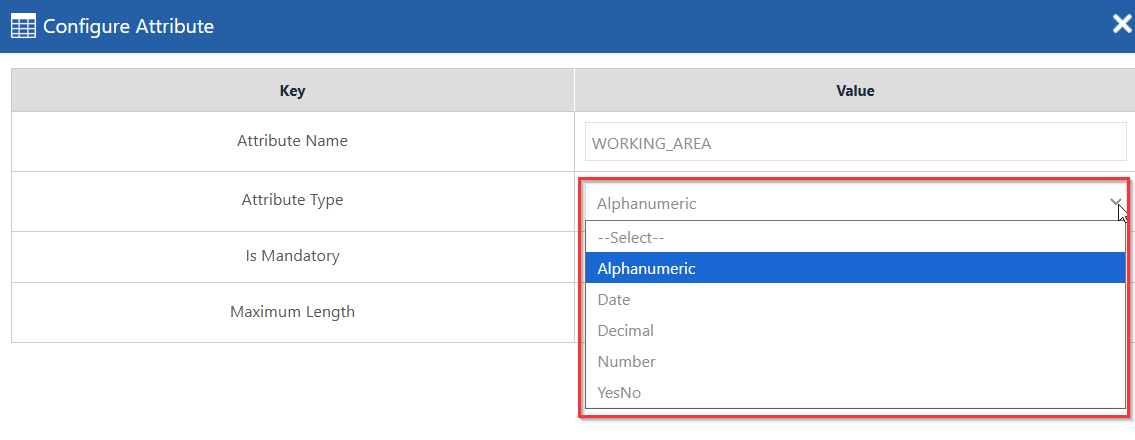
Attribute Type = Alphanumeric
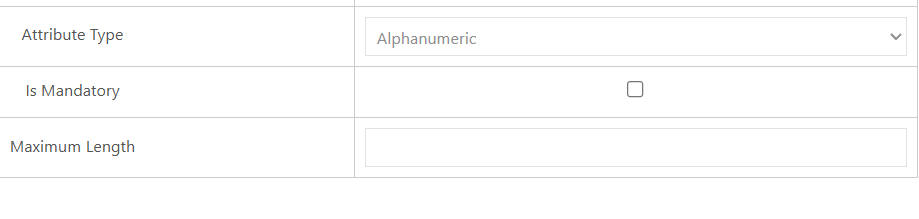
- Maximum Length: Enter maximum number of characters allowed inclusive of space.
Attribute Type = Date

- Format: Enter the required date and time format.
Example:dd/MM/yyyy HH:mm:ss
Attribute Type = Decimal
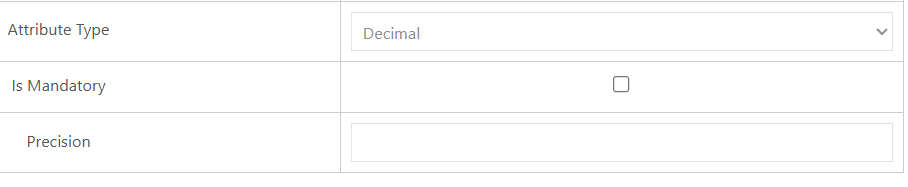
- Precision: Enter the decimal precision value in numbers.
Example: 4 – indicates that there should be 4 digits after the decimal point.
Attribute Type = Number
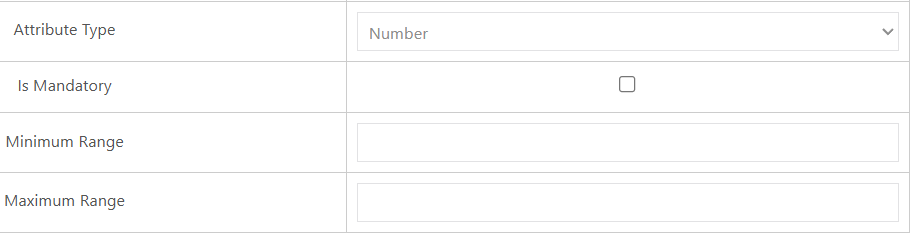
- Minumum Range: Enter the minimum range for number.
Example: 10 – Indicates that numbers greater than or equal to 10 is allowed. - Maximum Range: Enter the maximum range for number.
Example: 100 – Indicates that numbers less than or equal to 100 is allowed.
Attribute Type = YesNo
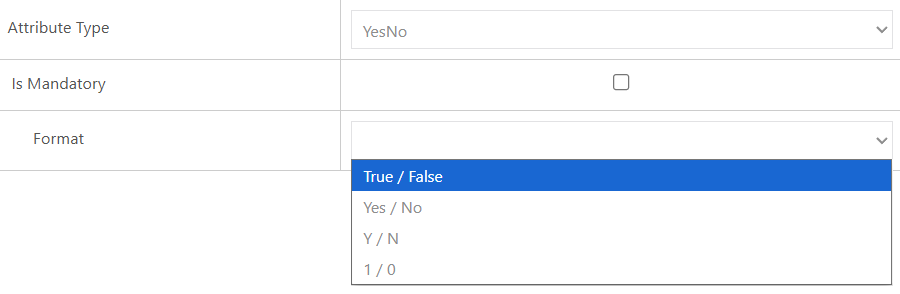
- Format: Select the required format.
Values only in the selected format will be allowed.