Resource Library
Resource Library is a simple file management section in the platform that allows you to upload various types of resource items (files) that are utilized within the Platform. Create folders or directories in the Resource Library section to categorize and manage your files. All the files that are utilized in the platform are uploaded to the Resource Library. The files in the resource library are utilized in Form-Views, Web Apps, Themes, and Templates sections.
Resource Library supports Javascript, CSS, video/audio, PDF, and image files.
Viewing Resource Library Categories
- Go to Main Menu > Management > Resource Library.
-
Click the expand arrow on the left side menu to expand the left menu panel.
View the categories: Files and Published Files.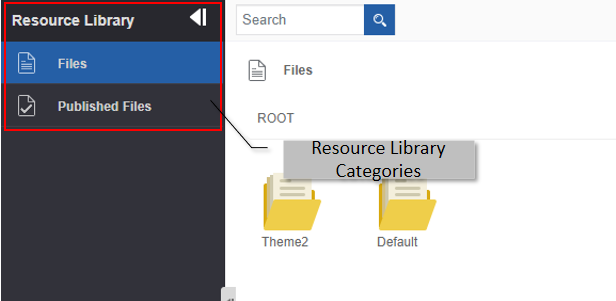
Files and Directories
Create two types or categories of resource items in the Resource Library > Files section viz, Files and Folders. All the resource items are listed in the ROOT directory.
-
Files: Upload single or multiple files. Once you upload the file, the file name will be set as an entity name and can be accessed within the organization. The file names appear in places where you need to map files.
-
Directories: Directories hold multiple files and file types. You can create directories or folders for categorizing your files. Create a directory (folder) by specifying the name of the directory and then upload multiple files to this directory. After uploading files, each file will be listed as the entity with the file name as the entity name in the platform.
Viewing Resource Items in the Files Section
The files section contains Files and Directories (Folders). Navigate inside the directory structure to view the files within.
- Go to Main Menu > Management > Resource Library > Files. A list of all files within the Files section appears.
- Double-click a file to open and view the file contents.
-
Hover over a file and click the three dots (More Actions) to display the applicable actions.
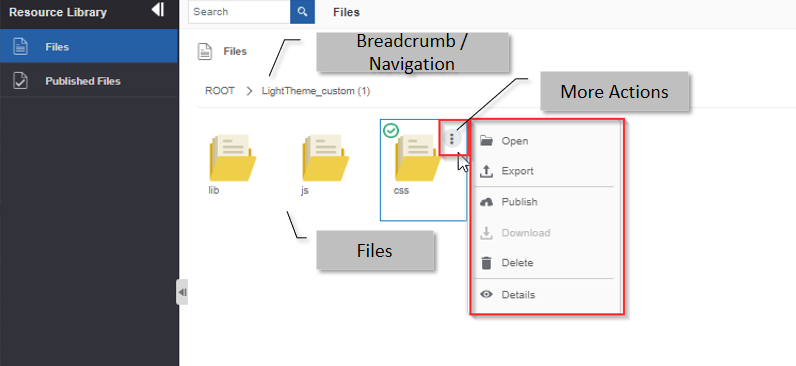
- ROOT: Root folders appear within this folder.
- Breadcrumb: When you navigate within a folder, the navigation path appears as a breadcrumb. Click a folder name in the breadcrumb to navigate within that folder.
- Directory: Click +Directory to create a new Folder or directory.
- Upload Files: Click Upload Files to upload a new file.
- More Actions:
- Open: To open a directory.
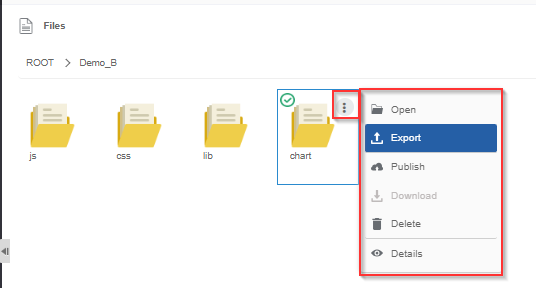
- Export: To export a directory.
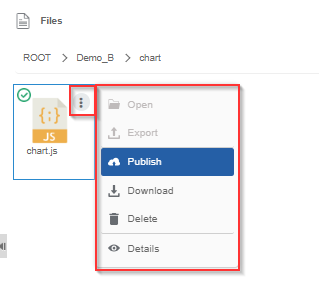
- Publish: To publish a directory.
- Delete: To delete a directory.
- Details: To view details of the directory.
Creating a New Directory
Create a directory / folder structure and naming conventions as per the requirement of your project.
- Go to Main Menu > Management > Resource Library > Files. A list of all files within the Files section appears.
- Double-click and navigate to the folder within which you need to create a folder or directory.
-
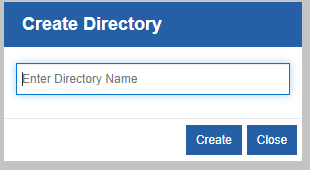
Click +Directory (top-right). Create Directory pop-up appears.
-
Enter the directory name.
- Click Create to create the directory (or click Close to discard the creation). The directory is created and it gets listed within the selected directory.
Viewing Details about Directory / File
- Go to Main Menu > Management > Resource Library > Files. A list of all files within the Files section appears.
- Double-click and navigate to the folder that you want to rename.
-
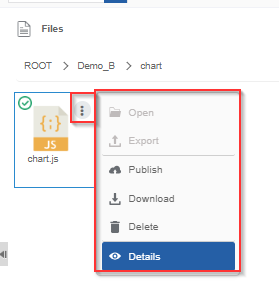
Hover over the directory name and click More Actions.
-
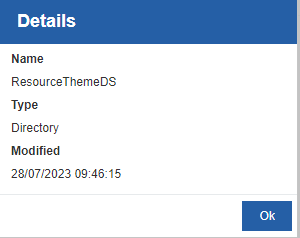
Click Details. The details of the Directory / File appear.
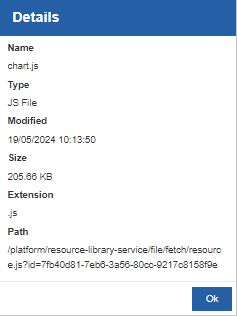
- Name: Name of the file or the directory.
- Type: Type of the file or directory.
- Modified: File/directory modified date and time.
- Extension: Extension of the file.
- Size: The size of the file.
- Path: Path of the file. To access any file, copy the file path and paste it in the browser after the server host and port number.
-
Click Ok to close the pop-up.
Downloading File
Follow the below steps for downloading the file from the resource library. Download only the files, not the folders.
- Go to Main Menu > Management > Resource Library > Files. A list of all files within the Files section appears.
- Double-click and navigate to the file that you want to download.
-
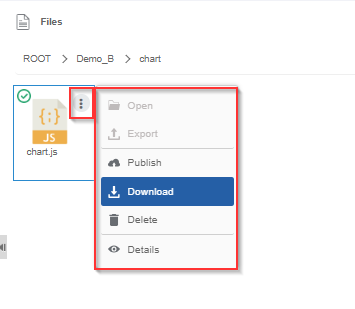
Hover over the file name and click More Actions.
-
Click Download. The file gets downloaded to your local system.
Uploading a New File
Upload any type of file into the Files section.
- Go to Main Menu > Management > Resource Library > Files. List of all files within the Files section appears.
- Double click and navigate into the folder within which you need to upload a new file.
-
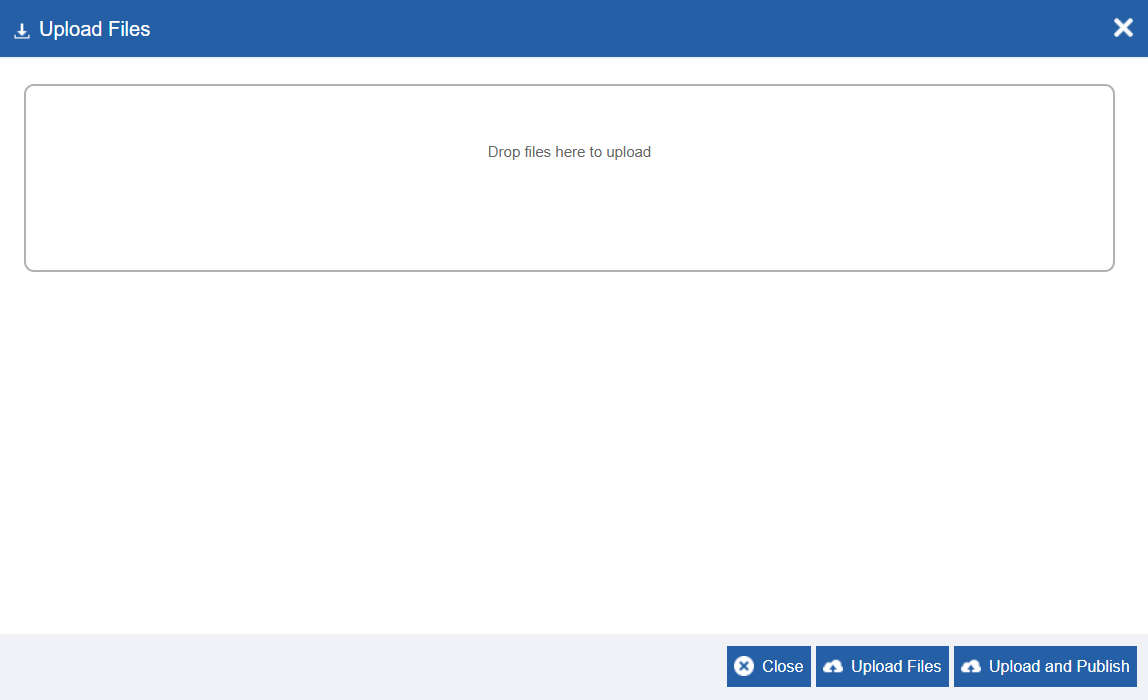
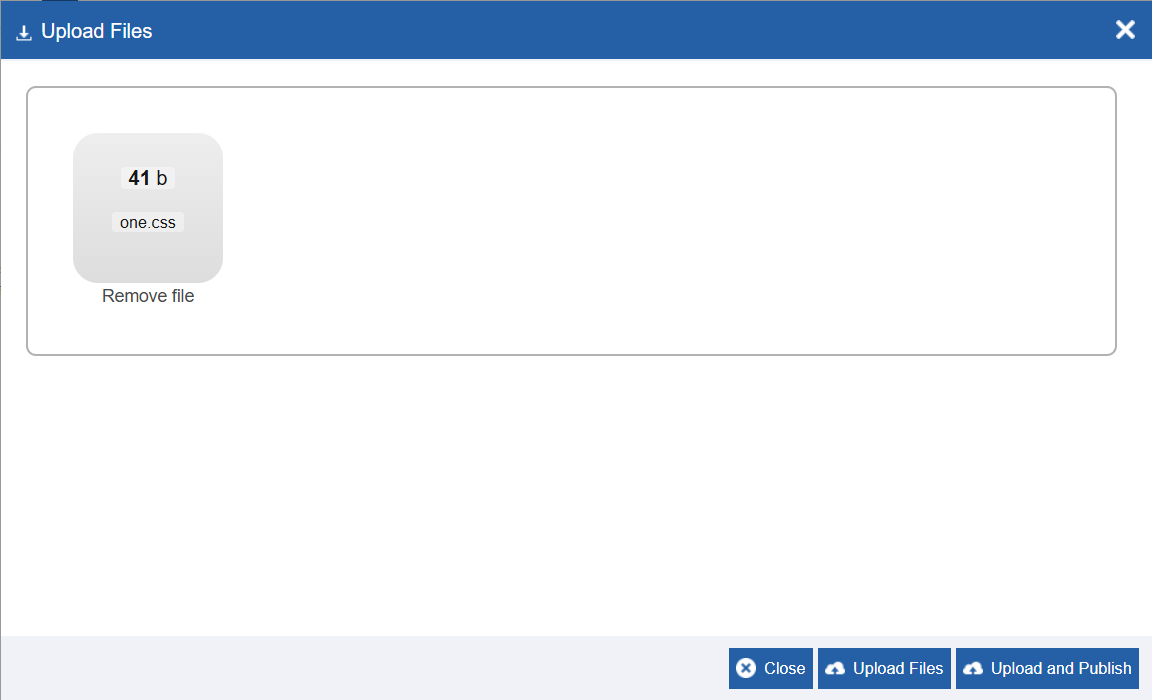
Click Upload Files (top-right). Upload Files pop-up appears.
-
From the Explorer Window drag the required file(s) into Drop files here to upload area. Or click “Drop files here to upload” and then select the required file(s). Click the drop-box and select multiple files.
Info
When you select the file(s), the uploaded file name(s) appears in the UI along with “Remove File” option. Click Remove File option to remove the selected file.
-
Click Upload Files to upload the file to the selected folder (or click Close to discard the action).
- Click Upload and Publish to upload and publish the selected file.
Editing Files
In the Resource Library, view the details of the files and directories and the items within. The contents within the file cannot be viewed or edited through the platform.
In case if you need a modification in a file,
- Download the required file from the resource library to your local system.
- Edit the file as per your requirement.
- Remove the existing file if it is no longer needed.
- Upload the edited file to the Resource Library. If you are not removing the original file, make sure to rename the new file or rename the old file.
Note
You cannot rename a file in the Files section, however, you can re-upload the same file with a different file name.
Publishing a Directory / File
Publish feature allows you to publish a directory or a file. When you publish a directory, all the files within that directory get published. When you publish a file, the selected file get published.
- Go to Main Menu > Management > Resource Library > Files. A list of all files within the Files section appears.
- Double-click and navigate to the directory (or file) that you want to publish.
-
Hover over the directory name (or the file name) and click More Actions.
-
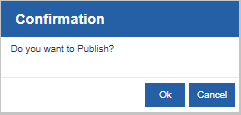
Click Publish. Publish Confirmation appears.
-
Click Ok.
-
When you publish a file, the published files appear on the Resource Library > Published Files section within the same directory structure. If you publish a file that is already published, it will overwrite the already existing published file. The Published files will be available in the platform for utilization.
-
When you publish a directory, all the files within that directory get published and hence the whole directory structure along with the files appear in the Resource Library > Published Files section.
Tip
Directly publish a File when you upload it by selecting the Upload and Publish option.
Exporting a Directory
You can export a directory or folder; however, you cannot export a file. Export the directories in the ROOT folder or the internal folders. The directories or folders exports in the .zip format.
- Go to Main Menu > Management > Resource Library > Files. The list of all files within the Files section appears.
- Double-click and navigate to the folder that you want to export.
-
Hover over the directory name and click More Actions.
-
Click Export. The directory gets exported to your local system in a .zip format.
Importing the Directory
Import a directory from your local to the platform.
-
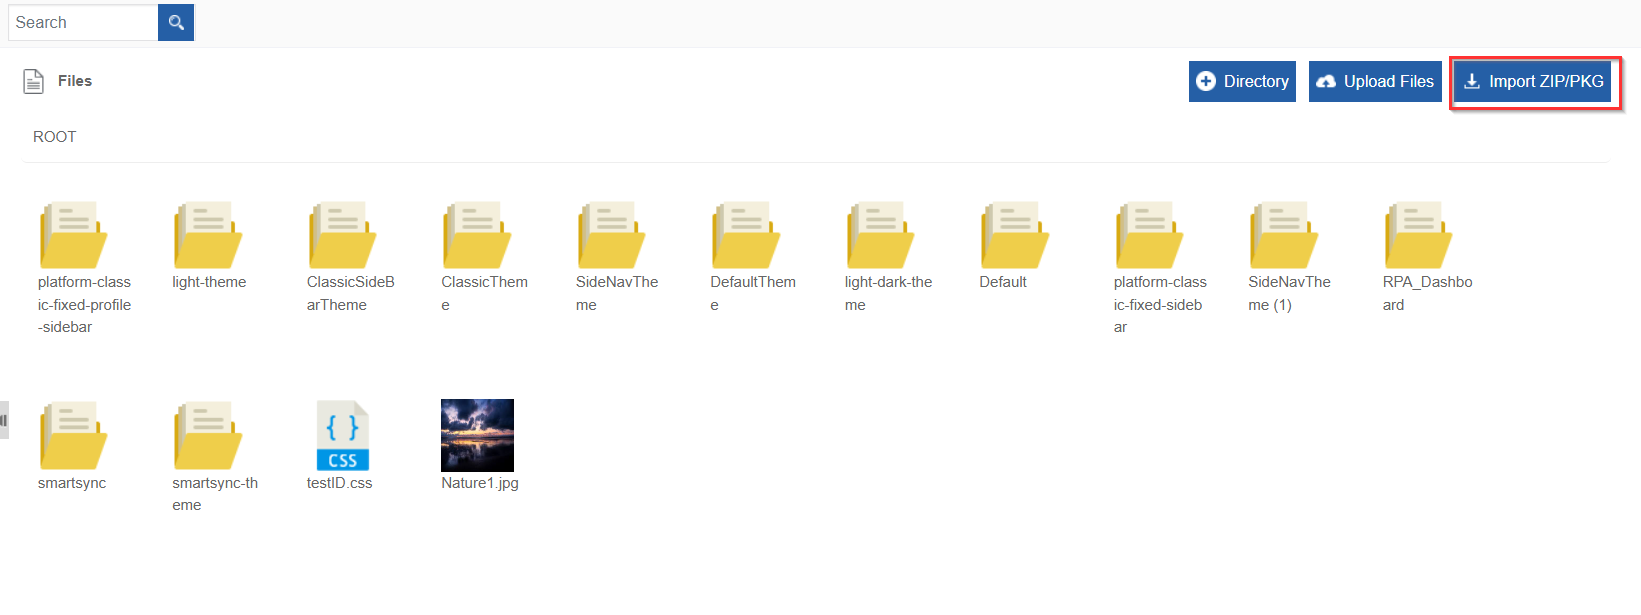
Go to Main Menu > Management > Resource Library > Files.
-
On the upper right click Import.
-
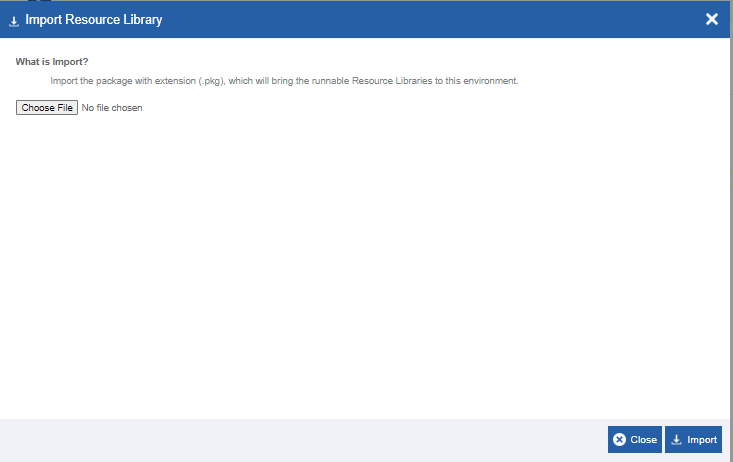
Click Choose File and select the file (in .rar format) that you want to import. The selected folder details appear.
-
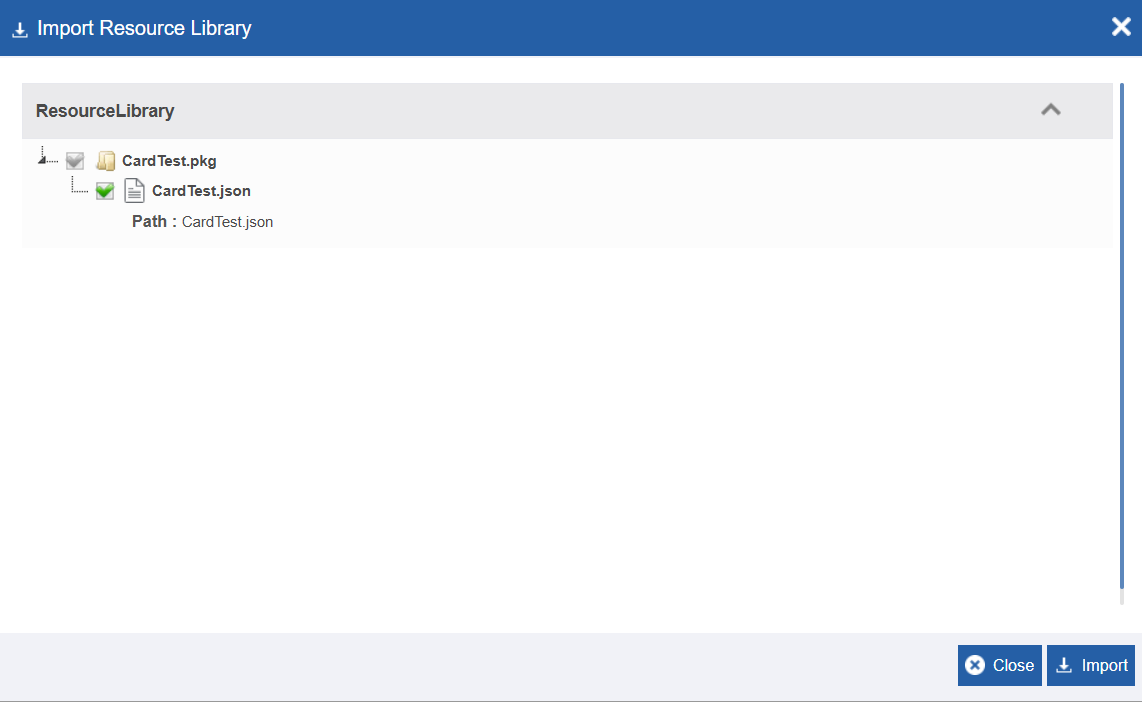
Select Directory/Files: Check the required directory or files. Only those items are imported. When you select a directory, all the sub-directories and files within that directory are selected for import.
-
Click Import. A Success message appears on successful import of the file.
- Click Close. The file is imported to the platform.
Deleting a Directory / File
Delete a directory or a file. When you delete a directory, all the files and sub-directories within that directory get deleted.
Warning
Make sure the directory or file that you are deleting is not been utilized in any of your platform flows, views or entities.
- Go to Main Menu > Management > Resource Library > Files. A list of all files within the Files section appears.
- Double-click and navigate to the folder that you want to delete.
-
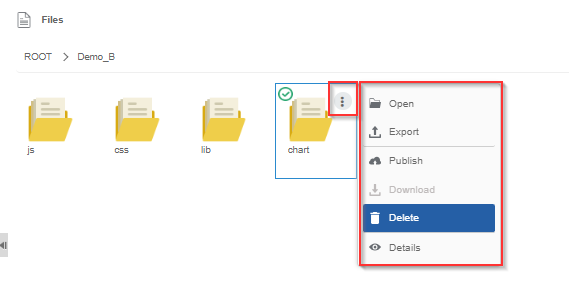
Hover over the directory name and click More Actions.
-
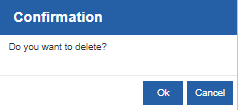
Click Delete. Delete Confirmation appears.
-
Click Ok. The selected folder gets deleted.
Published Files
The Files and directories that are published will be listed in this section. From the Files section, publish the directories and files. The directory structure of the published files will be the same as in the Files section.
Viewing Published Files and Directories
- Go to Main Menu > Management > Resource Library > Published Files. A list of all files and directories that are published appears.
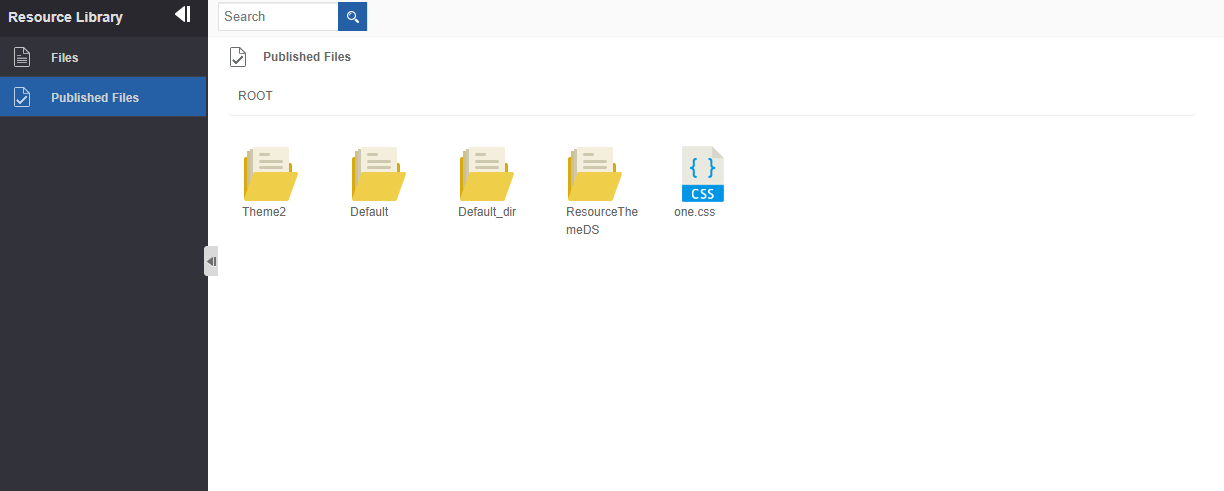
The directory structure will be maintained the same as in the Files section for the published files.
Viewing Details about Published Directory / File
- Go to Main Menu > Management > Resource Library > Files. A list of all files within the Files section appears.
- Double-click and navigate to the folder that you want to view details.
-
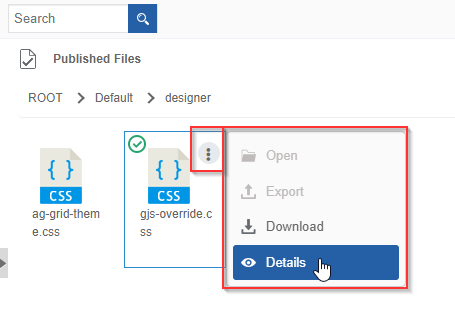
Hover over the directory name and click More Actions.
-
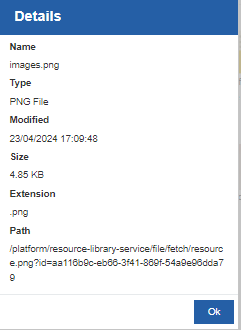
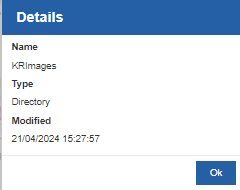
Click Details. The details of the Directory / File appears.
-
Name: Name of the file or the directory.
- Type: Type of the file or directory.
- Modified: File/directory modified date and time.
- Extension: Extension of the file.
- Size: Size of the selected file.
-
Path: Path of the file.
-
Click Ok to close the pop-up.
Downloading Published File
Follow the below steps for downloading the file from the resource library. Download only the files, not the folders.
- Go to Main Menu > Management > Resource Library > Files. A list of all files within the Files section appears.
- Double-click and navigate to the folder that you want to delete.
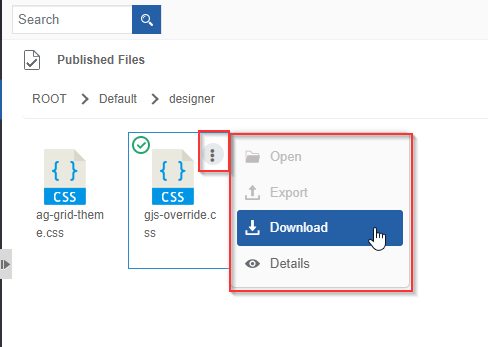
-
Hover over the directory name and click More Actions.
-
Click Download. The file gets downloaded to your local system.
Exporting a Published Directory
You can export a directory or folder, however, you cannot export a file.
- Go to Main Menu > Management > Resource Library > Files. List of all files within the Files section appears.
- Double click and navigate to the folder that you want to export.
-
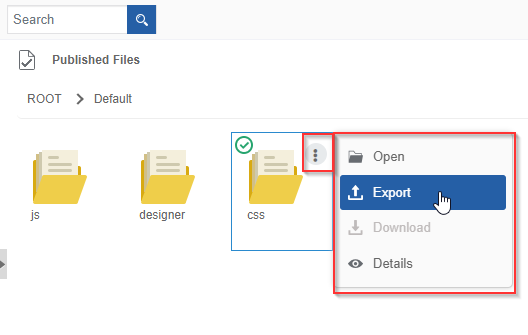
Hover over the directory name and click More Actions.
-
Click Export. The directory gets exported to your local system.