Managing Data Flows
Users with access permission as organization administrator or process admin can create an application and then view / work on the data flow module.
Viewing Data Flow List
-
Go to Main Menu > App Studio > Applications. The list of applications on the Platform appears.
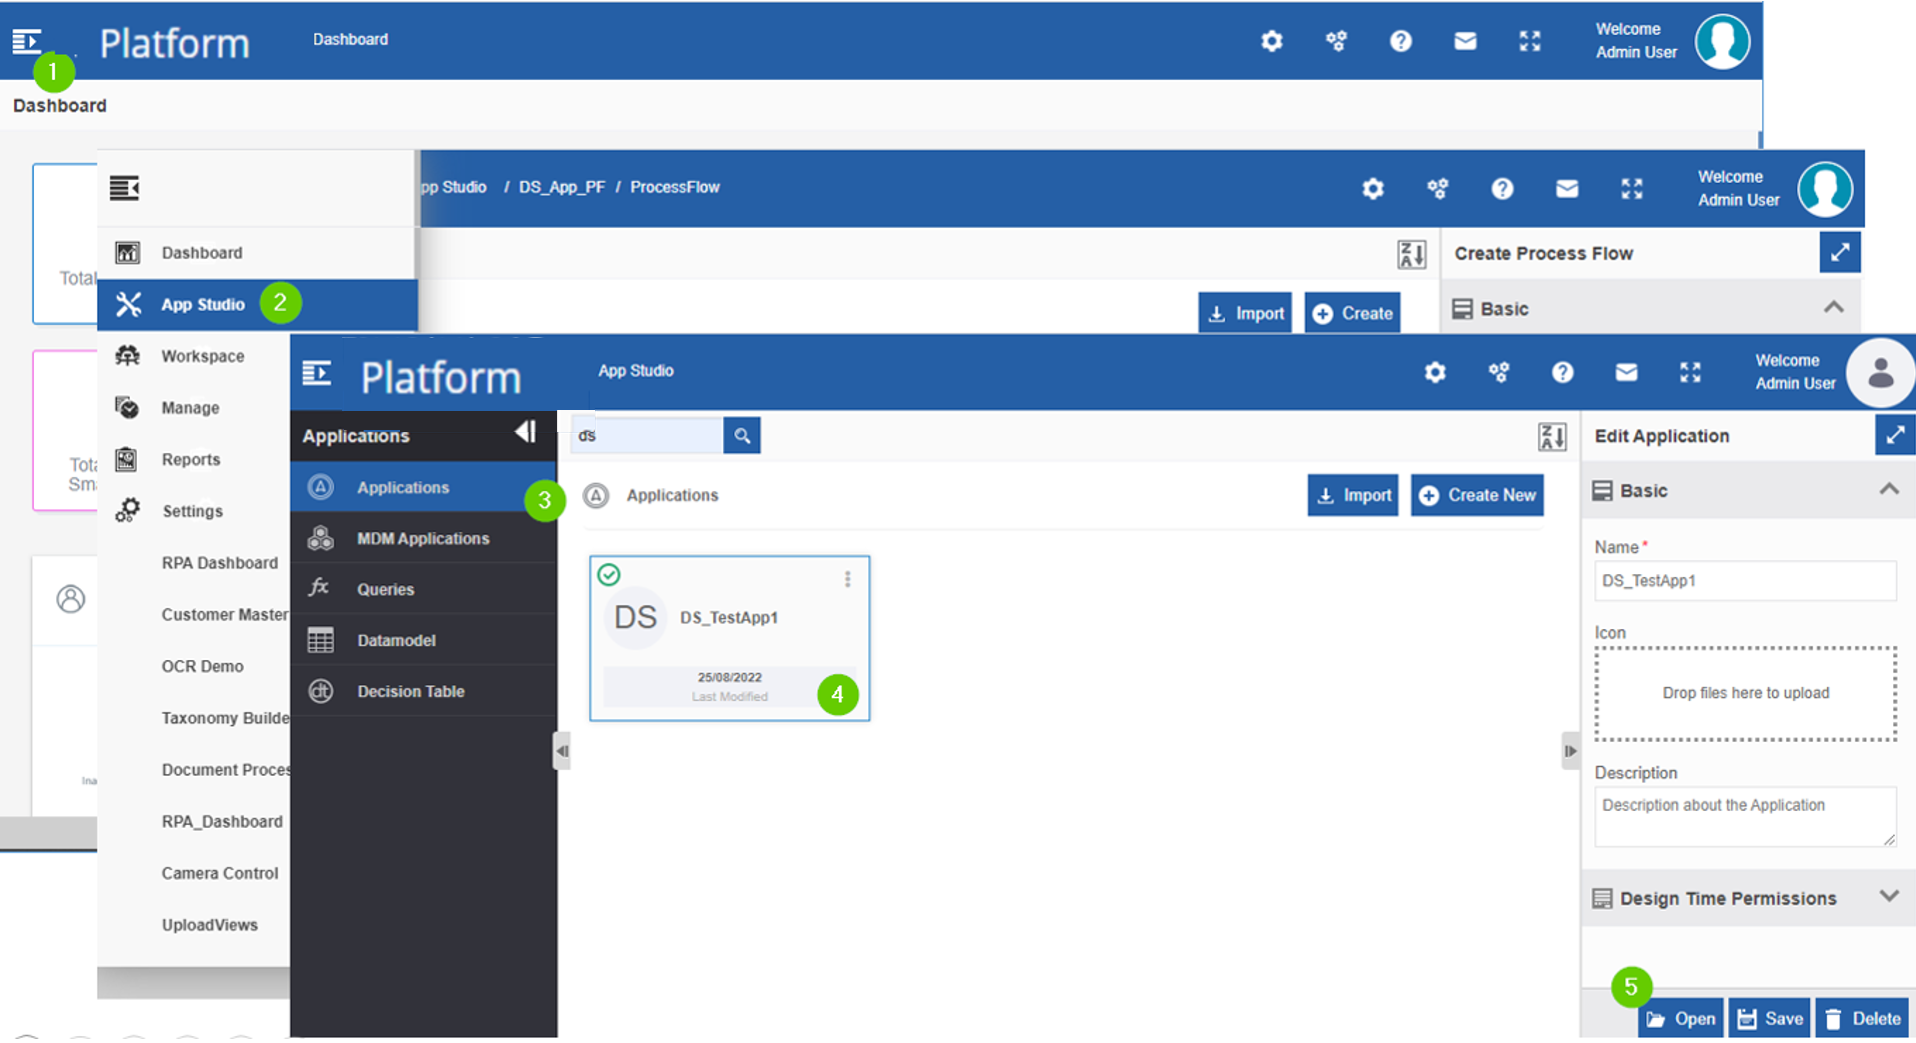
-
Click and expand the left side menu and click Dataflow. The list of all data flows within the selected application appears.
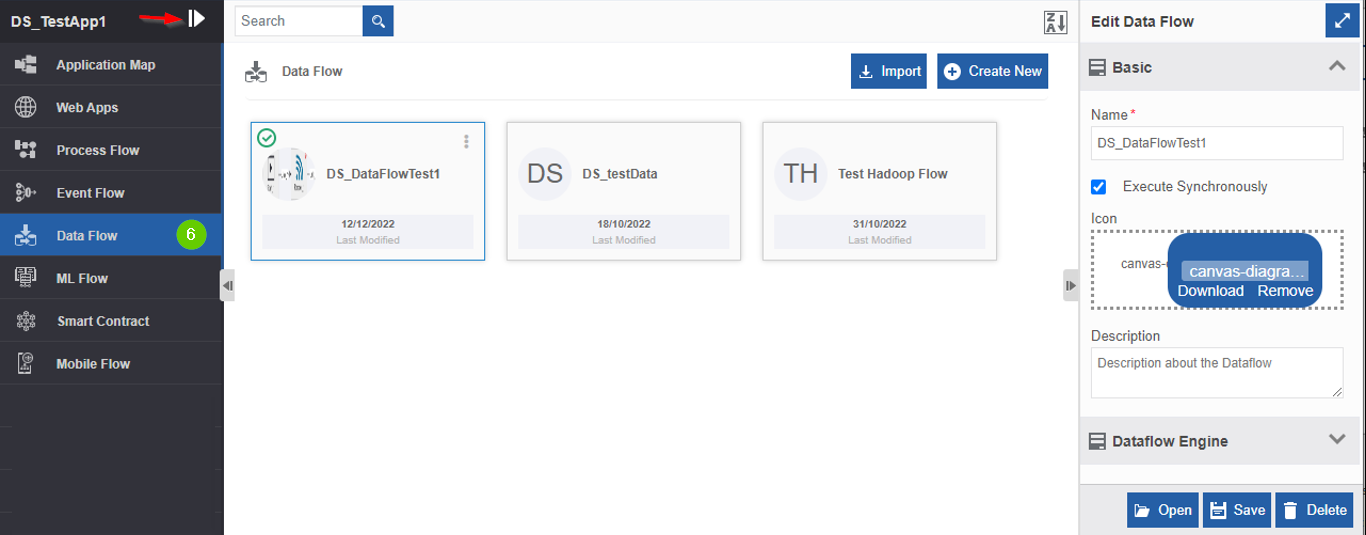
The Data Flow List page
Searching for a Data Flow
- Go to Main Menu > App Studio > Applications > open [Application_Name] > Data Flow. The dataflow list page appears.
- Type the name (or first few letters) of the data flow in the search box on the upper-left of the page. The filtered results appear.
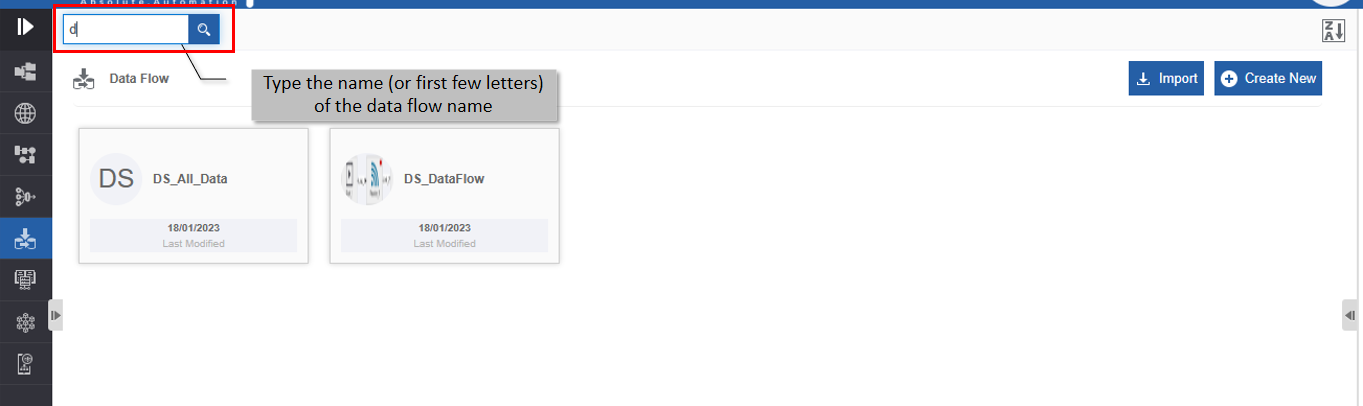
Searching for the data flows
Sorting Data Flow List
On the Data flow page, the data flow cards appear in alphabetically ascending order by default.
-
Go to Main Menu > App Studio > Applications > open [Application_Name] > Data Flow. The dataflow list page appears.
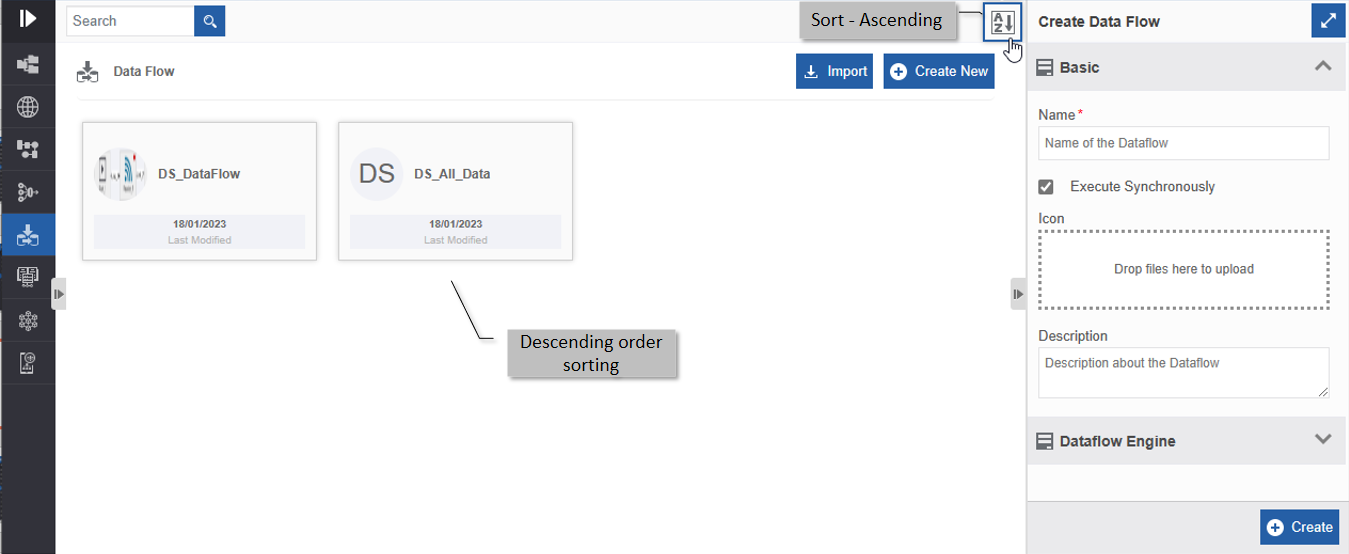
The data flows appear in ascending order by default and the sort icon is descending (Z🡪A).
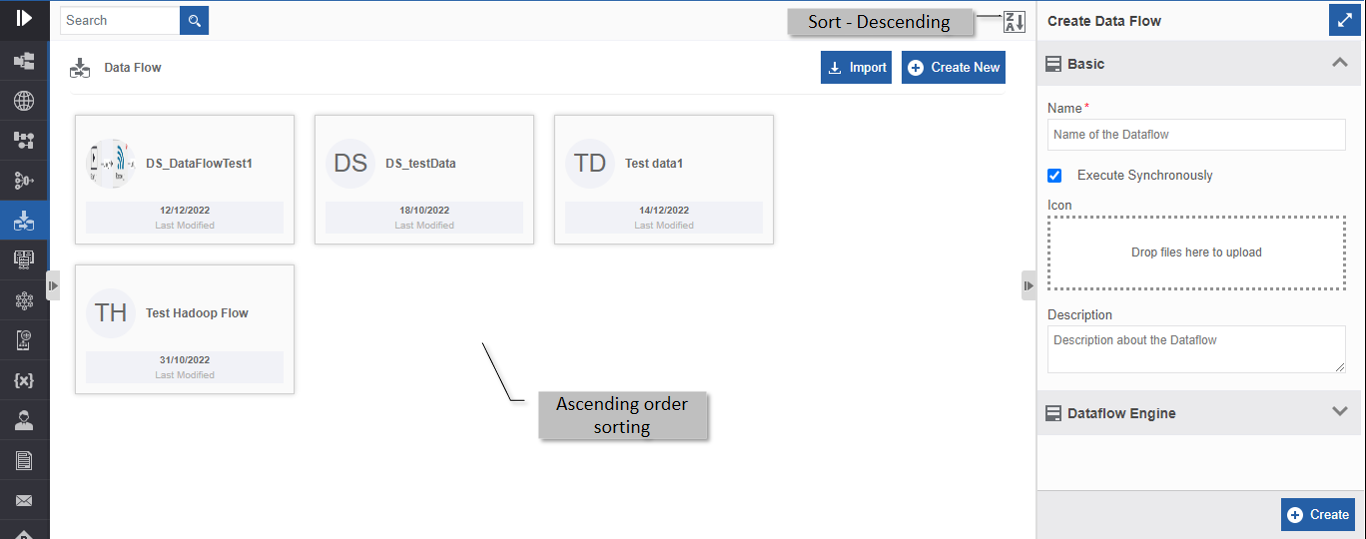
-
Click the Descending order sort icon (Z🡪A). The data flows get sorted in descending order (A🡪Z) of the flow names. The Sort icon is now changed to ascending order (A🡪Z).
-
Click the Ascending order sort icon (A🡪Z) for sorting in the ascending order (A🡪Z). The sort icon changes to descending order (Z🡪A).
Understanding Data Flow Interface
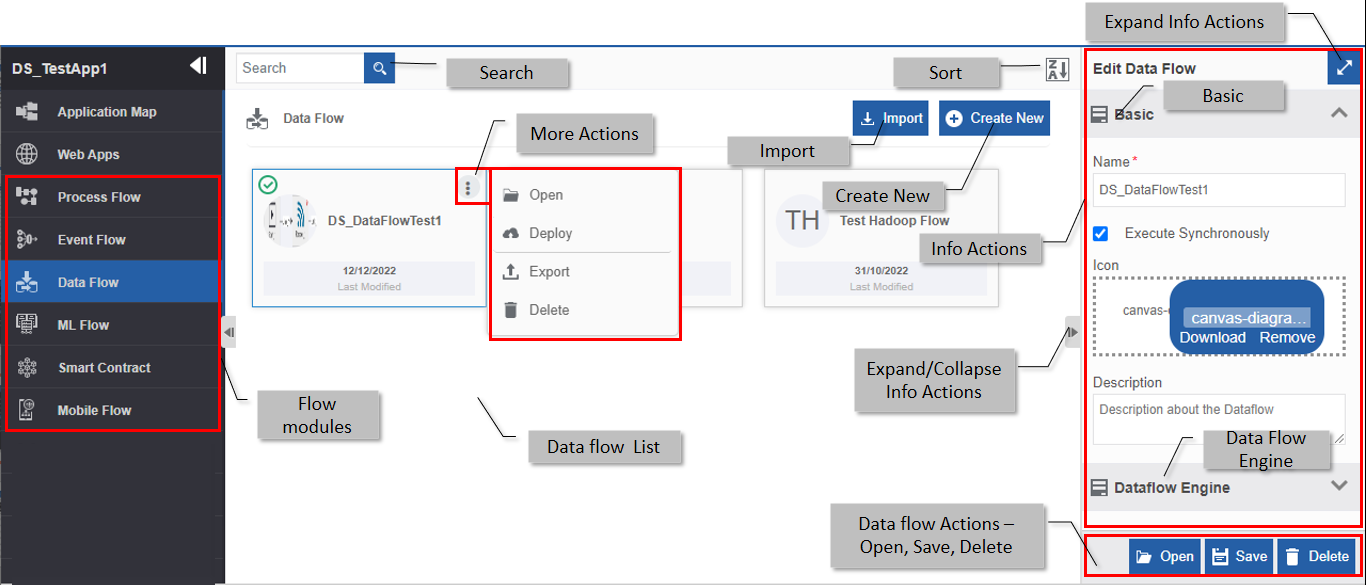
| Feature | Description |
|---|---|
| Search | To search for a flow in the data flow list. |
| Data flow List | The list of all data flows in the selected application. |
| Sort | To alphabetically sort the data flow cards on the data flow list page. |
| Actions | To perform actions on the data flow. - Open : Click Open to view the flow details. - Save : Click Save to save the details after editing or modifying the data flow configuration. - Deploy : Click Deploy to validate and deploy the data flow. - Delete : Click Delete to delete the data flow. |
| More Actions (three dots in the data flow card) | Click the three dots on the data flow card to view and execute the Open, Save Delete actions. |
| Export (in More Actions) | To export the data flow (in a .pkg file) from the Platform to the local system. |
| Import | To import the data flow (.pkg file) from the local system into the selected application of the Platform. |
| Create | To create a new data flow. |
| Info Actions | Attributes/properties and configurations of the data flow. |
| Expand Info Actions | To expand the Info Actions in a separate pop-up. |
| Expand/Collapse | To hide and view the Info actions panel. |
Viewing and Editing Data Flow Details
- Go to Main Menu > App Studio > Applications > open [Application_Name] > Data Flow. The dataflow list page appears.
-
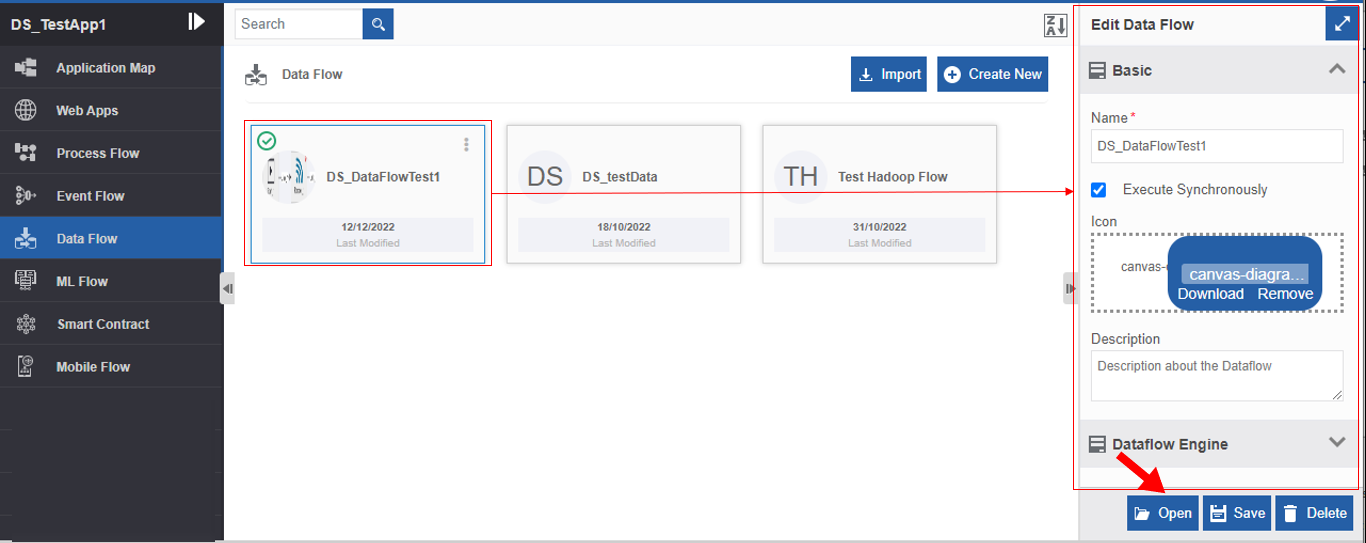
On the Data Flow page, click a data flow card. The Info Actions area on the right side of the screen displays Edit Data Flow with Basic and Dataflow Engine properties for the selected data flow. (If you do not see the right-side panel, click the expand/collapse arrow (
 ) on the right side of the page.)
-
For viewing the flow, click Open (or double-click the name card). The data flow design canvas displays with the Edit Data flow panel on the right side.
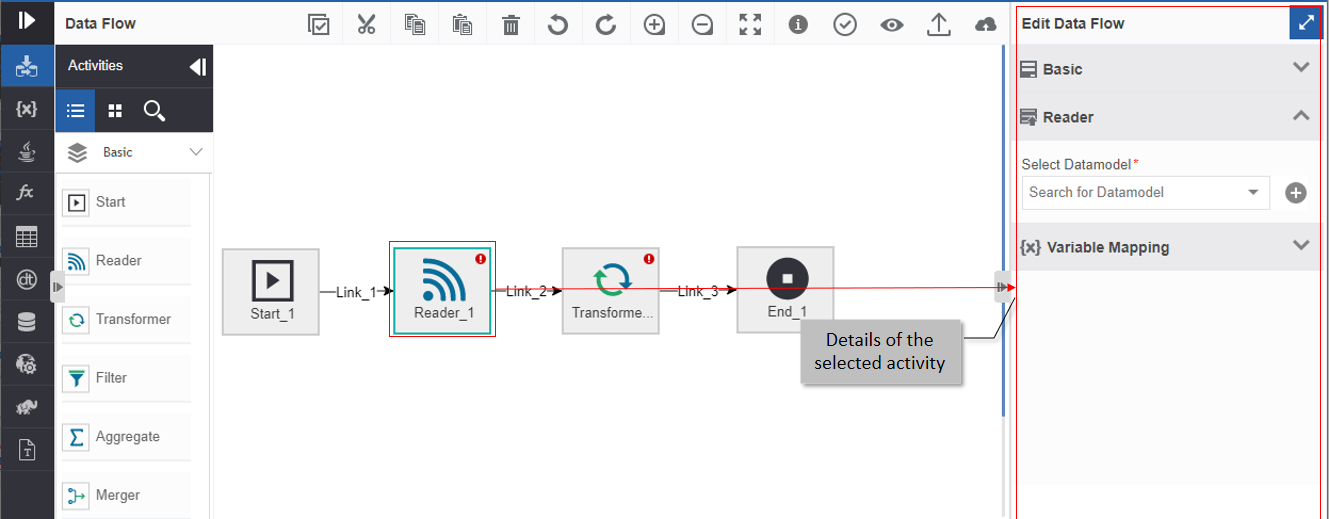
- Click on any activity. The Edit Data flow panel displays the selected activity details. Modify the activity details.
-
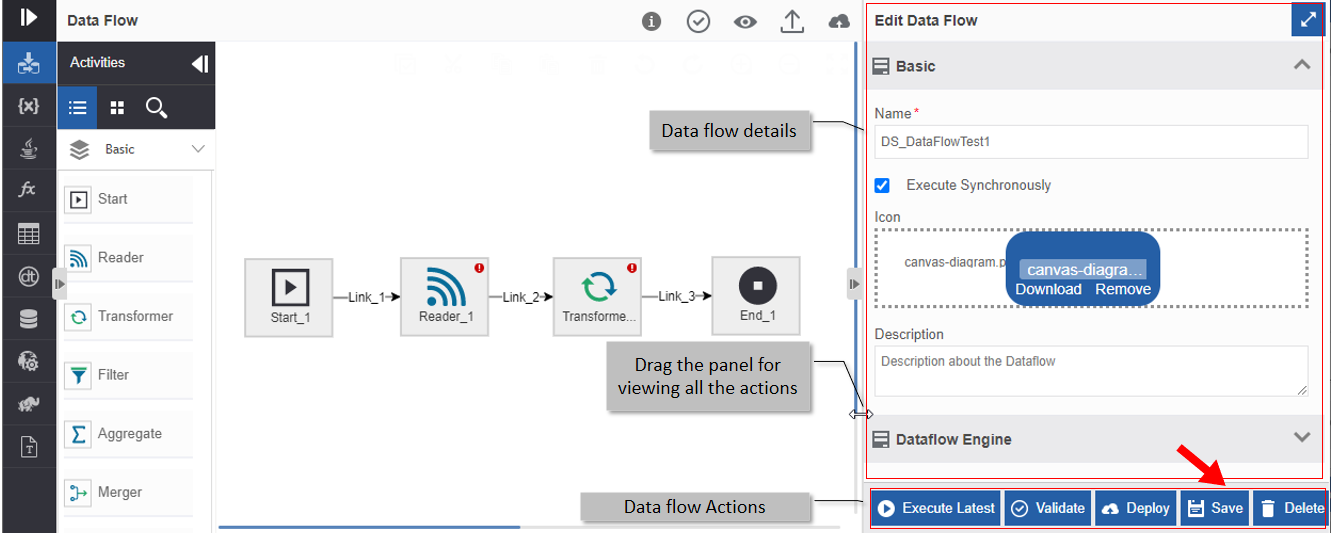
Click on the canvas. The Edit Data flow Panel displays data flow details. Modify the data flow details as required. All the details in the design canvas and the activity details are auto-saved.
-
Click Save on the lower-right of the page for saving the modified flow details.
When you select an activity, the Save button is not displayed. Hence, make sure you click the design canvas to view the save button and then update the data flow details and save the flow. Save is applicable only for the flow details.
Note
Editing/modifying the flow details includes adding a new activity, deleting an existing activity, redefining the links, defining new links, adding/modifying activity configurations and mapping, etc.
Previewing the Data Output of an Activity
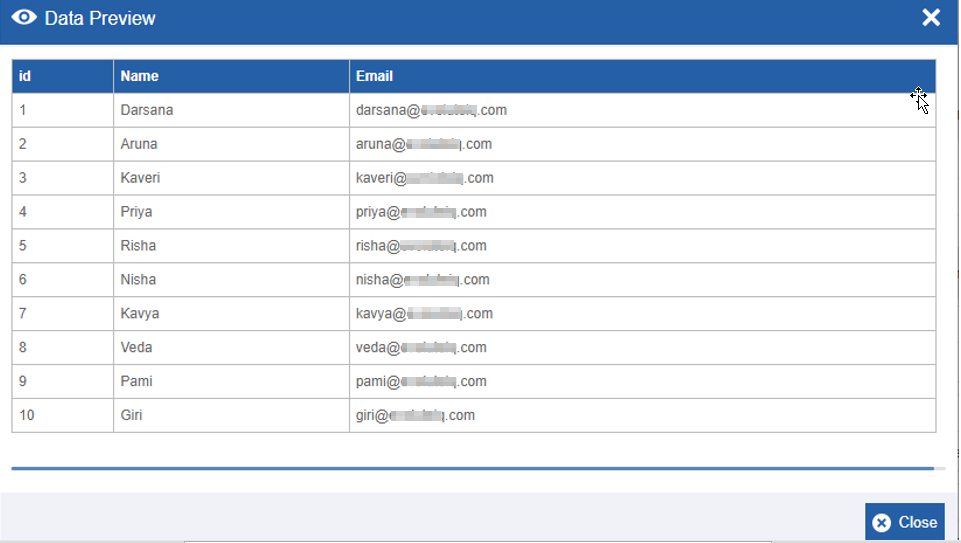
The details of that output data model in an activity as per what you have defined or filtered, or transformed appears in the preview. The preview will display only the first 20 records of the result set. That is, by using the preview feature of the Reader activity, you can choose to preview the details of the output data of Reader.
Info
The preview feature applies to the activities, Reader, Transformer, Filter, Merger, Aggregate, Custom Query, Rule Executor, Update Attribute, Decision Table, ML Predictor, and Webservice.
- Go to Main Menu > App Studio > Applications > open [Application_Name] > Data Flow. The dataflow list page appears.
- Click the data flow name card and click Open (or double-click the name card). The Data flow page appears with the flow details.
-
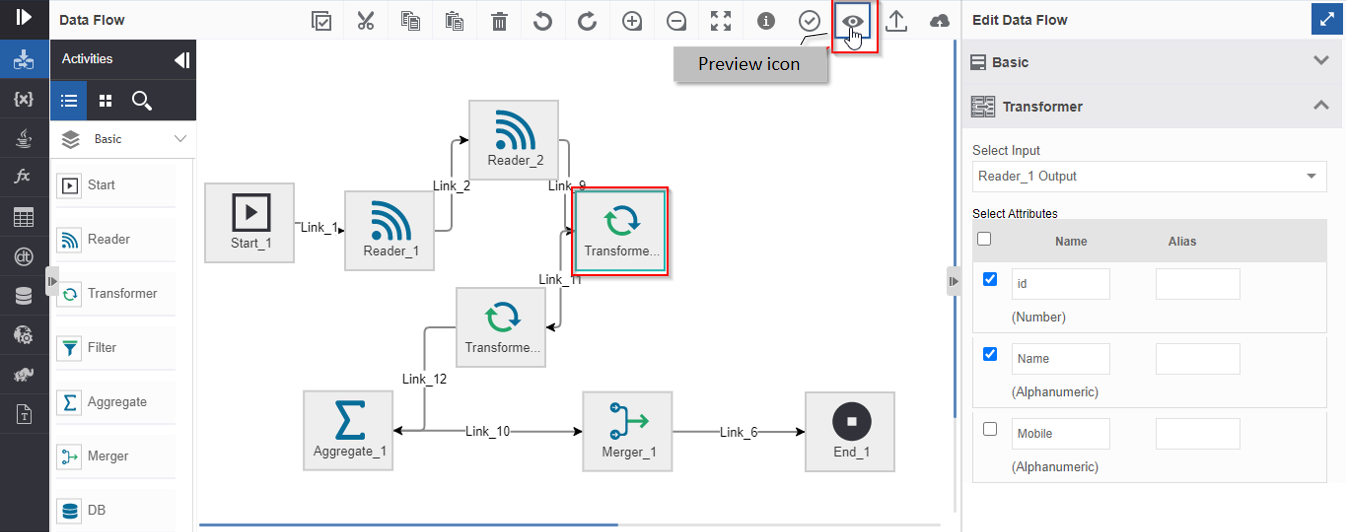
Design the required data flow and map the required data models to the activities as per your requirement.
-
Click any activity and then on the toolbar click Preview icon (eye icon). The data preview of the result of that activity appears on the pop-up.
-
Click Close to close the data preview.
Validating Data Flow
When a data flow is created and configured, you should validate the data flow for any errors. The data flow is automatically validated when it is deployed.
The validation is a success when all the mandatory details are configured and/or mapped.
- Go to Main Menu > App Studio > Applications > open [Application_Name] > Data Flow. The dataflow list page appears.
- Click the data flow name card and click Open (or double-click the name card). The Data flow page appears with the flow details.
- Click Validate at the bottom right of the page. (Make sure you click on the design canvas so that action buttons including the validate button appear.)
-
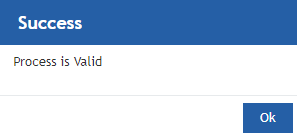
If the validation is a success, a success message appears. Go to step 7.
Else if the validation fails, go to step 5.
-
If the validation is a failure, an error message appears.
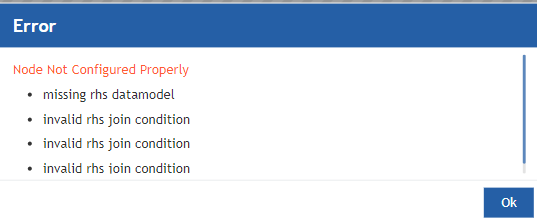
Info
When you click Validate, the Platform validates activities and transitions in the flow one by one. When a configuration error is found, it displays the error.
-
Click OK and correct the errors as per the instruction in the Error message box. Go to Step 3 and repeat the validation.
- Click OK in the Success message box and validation is completed.
Deploying Data Flow
When you deploy a data flow, a version of the data flow is created. The version number is automatically incremented in the background. Always the latest deployed version is picked for execution.
- Go to Main Menu > App Studio > Applications > open [Application_Name] > Data Flow. The dataflow list page appears.
-
Click the data flow name card and click Open (or double-click the name card).
-
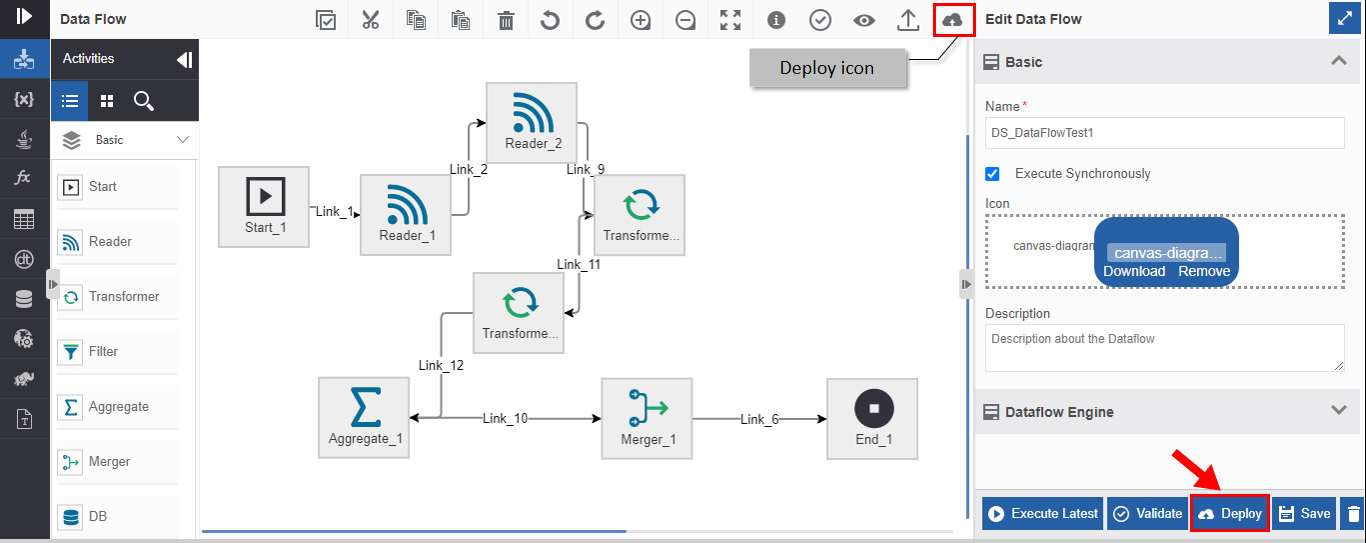
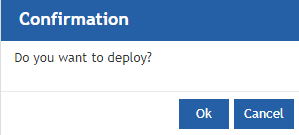
Click Deploy (you can click the Deploy on the bottom right or the deploy icon on the toolbar). Deploy confirmation message appears.
-
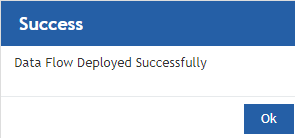
Click Ok to deploy the flow (or click Cancel to cancel the action). If the Validation is a success, the flow gets deployed for execution and a success message appears.
-
If deployment is a success, go to step 6. Else if there is a validation error, rectify validation errors and deploy the data flow again (step 1).
Refer to Validating Data flows for validating the flow before deployment. -
Click OK.
Executing the Latest Data Flow
To execute a test data flow, you need to deploy the flow. In a data flow, the Execute Latest feature is used to run latest the designed flow.
Dataflow engine should be up - Background activity
The data flow will not execute if the dataflow engine is not up. Error message appears in the UI if the data flow engine is not up.
In real-time, a dataflow can be executed by a process flow or an event flow or a data flow or through an API.
- Go to Main Menu > App Studio > Applications > open [Application_Name] > Data Flow. The dataflow list page appears.
- Click the data flow name card and click Open (or double-click the name card).
-
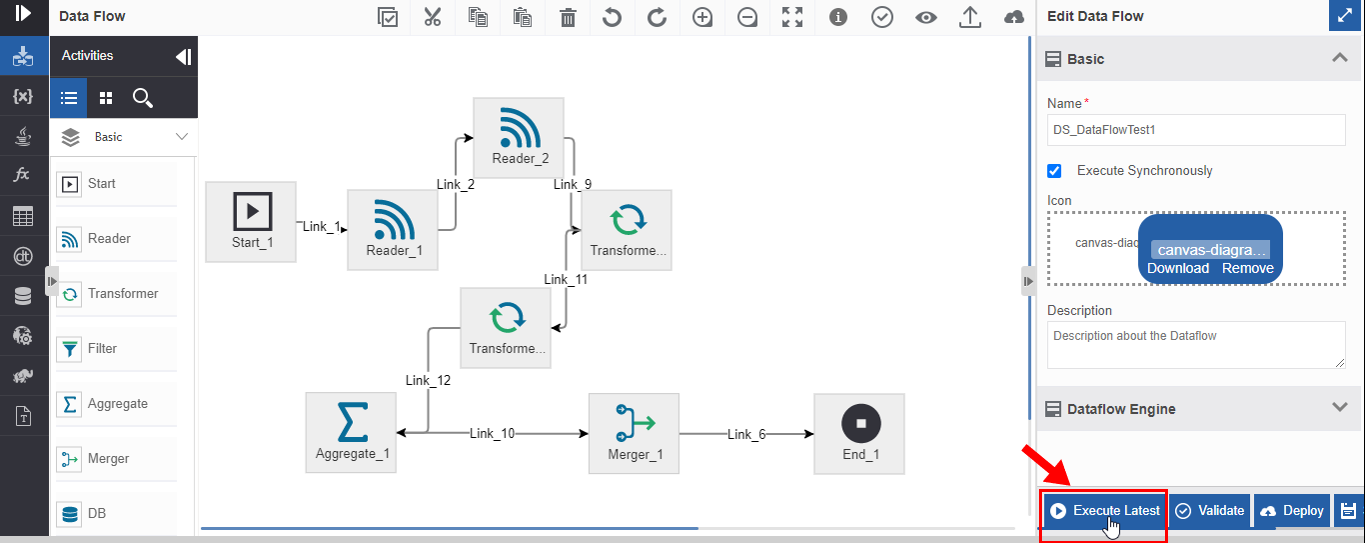
Validate and Deploy the data flow. On successful deployment, a success message appears. Now a new version of the data flow gets created.
-
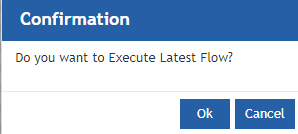
On the bottom right of the page, click Execute Latest. Confirmation for Executing the latest data flow appears.
-
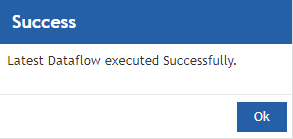
Click Ok. If there are no errors in the execution, success message appears.
-
Click Ok.
Viewing deployed dagtaflow details
The deployed data flows with version details are listed in Manage > Application Management > Data Flows from where you can execute your data flows.
Exporting Data Flow
A data flow can be exported from App Studio as a package file (with .pkg extension) to the local system. When you export a data flow all the entities of the flow get exported along with the flow.
- Go to Main Menu > App Studio > Applications > open [Application_Name] > Data Flow. Data flow list page appears.
-
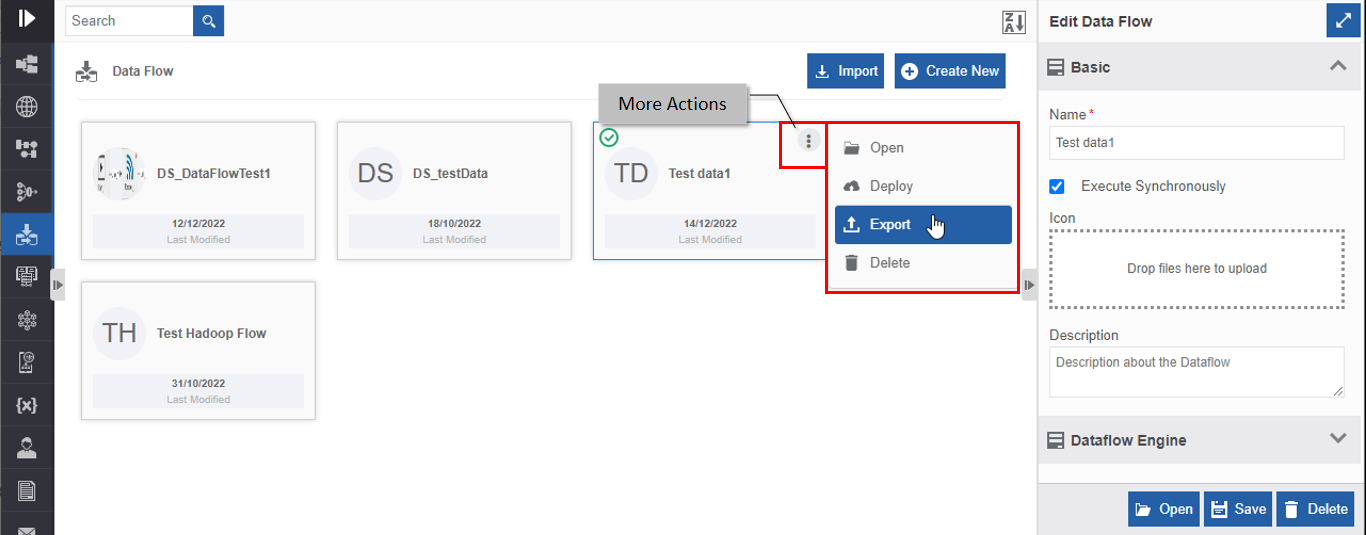
Hover over the data flow name card. More Actions (three dots) appear.
-
Click More Actions and then click Export. The data flow exports (downloads) to the local system. The exported file format is .pkg (package file format).
Alternatively, you can open the data flow and click the export icon in the data flow designer toolbar for exporting the data flow.
Importing Data Flow
A package file with the extension .pkg can be imported within an application. After importing the data flow, the flow is listed along with existing data flows.
-
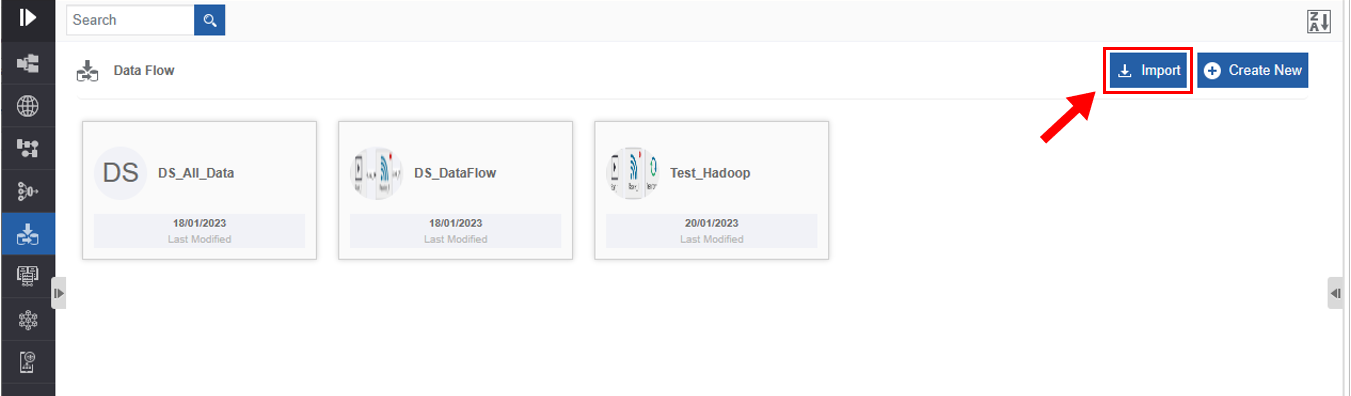
Go to Main Menu > App Studio > Applications > open [Application_Name] > Data Flow. The dataflow list page appears.
-
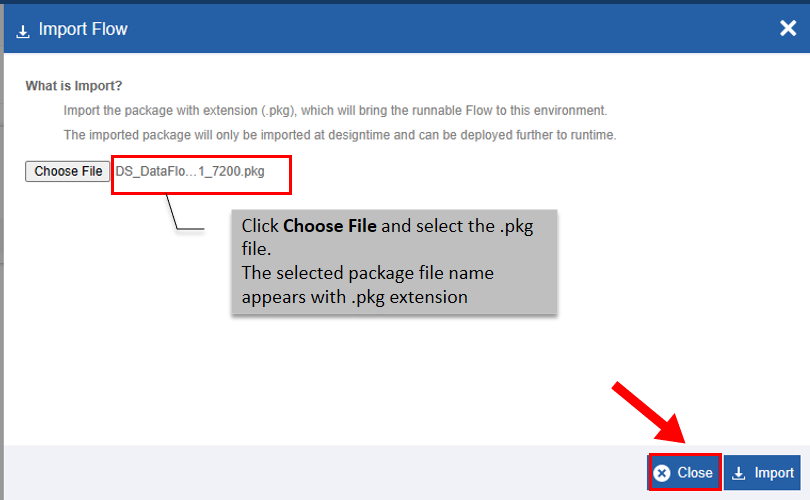
On the top-right, click Import. The Import Flow pop-up displays.
-
Click Choose File and select a package file (with extension .pkg)
-
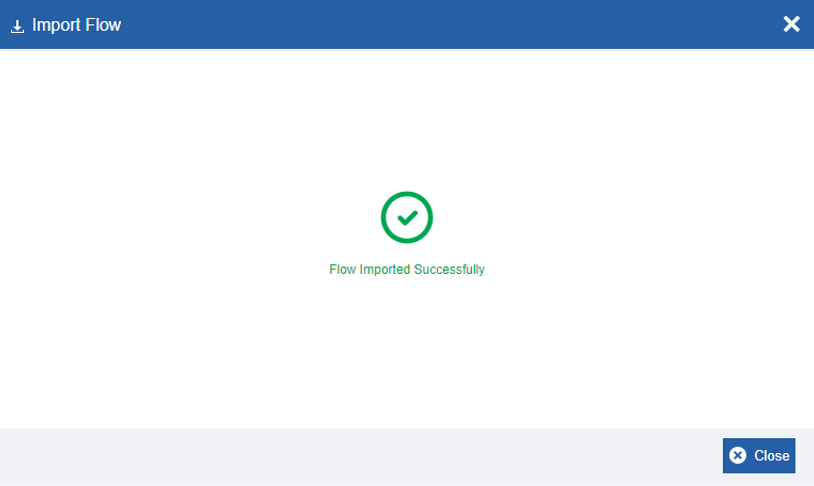
Click Import. A success message appears if the import is successful. Or
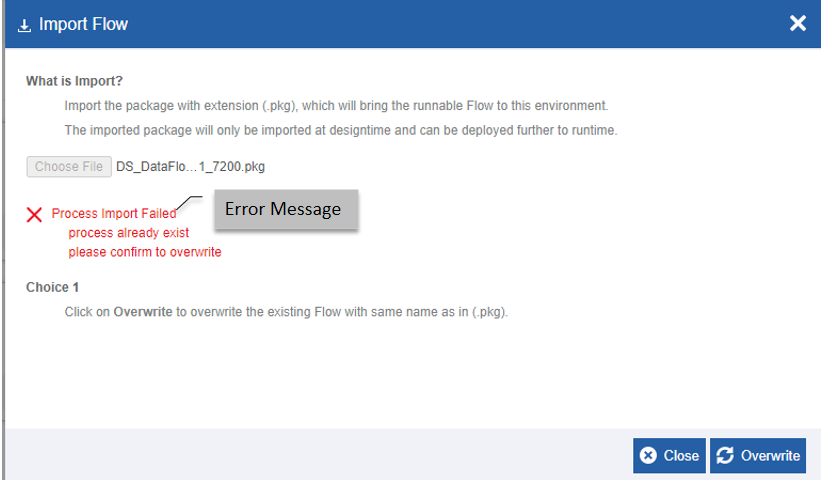
If the package file name selected is matching with any of the already existing data flows in the application, an error message appears as there is a data flow in the same name in the module.
-
Click Overwrite. The new package file overwrites the already existing data flow.
Deleting Data Flow
When a data flow is deleted, its design and mappings get deleted. You cannot get back a deleted data flow unless you have exported it. If you have exported the data flow before deleting it, you can import it back into an application in the Platform.
- Go to Main Menu > App Studio > Applications > open [Application_Name] > Data Flow. The dataflow list page appears.
-
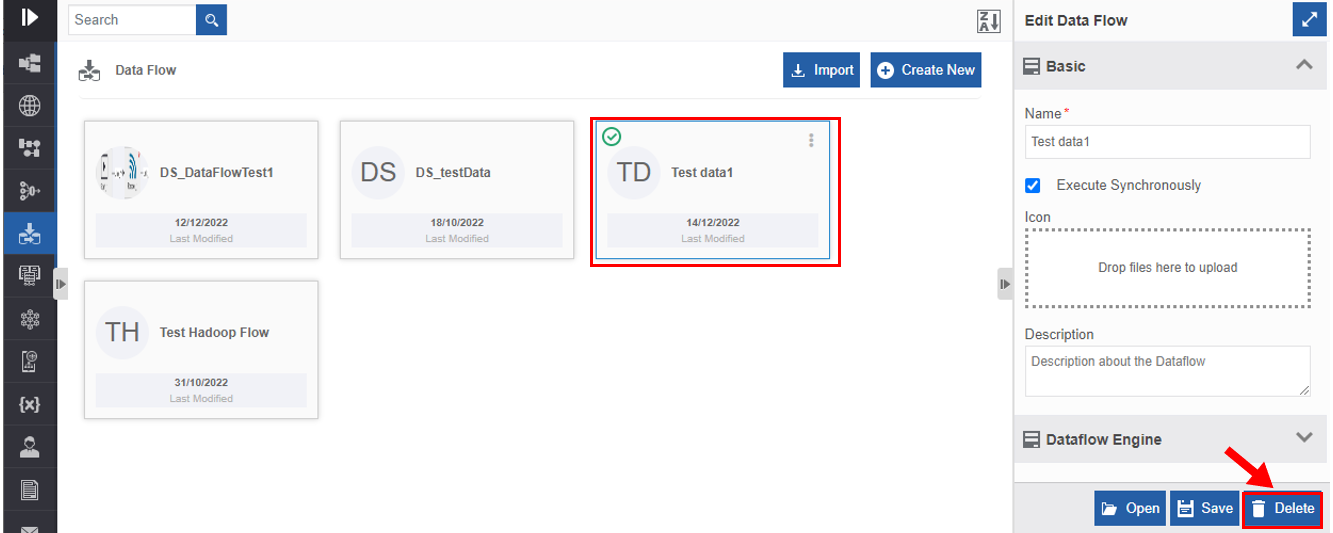
Click the data flow name card. The lower-right of the page displays the Delete button.
-
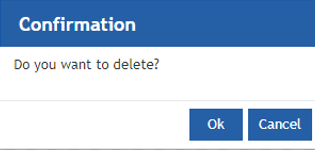
Click Delete. A confirmation pop-up appears.
-
Click OK for deleting the data flow. Or Click Cancel to cancel the action.
Alternatively, you can follow the below steps to delete the data flow:
- Go to Main Menu > App Studio > Applications > open [Application_Name] > Data Flow. The data flow list page appears.
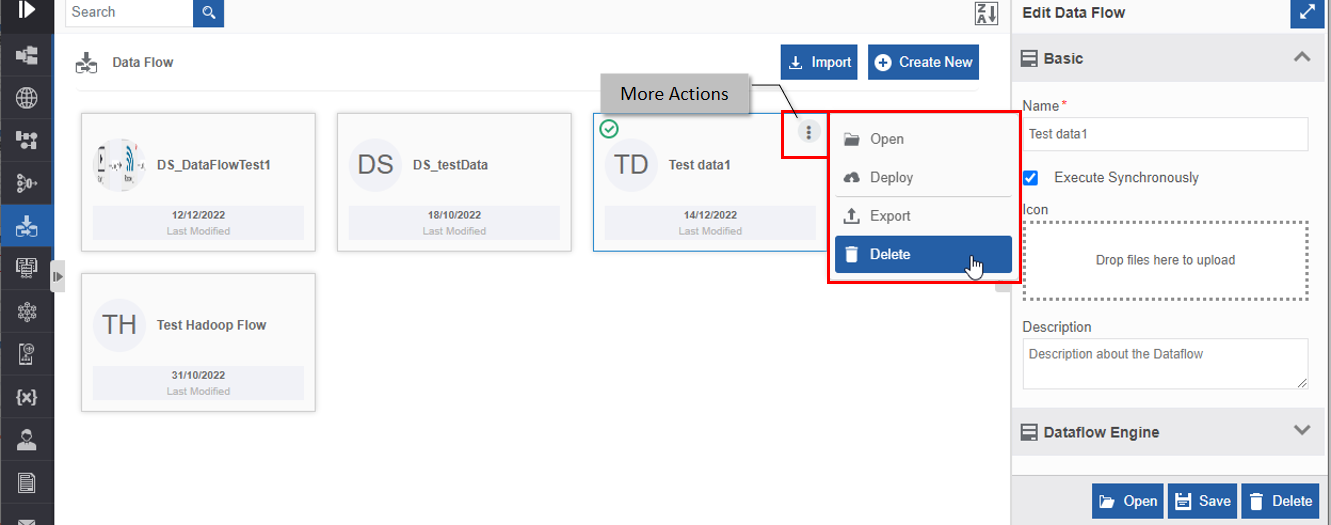
- Hover over the data flow name card. Three dots appear on the upper right of the data flow card.
-
Click the three dots. More Actions appear.
-
Click Delete. Confirmation pop-up displays.
- Click ok.
Deleting deployed data flows
Every time a data flow is deployed, a version of that data flow is created. If you delete a deployed data flow from the App Studio, it is deleted from the design perspective. That is, the flow design is deleted and you will not be able to edit or redeploy data flow for creating a new version.
However, the earlier deployed version of the same data flow will be available for execution in the Manage > Application Management > Data Flow Version History.
Deleting undeployed data flows
When an undeployed data flow is deleted, it is completely removed from the Platform and you will not be able to retrieve it unless you have exported it before deleting it.