Custom Activity
Custom activities are activities that can be designed as per your requirements. The activities created can be utilized in the process flows for an organization.
There are two types of custom activities:
- Custom activity of type custom activity,
- Custom activity of type subflow.
A custom activity of type custom activity is designed by uploading JSON files, Javascript, and JAR files that contain the configuration details required for that custom activity.
A custom activity of type subflow allows you to design a process flow as an activity.
Creating New Custom Activity Configuration
Follow the below steps for creating a new Custom Activity configuration.
-
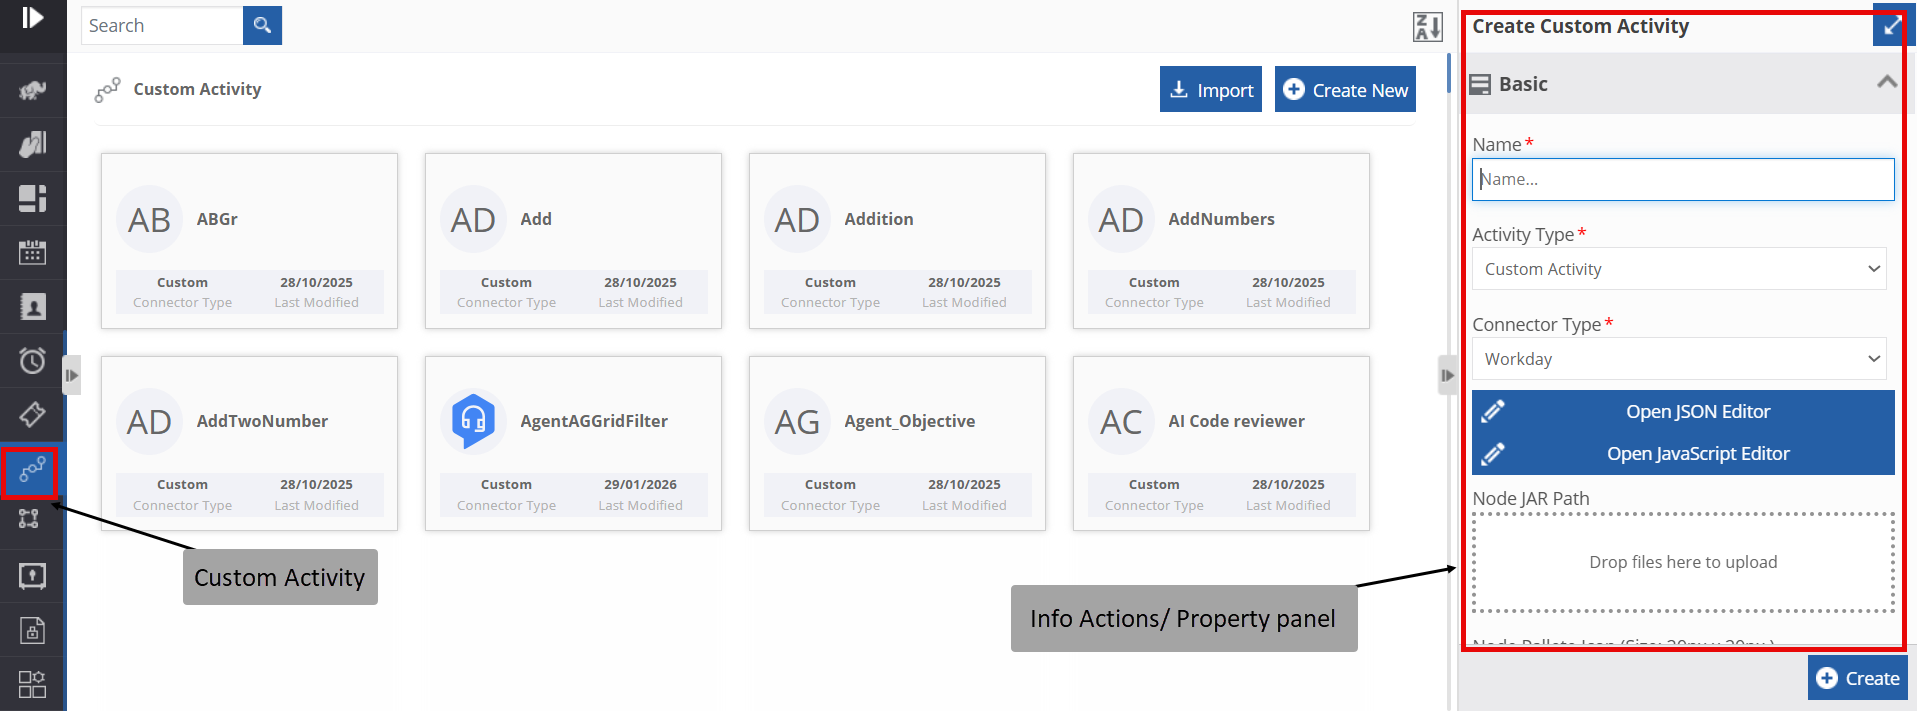
Go to Main Menu > Management > Configuration Management > Custom Activity.
-
Click +Create New.
-
Enter the configuration details in the Create Custom Activity panel as explained below.
Field Description Name* Enter the name of the custom activity.
Character limit: 50.
Data type: Alphanumeric and underscore.Activity Type* Select the activity type. 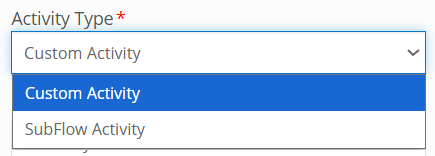
Custom Activity : Creates a custom activity as per your configuration details.
Sub Flow Activity : Creates a process flow that can be used as an activity.
Refer to Creating Subflow for Custom Activity.Connector Type* Select the required connector type. 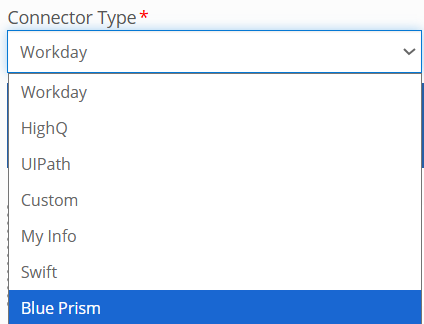
Refer to Custom Activity Connector Types for more details on connectors.Open JSON Editor Click to open the JSON editor. Enter or paste the JSON code.
The information regarding the content and structure of the activity is coded in the JSON file as per your requirement.
The node name that is given in the JSON editor will appear on the Custom Activity list as the custom activity name.
Refer to Sample JSON Code Details.Open JavaScript Editor Click to open the JavaScript editor. Enter or paste the JavaScript code.
The details of the logic and validations on the input content are coded in the JavaScript file as per your requirement.
Refer to Sample JavaScript Code Details.Node JAR Path Upload the JAR file.
The processing that you want to perform at the time of execution of the custom activity is coded in the JAR file.
Refer to Sample Node JAR Path Details.Node Pallete Icon* Upload node Pallete icon. This is used for listing purposes. This icon appears on the Process flow Activity panel.
Only SVG file format is supported. SVG is used to define vector-based graphics for the Web.
The maximum size of the image that can be uploaded is 20px X 20 pxNode Icon* Upload node icon. This image appears on the activity in the designer area when the corresponding activity is dragged to the process flow designer area.
Only SVG file format is supported. SVG is used to define vector-based graphics for the Web.
The maximum size of the image that can be uploaded is 40px X 40pxNode Accordion Icon Upload node accordion icon. This icon appears on the Info Actions panel for the activity configuration category accordion.
Only SVG format is supported. SVG is used to define vector-based graphics for the Web.
The maximum size of the image that can be uploaded is 20px X 20 px.Description Write a brief description of the custom activity.
Character limit: 1000 characters
Data type: Alphanumeric and symbols. -
Click Create on the bottom right of the page and the custom activity gets created with the details entered.
Creating Subflow for Custom Activity
To create a process flow as a custom activity, follow the below steps.
- Go to Main Menu > App Studio > Applications > open [Application_Name] > Process Flow module.
- Create and configure the process flow details and entities as per your needs.
- Deploy the process flow.
- Go to Main Menu > Management > Configuration Management > Custom Activity.
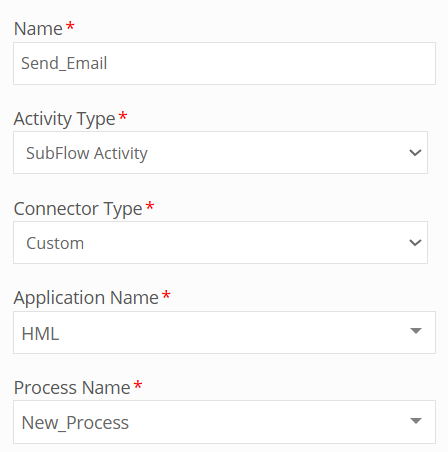
- Click Create New and create a Custom Activity by selecting Activity Type as Sub Flow Activity. Application Name drop-down appears. The application name appears only if one of the process flow within that application is deployed.
- Select the application name. The Process flow list appears. Only the deployed process flows are listed in the drop-down.
-
Select the process flow that you want to define as the custom activity.
-
For other configurations, go to step 3 details and configure accordingly, and finally click Create for creating the subflow type custom activity.
Custom Activity Connector Types
Connectors are used to achieve specific requirements in your activity. Some connectors are part of the Platform, however, you can include external connectors for utilizing the features of the same.
The connector types supported in the custom activities are explained below.
Blue Prism: Selecting Blue Prism allows you to create a custom activity that interacts with the Blue Prism application via APIs. When you create a Blue Prism custom activity, it will be listed in the Blue Prism category of the Activities.
Custom: Select the option “Custom” if you are defining a custom activity or if you are creating a subflow custom activity within the Platform.
HighQ: Selecting HighQ allows you to create a custom activity that interacts with the HighQ application via APIs. When you create a HighQ custom activity, it will be listed in the HighQ category of the Activities.
My Info: Selecting My Info allows you to create a custom activity that interacts with the My Info application via APIs. When you create a My Info custom activity, it will be listed in the My Info category of the Activities.
Swift: Selecting Swift allows you to create a custom activity that interacts with the Swift application via APIs. When you create a Swift custom activity, it will be listed in the Swift category of the Activities.
UIPath: Selecting UIPath allows you to create a custom activity that interacts with the UIPath application via APIs. When you create a UIPath custom activity, it will be listed in the UIPath category of the Activities.
Workday: Selecting Workday allows you to create a custom activity that interacts with the Workday application via APIs. When you create a Workday custom activity, it will be listed in the Workday category of the Activities.
Viewing and Editing Custom Activity
- Go to Main Menu > Management > Configuration Management > Custom Activity.
-
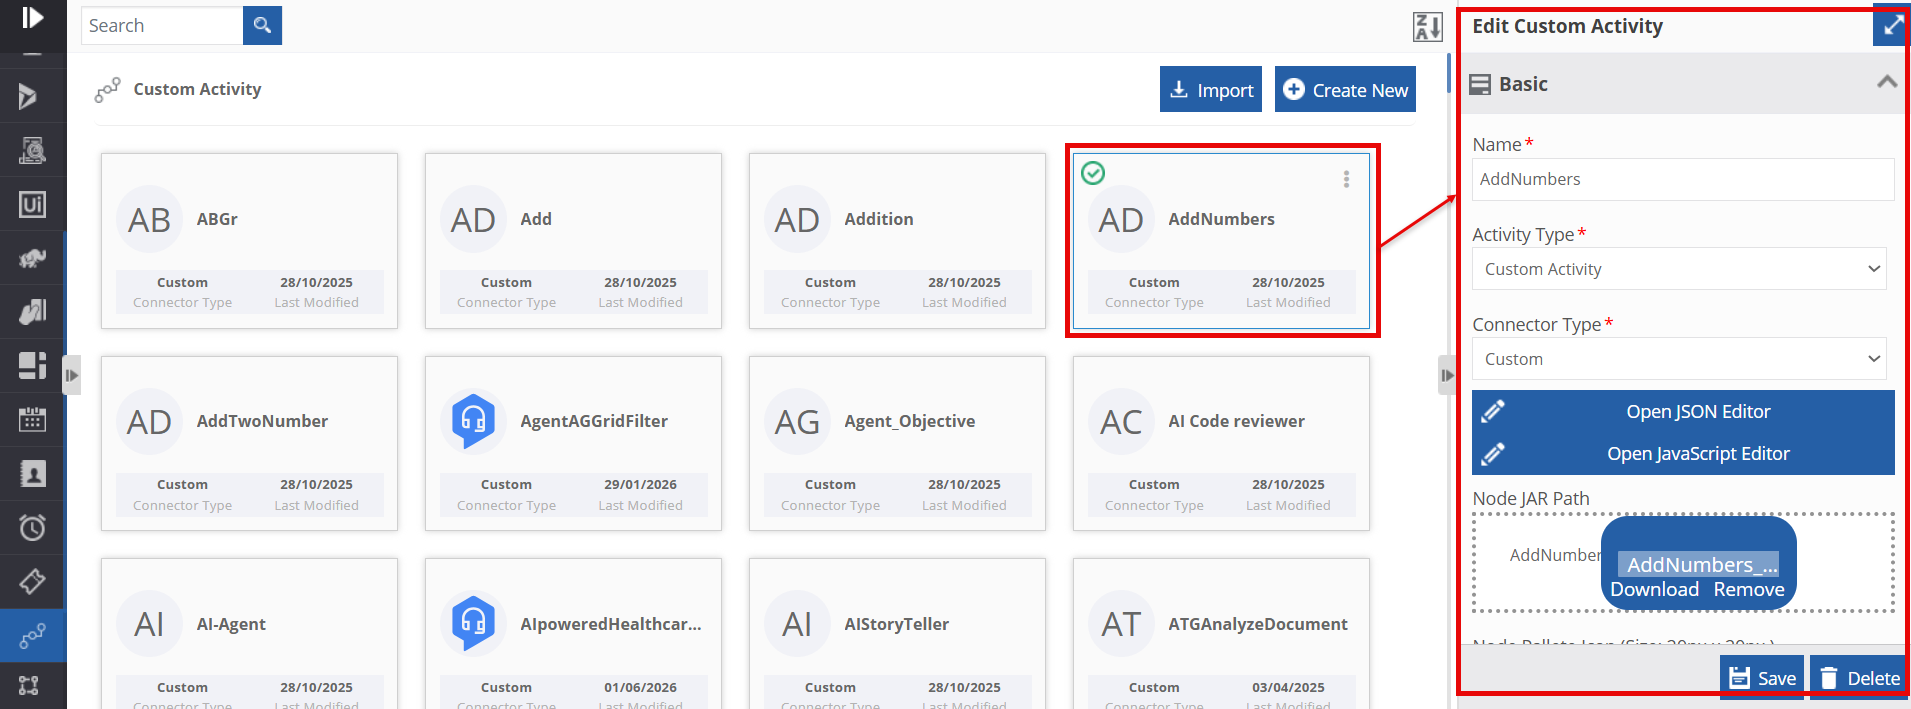
Click the Custom Activity card to view the details of the selected Custom Activity. The details of the Custom Activity appear in the Info Actions panel (Edit Custom Activity).
-
Edit the Custom Activity details as needed.
- Click Save.
Duplicating Custom Activity
Follow the below steps for duplicating an existing custom activity.
- Go to Main Menu > Management > Configuration Management > Custom Activity.
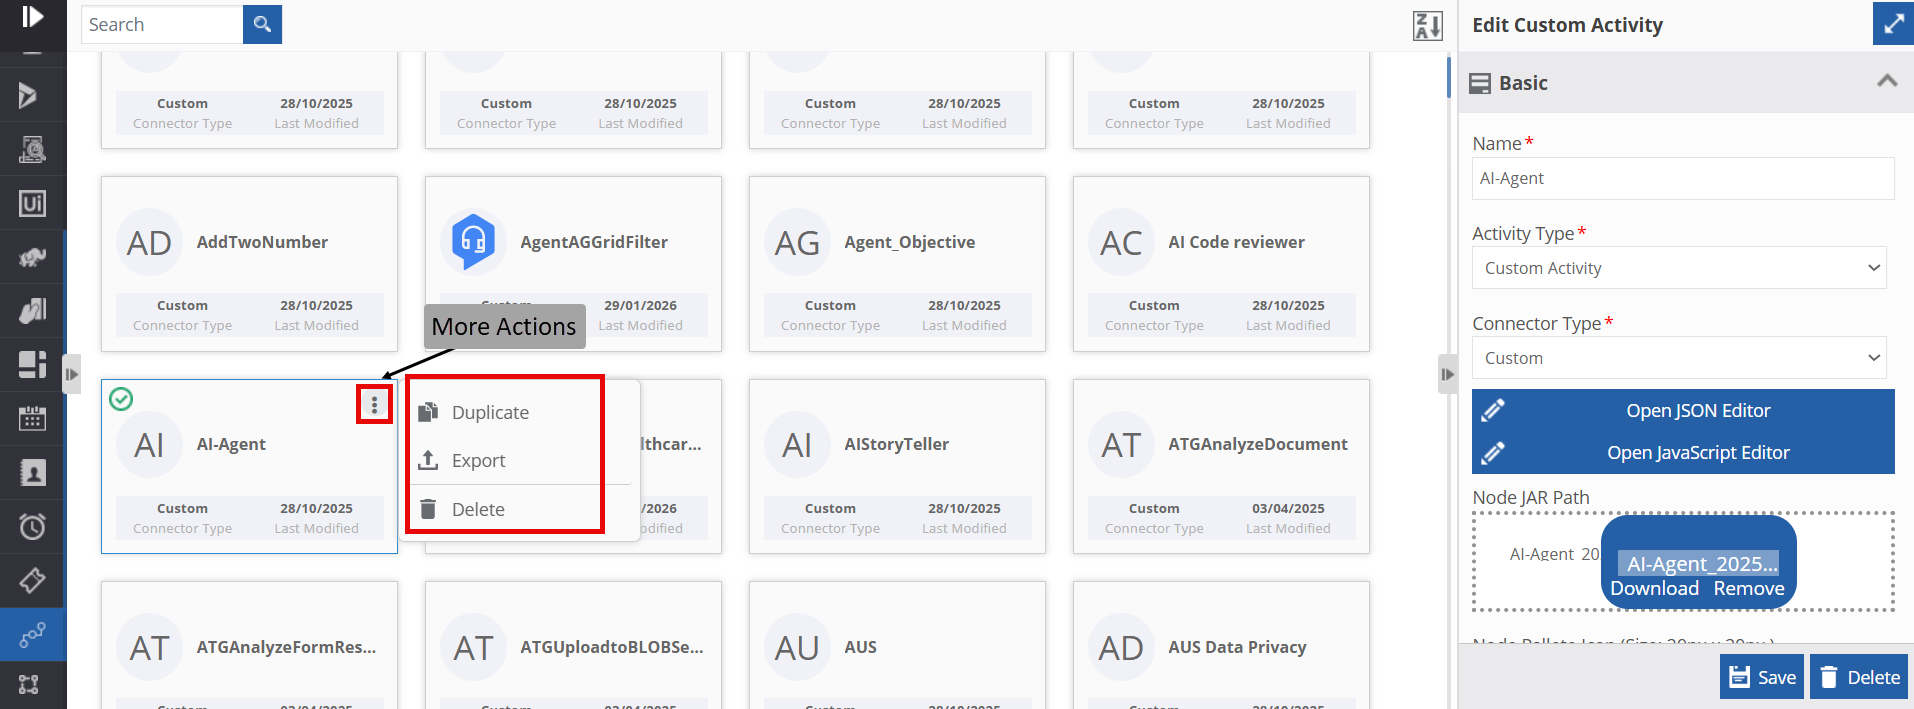
- Hover over any custom activity card. Three dots appear on the upper right side of the card.
-
Click the three dots. More Actions appear.
-
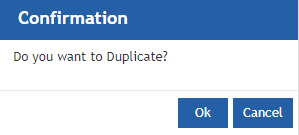
Click Duplicate. A confirmation pop-up appears.
-
Click Ok for duplicating the custom activity (or you can click Cancel to cancel the duplicate action). A Success message appears on the successful duplication of the custom activity.
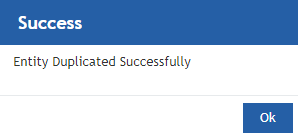
-
Click Ok. A duplicate copy of the custom activity appears on the custom activity page with the same custom activity name suffixed with “_copied”.
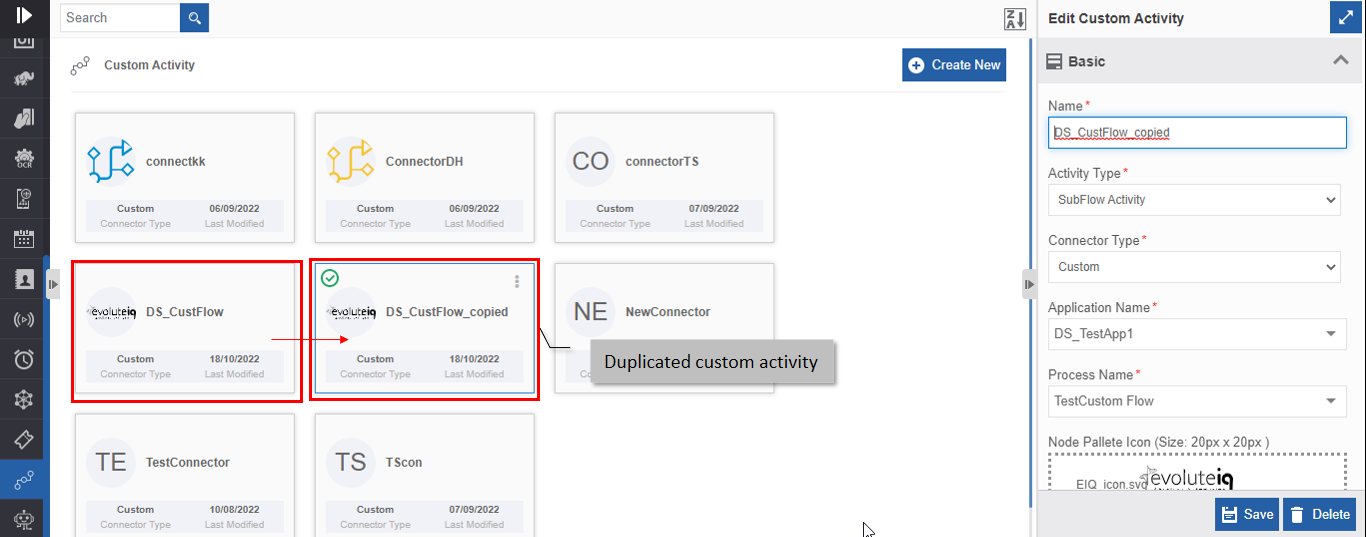
Exporting a Custom Activity
You can export a custom activity as a package to your local system.
- Go to Main Menu > Management > Configuration Management > Custom Activity.
-
Hover over a custom activity name card and click the three dots (More Actions).
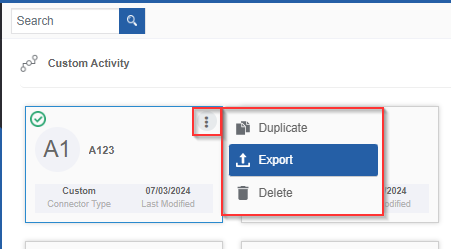
-
Click Export. The selected custom activity gets exported to your local system in the. pkg format.
Importing Web App
You can import a custom activity package into the Custom Activity section for utilization.
-
Go to Main Menu > Management > Configuration Management > Custom Activity.
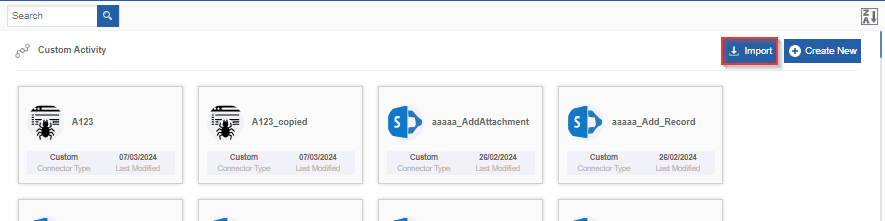
-
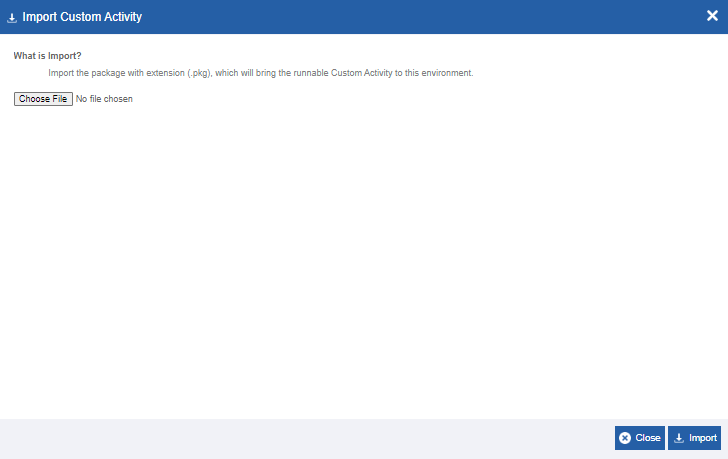
On the upper right click Import.
-
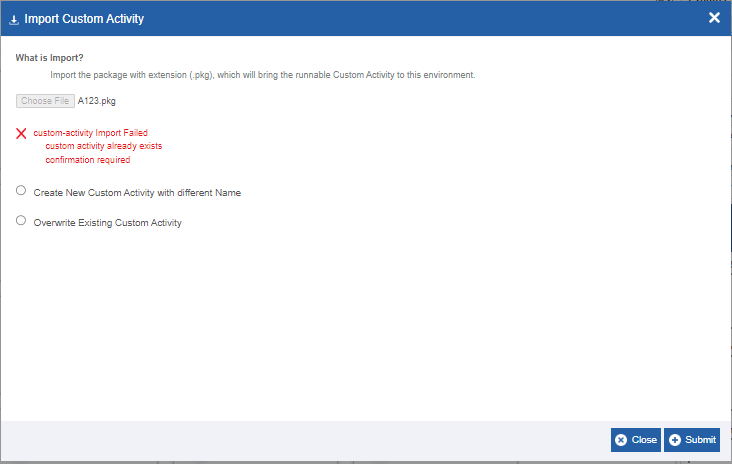
Click Choose File and select the file (in .pkg format) that you want to import. If the import package name and matches with any of the existing custom activity, import filed message appears with an option to rename the package name or to overwrite the existing custom activity in the platform.
-
Create new Custom Activity with different name: Click this option if you want to import the same package with a different name.
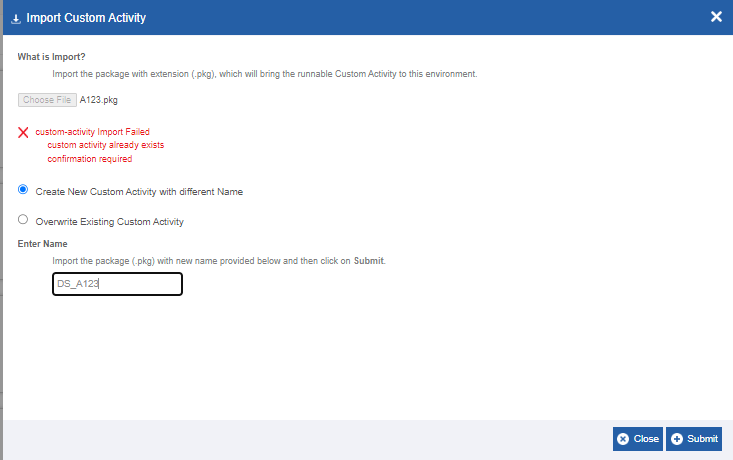
Enter the new name in the Enter Name field.
Overwrite Existing Custom Activity: Click this option to overwrite the existing custom activity with the import file with the same name as in the package.
-
-
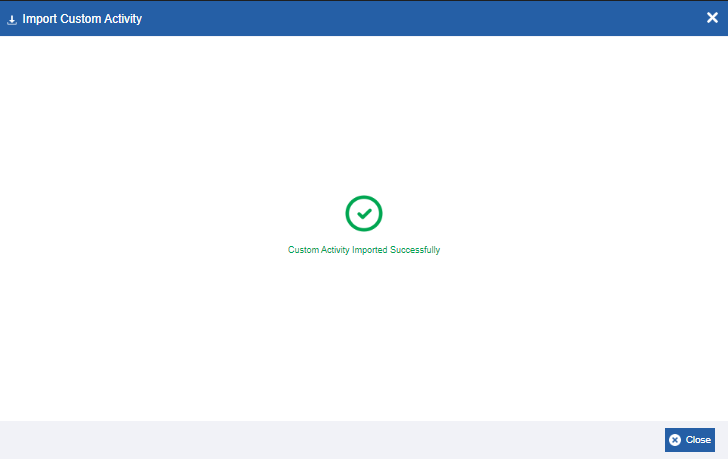
Click Import. A Success message appears on successful import of the package.
-
Click Close. The package is imported to the platform.
Deleting Custom Activity
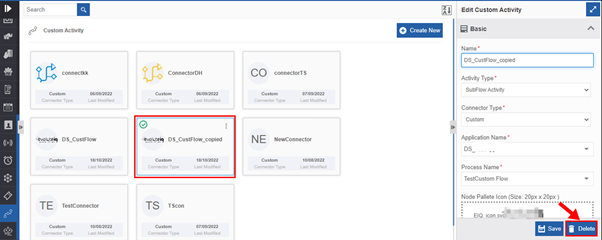
- Go to Main Menu > Management > Configuration Management > Custom Activity.
-
Click the custom activity name card that is to be deleted. The lower-right of the page displays the Delete button.
-
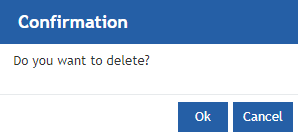
Click Delete. A Confirmation pop-up for delete appears.
-
Click Ok for deleting the custom activity.
Or
Click Cancel to cancel the action.
Alternatively, you can follow the below steps to delete the custom activity:
- Navigagte to main menu > Management > Configuration Management > Custom Activity
- Hover over the custom activity card. Three dots appear on the upper right side of the card.
- Click the three dots. More Actions appear.
- Click Delete and follow step 4 in the above procedure.
Custom Activities in Process Flows
Adding and Viewing Custom Activities
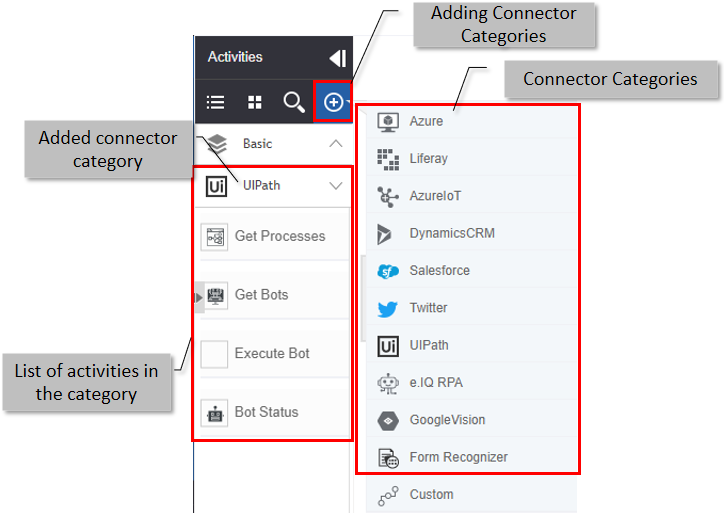
The custom activities created in the main menu > Management > Configuration Management > Custom Activities can be accessed through the process flow Activities panel.
- Navigate to main menu > App Studio > Process Flows.
-
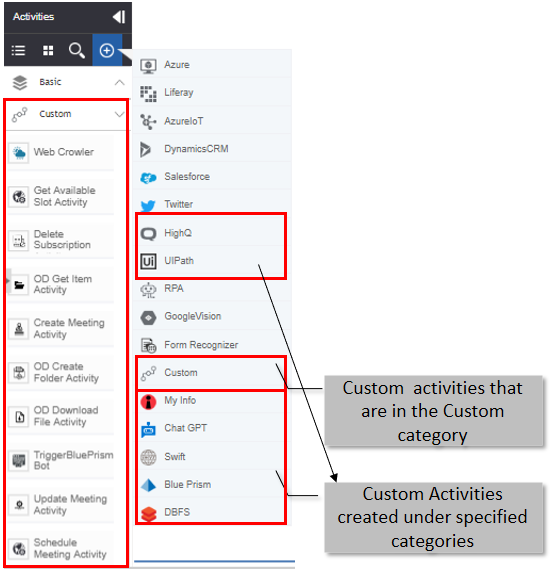
In the Process Flow - Activities panel click “+” for viewing the advanced connectors.
-
Click Custom. All the custom-defined activities get added to the Activities panel under the Custom accordion.
The custom activities that are of type “Custom” appear below the Custom category. Other custom activities are listed below the selected custom category type.
Custom activities that are in different categories will be listed under that category along with the default activities (if any) in that category.
Custom Activity in Process Flow
To use the custom activity, you need to add the custom activity category to the activities list and then drag the activity to the process designer.
Based on the type of custom activity added (Sub Flow Activity Type or Custom Activity Type) to the process flow, the configuration details are different.
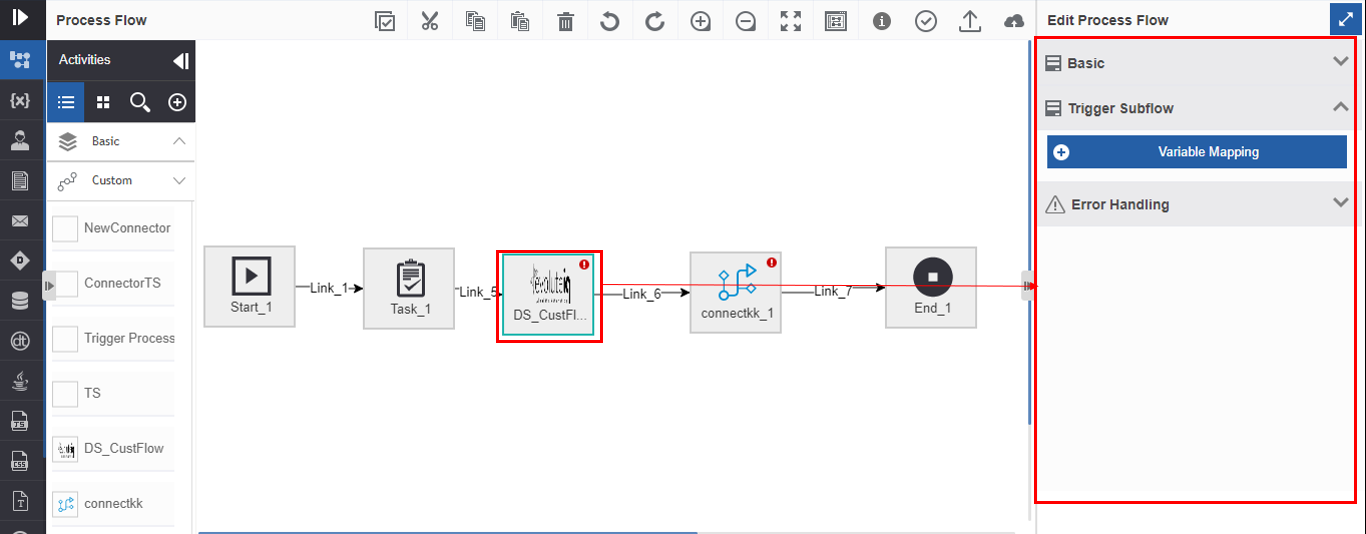
The sections included in Info Actions for the custom activity of type Subflow are Basic, Trigger Subflow, and Error Handling. Refer to Configuring Subflow Activity.
The sections included in Info Actions for the Custom activity of type custom activity are Basic and the configurations are coded as in the JSON file. Refer to Configuring Custom Activity.
Configuring Subflow Activity
- Add the Custom Activity category to the Activity list. Refer to Adding and Viewing Custom Activities.
-
Design the process flow by dragging the subflow custom activity as needed.
-
Click the activity. Configuration details appear on the Info Actions panel.
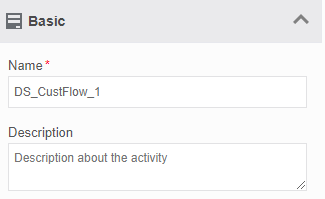
- Click Basic accordion.
-
Provide Name and Description for the activity.
-
Click Trigger Subflow accordion.
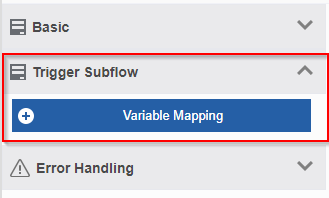
- Click +Variable Mapping. Variable mapping pop-up appears.
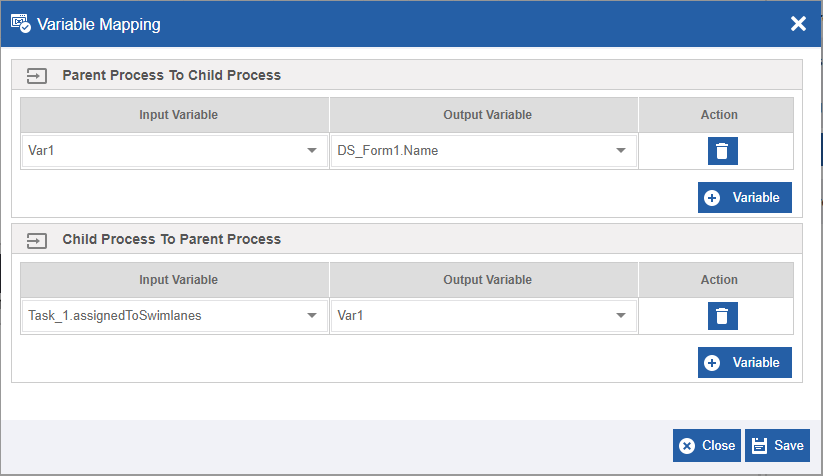
- In the Parent Process To Child Process, click Variable and select Input Variable (parent process variable) and Output Variable (child process variable). This is done to pass the data from the parent process to the child process, that is, custom subflow activity.
- In the Child Process To Parent Process, click Variable and select Input Variable (child process) and Output Variable (parent process). This is done to pass the data from the child process, that is custom subflow activity to the parent process.
- Click +Variable, to add more variables in each section.
- Click the delete icon to remove an input or output variable mapping.
- Click Save.
-
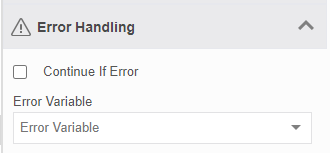
Click Error Handling accordion.
-
Check the Continue If Error check box if you want to continue the workflow even if the error occurs. Else uncheck the checkbox to break or stop the workflow execution when an error occurs.
-
Select a variable from the Error Variable drop-down. The variable should be of data type, alphanumeric. Error variable stores the first line of the error.
-
-
Click Create/Save to save the changes.
Configuring Custom Activity
Custom activity configurations depend on the JSON file, JavaScript file, and the JAR file that you uploaded while creating the custom activity in the main menu > Management > Configuration Management > Custom Activity.
- Add the Custom Activity category to the Activity list. Refer to Adding and Viewing Custom Activities.
-
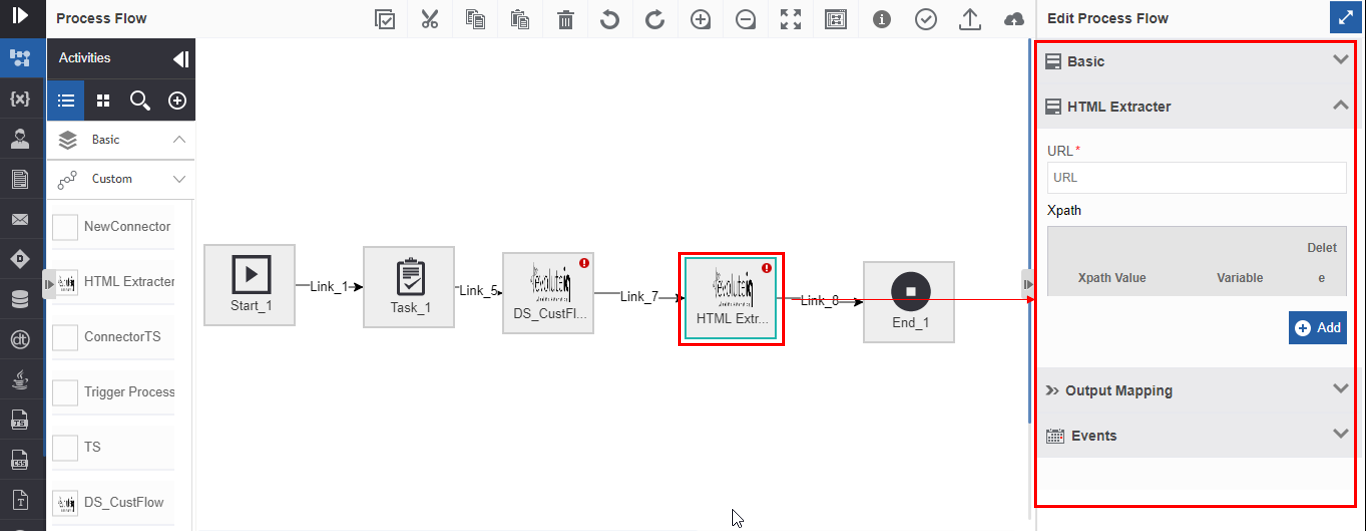
Design the process flow by dragging the custom activity as needed. The custom activities appear below the Custom category in the Activities pane. The name of the custom activity is the node name that you have coded in the JSON file.
-
Click the activity. Configuration details appear on the Info Actions panel.
-
Click Basic accordion.
-
Provide Name and Description for the activity.
-
Click {custom_configuration} accordion (that appears on the Info Actions) and configure the details as needed. The custom configuration accordion and details appear based on JSON file details that you provided in the Manage module.
Connector-Based Custom Activities
The connector-based custom activities appear on the specific Connector category in the Activities panel. The connector-based activities (default) and the custom activities can be accessed only by adding those activities to the Activities panel.
- In the Process Flow Activities Panel > Click “+” > click the connector name. All the activities supported for that connector including the custom activities appear below the connector category.