Access Token
Access tokens are used in token-based authentication to allow an application to access an API. You can authenticate an external application or API using Access tokens. Access tokens make API requests on behalf of a user.
You can create Access tokens in Configuration management that allow the user to make API requests in the application created. In the Platform, access tokens generated are utilized through the entity, Webservice.
Creating New Access Tokens
You can create an access token entity and generate an access token for a particular API for authenticating and utilizing that API (in the web service entity that can be mapped to flows).
Follow the below steps for creating a new access token.
-
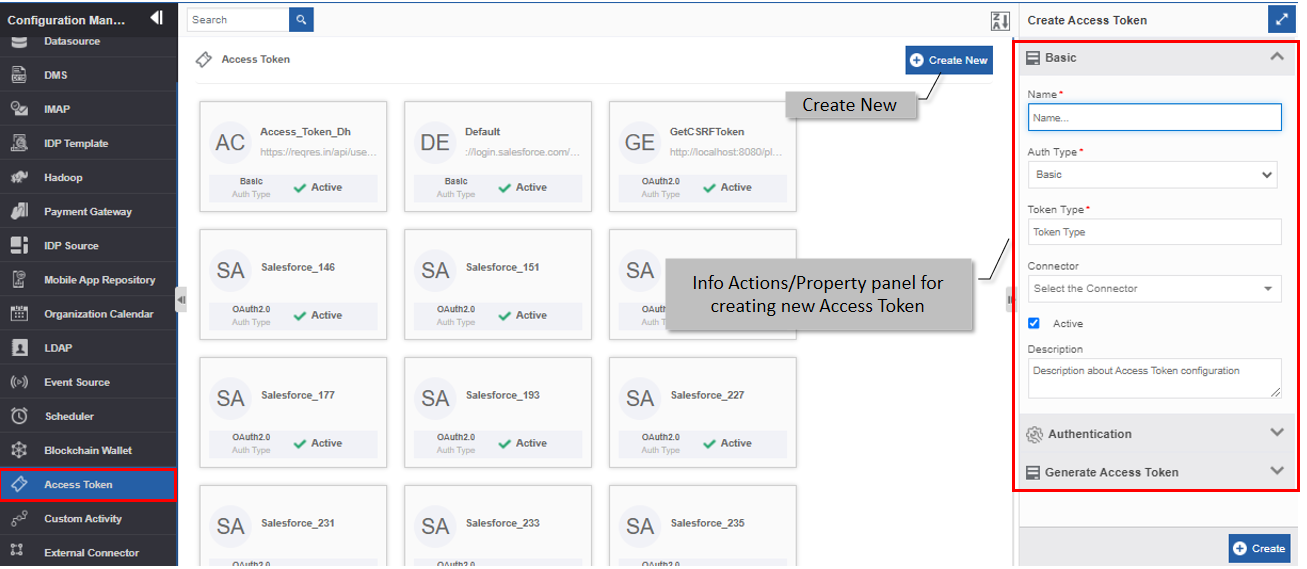
Go to Main Menu > Management > Configuration Management > Access Token.
-
Click +Create New.
-
Enter the details in the Create Access Token panel as explained below.
Field Description Basic Name* Enter the name of the access token.
Character limit: 50.
Data type: Alphanumeric and symbols. Whitespace is not allowed.Auth Type* Select an authentication type from the Auth Type drop-down. 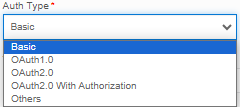
Refer to Auth Types for Access Token for more details.Token Type* Enter the type of token you want to generate based on the Auth Type selected.
E.g., Bearer.Connector* Select the connector from the drop-down depending on the API that you need for authentication.
You must configure the required external connector configuration in the Management > Configuration Management > External Connector before configuring the Access token so that the required connector appears on this drop-down list.Active Select the box if you want to keep the access token active.
To deactivate an access token, deselect the box and you will not be able to access it in the webservice entity.Description Enter a description for the access token. Authentication
(Basic, OAuth1.0, OAuth2.0)Access Token URL* Enter the Access Token URL based on the connector selected. Access Token Request Method* Select the Access Token Request Method (GET/POST). 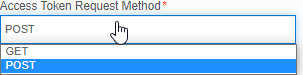
Access Token Request Header* Enter the Key and Value in the Access Token Request Header . The details are specific to the request method selected. 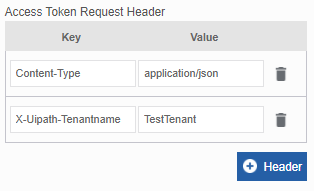
- Click Header to add multiple Keys and Values.
- Click the delete icon to delete the attribute.Authentication
(OAuth2.0 with Authentication)Provider Type* Select the provider type name. 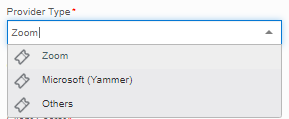
Properties related to the selected provider are auto-populated for Zoom and Yammer.
For Others , provide all the provider type-specific details.Client ID* Enter the client ID. Client Secret* Enter the client's secret. Authorization URL If your provider type is “Others”, enter the Authorization URL.
If you select Zoom or Yammer, the Authorization URL is auto-populated.Scope If your provider type is “Others”, enter the Scope.
If you select Yammer, the Scope is auto-populated.
For Zoom there is no Scope.Access Token URL* If your provider type is “Others”, enter the Access Token URL.
If you select Zoom or Yammer, the Access Token URL is auto-populated.Is Refresh Required If your provider type is “Others” and if the token has any expiry, select “Is Refresh Required?”
If you select Zoom or Yammer, the “Is Refresh Required?” gets selected.Refresh Token URL* If your provider type is “Others”, enter the Refresh Token URL.
If you select Zoom or Yammer, the Refresh Token URL is auto-populated.Generate Access Token (Basic, OAtuh1.0, OAuth2.0) Access Token Request Body* Enter the Access Token Request Body details. Generate Token Click Generate Token to generate the access token with the details provided.
Refer to Generating Access Token for details on access token generation different Auth Types.
The generated token appears in the Access Token Response textbox.Access Token Response When you click Generate Token , the token generated appears in this textbox. After creating the access token, it is removed for security reasons. If you need to generate a token, you need to click the Generate Token again. Access Token Copy the token displayed in the “Access Token Response ” and paste it into the Access Token textbox.
This is applicable only for Auth TypeOAuth2.0.Access Token Secret Enter the Access Token Secret.
This is a dynamic field that appears when you create the token.Refresh Token Is Refresh Required? The Refresh Token section with “Is Refresh Required?” property appears only if you select Auth Type as OAut2.0 or Others.
If the token is having any expiry, select the “Is Refresh Required?” checkbox. Refresh Token details appear.
The details given for the access token are to be given for the refresh token so that at the specified time, the token refreshes automatically. The token is generated internally and is not visible at the UI level.Refresh Token Enter refresh token details. Refresh Token URL* Enter the Refresh token URL for the selected connector. Refresh Token Request Method* Enter the refresh token Request Method (GET/POST) 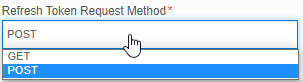
Refresh Token Request Header Enter the refresh token Request Header details. 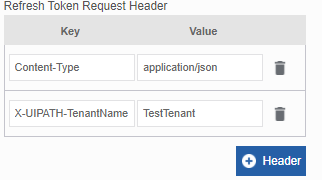
- Click Header to add multiple Keys and Values.
- Click the delete icon to delete the header.Refresh Token Request Body Enter refresh token Request Body. 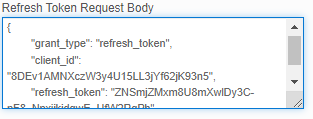
Refresh Interval Enter the refresh interval in seconds.
The token gets refreshed/regenerated at the specified seconds.
You need not regenerate the access token every time you access the API, as the system generates the token internally and calls the API.Response Mapping Enter the Value for the Key attributes in the Response mapping. 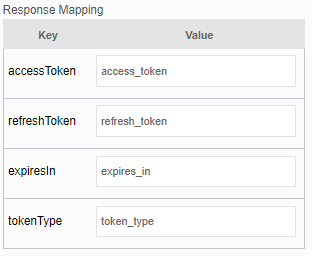
-
Click Create on the bottom right of the page and the access token gets created with the details entered.
Auth Types for Access Token
Auth Type is a required configuration for access token creation and generation.
The Auth Types available for the creation of access token are: Basic, OAuth1, OAuth2, and OAuth Management with Authorization.
To access Auth type configuration, navigate to Management > Configuration Management > Access Token > Create New – Auth Type drop-down.
- Basic: Basic access authentication is a method for an HTTP user agent to provide a username and password while making a request.
- OAuth: OAuth is an authentication protocol that allows you to approve one application interacting with another on your behalf without giving away your password. Two versions provided are OAuth1.0 (enhanced security and user control) and OAuth2.0 (more adaptable authorization protocol).
-
OAuth with Authorization (v6.1 onwards): This auth type is applicable when you create an access token for accessing an external connector account (currently this feature is implemented for Zoom or Yammer).
Note
When you click Generate Token after selecting this option for an external account (like Zoom or Yammer), the associated API redirects you to the corresponding account pages and prompts for your credentials of that account for authorization. The API generates access token only through authorization.
-
Others: Select "Others" if you using any other authentication method other than Basic and OAuth.
Generating Access Token
Access Token generation differs for different Auth Types.
For Auth types: Basic, OAuth1.0, and OAuth2.0, the generate token button appears in the Generate Access token section in the Property panel.
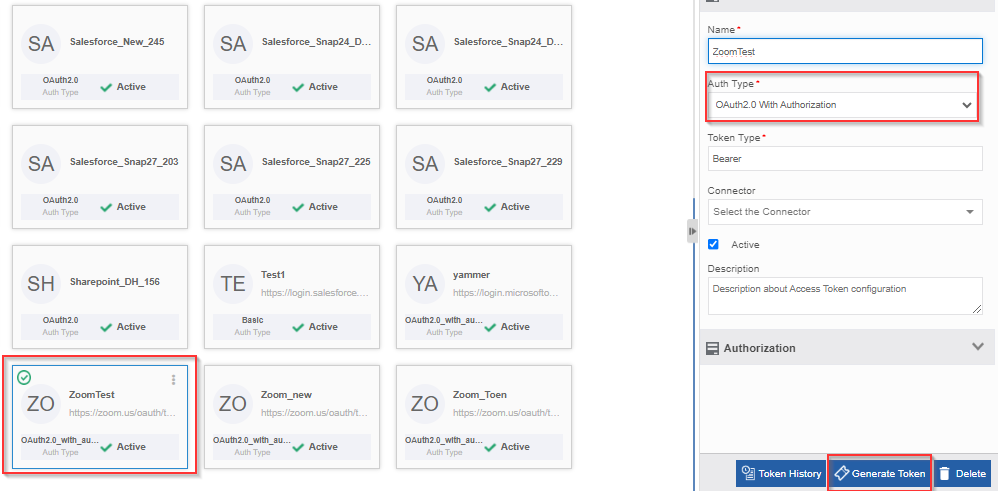
For Auth Type, OAuth2.0 with Authorization, Generate Token appears separately (not in any property panel) on the bottom-right. As of now the platform supports the auth type, OAuth2.0 with Authorization for the applications, Zoom and MS Yammer.
- Go to Main Menu > Management > Configuration Management > Access Token.
- For Auth Type = Basic / OAuth1.0 / OAuth2.0.
- Create an Access token card with Auth Type = Basic / OAuth1.0 / OAuth2.0
- Enter the Access Token Request Body details.
- Click Generate Access Token button in the panel. The generated token appears in the Access Token Response textbox.
-
For Auth Type = OAuth2.0 with Authorization:
-
Create an Access token card with Auth Type = OAuth2.0 with Authorization.
-
Click Generate Token. This redirects you to the corresponding account of the selected access token. Say for example, in case of regenerating access token for Yammer, it redirects you the Microsoft account.
- Enter your account credentials.
Once the token is generated, it is captured in the background (DB). You can get this generated token through the identifier in the webservice entity where you map this access token.
Once you generate the token, a Regenerate Token button appears. Regenerate Token allows you to regenerate token for the same entity. The regenerate token takes you through the above-mentioned Steps
-
Viewing and Editing Access Token
- Go to Main Menu > Management > Configuration Management > Access Token.
-
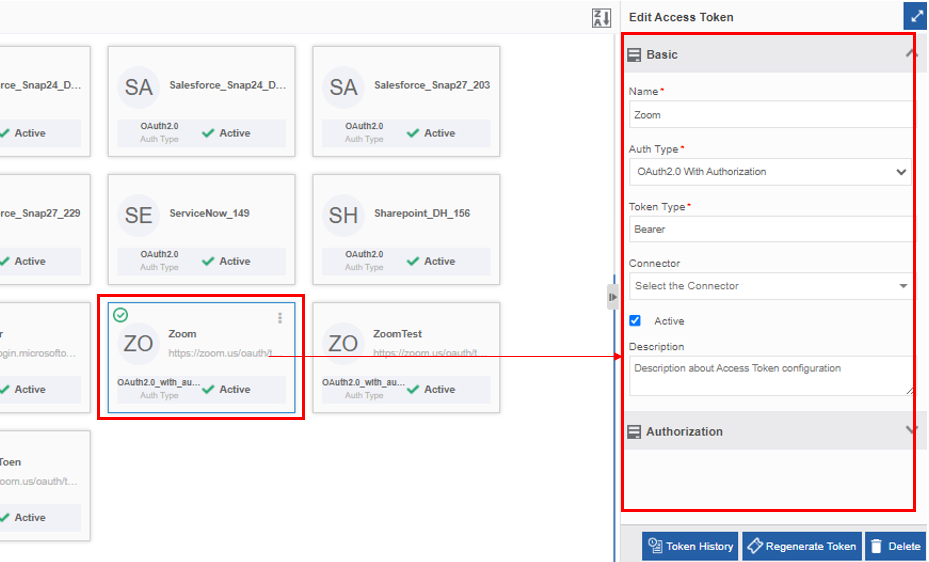
Click the Access Token card to view the details of the selected token. The details of the token appear in the Info Actions panel (Edit Access Token).
-
Edit the token details as needed.
- Click Save.
Viewing Token History
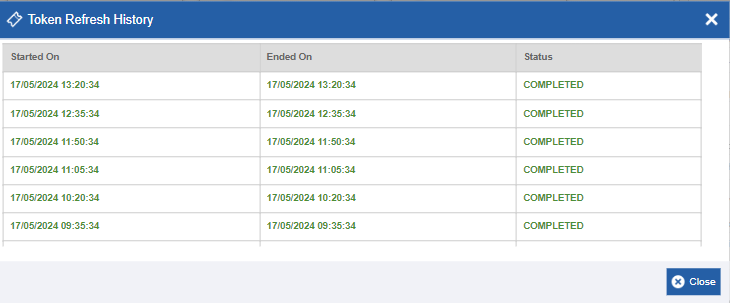
Token Refresh History provides the details on when the request is created by the stem for getting a refresh token for the configured access token. It also provides the information if the request for generating the refresh token is successful or not. If the request is not successful the error details appear on the error column.
- Go to Main Menu > Management > Configuration Management > Access Token.
-
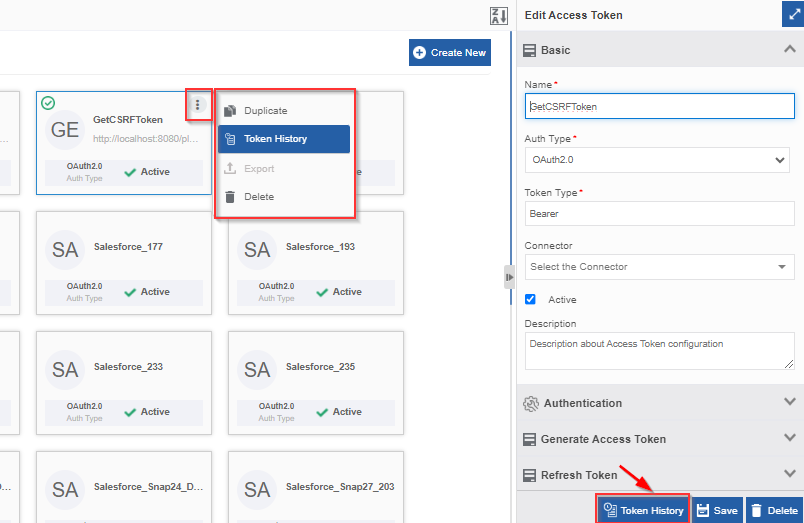
Click the token name card for which you need to view the history.
-
Click Token History. The Token Refresh History pop-up appears.
-
Click Close to close the Token Refresh History pop-up.
Alternatively, you can follow the below steps to view token history:
- Go to Main Menu > Management > Configuration Management > Access Token.
-
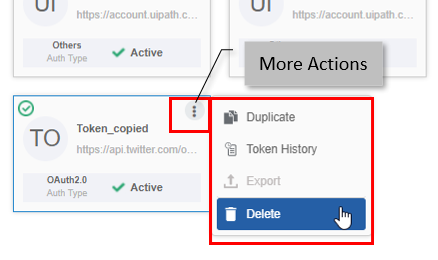
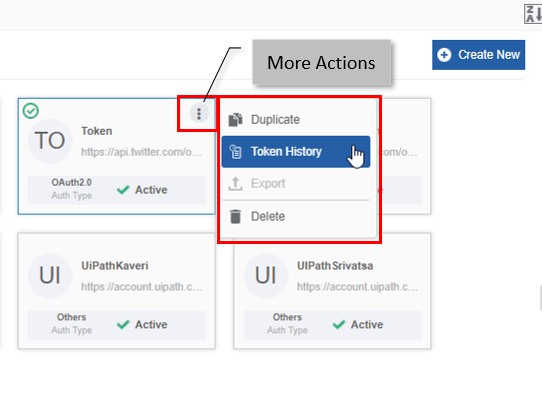
Hover over the Access token card. Three dots appear on the upper right side of the card.
-
Click the three dots. More Actions appear.
-
Click Token History.
Duplicating Access token
Follow the below steps for duplicating an existing access token.
- Go to Main Menu > Management > Configuration Management > Access Token.
-
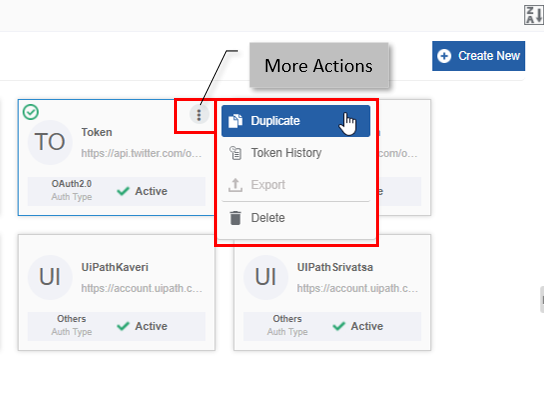
Hover over any access token card. Three dots appear on the upper right side of the card.
-
Click the three dots. More Actions appear.
-
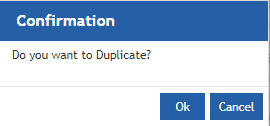
Click Duplicate. A confirmation pop-up appears.
-
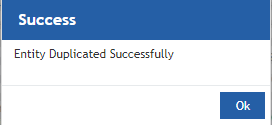
Click Ok for duplicating the token (or you can click Cancel to cancel the duplicate action). A Success message appears on the successful duplication of the access token.
-
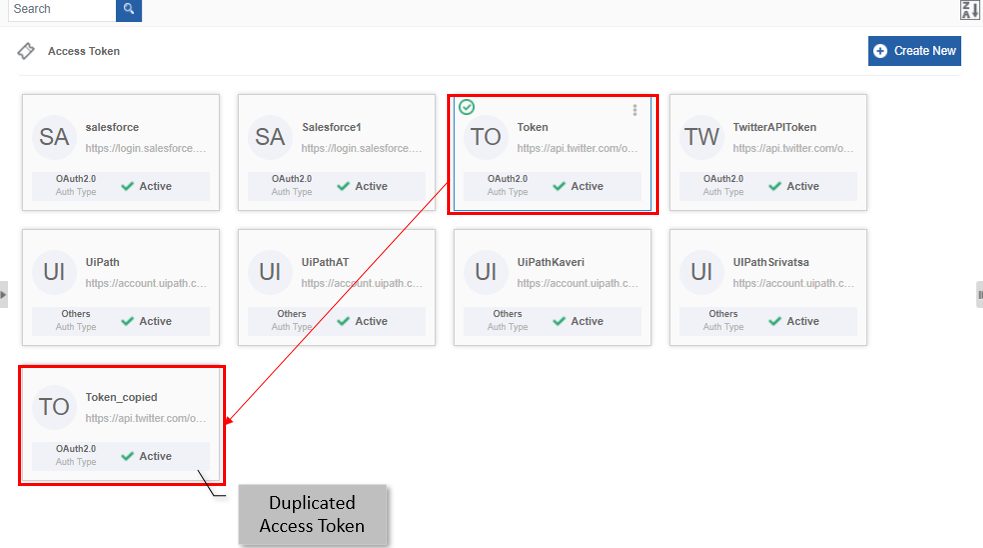
Click Ok. A duplicate copy of the access token appears on the Access Token page with the same token name suffixed with “_copied”.
Deleting Access Token
- Go to Main Menu > Management > Configuration Management > Access Token.
-
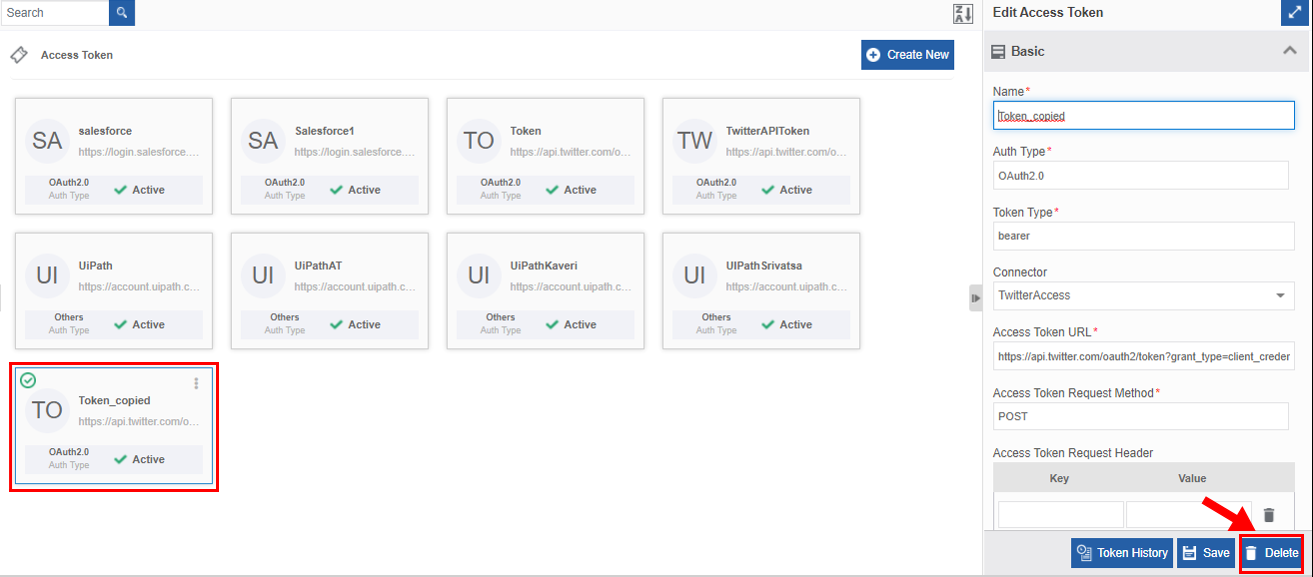
Click the token name card that is to be deleted. The lower-right of the page displays the Delete button.
-
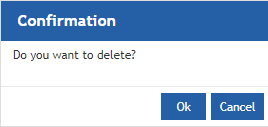
Click Delete. A Confirmation pop-up for delete appears.
-
Click Ok for deleting the token.
Or
Click Cancel to cancel the action.
Alternatively, you can follow the below steps to delete the token:
- Go to Main Menu > Management > Configuration Management > Access Token.
-
Hover over the Access token card. Three dots appear on the upper right side of the card.
-
Click the three dots. More Actions appear.
-
Click Delete and follow step 4 in the above procedure.