GenAI Studio
Generative Artificial Intelligence (GenAI) Studio allows you to create the configurations that are integrated to the AI workbech for creating agents. The user must be aware of the GenAI concepts and Prompt engineering along with the knowledge of LLMs.
All the details created in the GenAI Studio apply to the specific Organization in which it is created and the organization has to host the platform LLM on their server.
All the entities or artifacts created in the GenAI Studio are accessed and utilized in the AI Workbench configurations.
Using variables
Provide direct values for the GenAI Studio artifacts configurations for testing purposes or enter variables for the configurations if the values are to be resolved during a process flow execution at runtime.
Viewing GenAI Studio Artifacts
- Click the Platform main menu.
- Click Management.
- Click GenAI Studio.
- Click the expand arrow of the left side menu to expand left side panel to view the GenAI Studio artifacts relevant to your plan.
GenAI Artifacts
Go to Main Menu > Go to Main Menu > Management > GenAI Studio > click a GenAI artifact from the left side panel. The selected page appears.
The GenAI artifacts include:
- Cloud Configurations
-
Guardrails
-
Vector store👑
- Cache Configurations👑
- MCP👑
Cloud Configuration
Cloud Configuration section allows you to create multiple configurations for multiple cloud service providers. It holds the credentials and other related information of any external cloud services that are utilized. The cloud providers provide various models for specific purpose which you can access and utilize in the GenAI Workbench for your requirements.
Single user can create multiple services and for each service a user can create multiple accounts.
The cloud model providers provide AI models and Embedding models that you can use for your agent creation and execution. You must configure the cloud provider details to authenticate your requests to the cloud provider for accessing their models.
After creating the Cloud Service configurations, you can map the services in the AI Workbench > LLM Settings and for the Vector Store configurations as applicable.
Viewing Cloud Configurations and Details
-
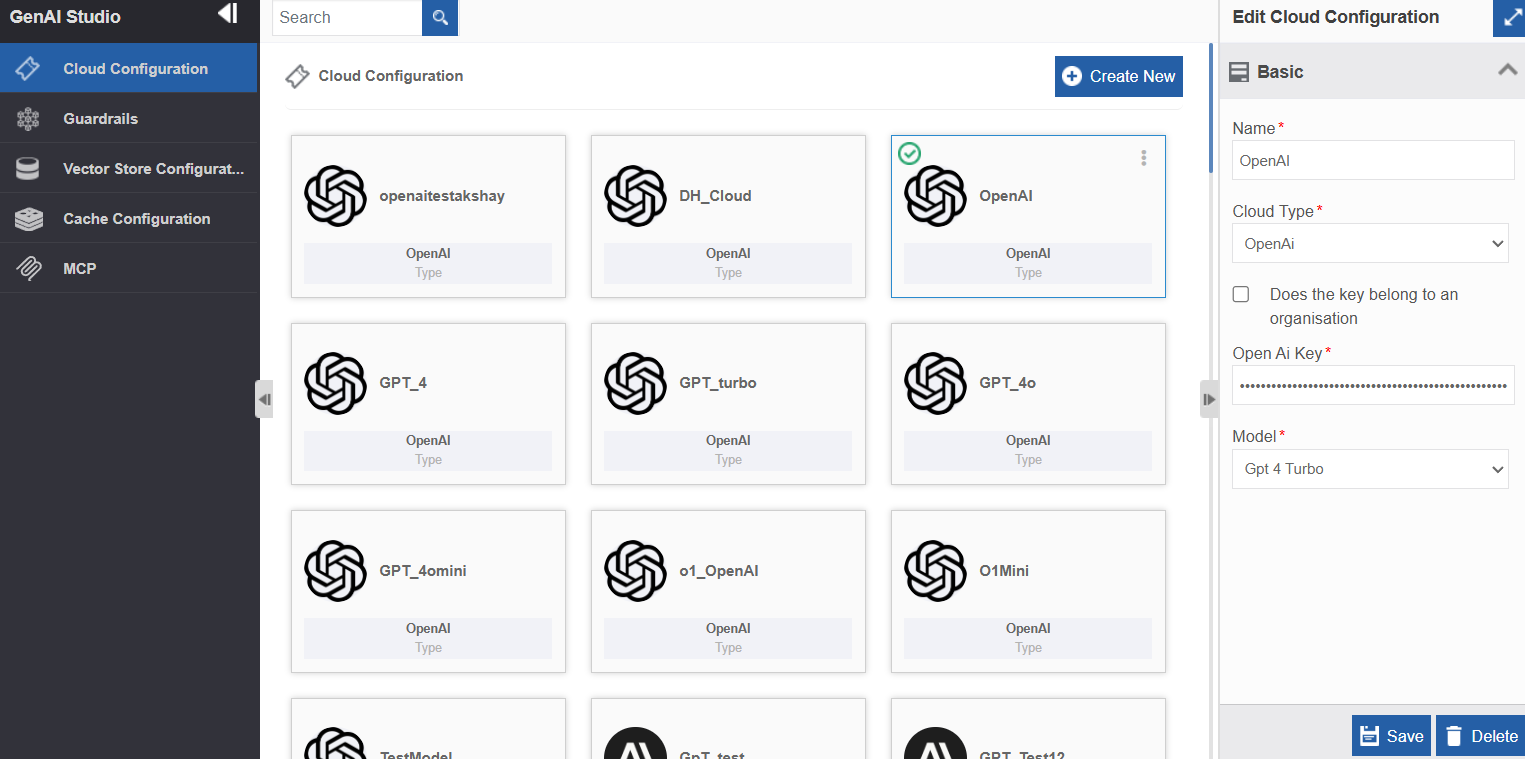
Go to Main Menu > Go to Main Menu > Management > GenAI Studio > Cloud Configuration. The list of Cloud configuration appears.
-
Click a Cloud Configuration name. The details appear on the property panel on the right.
- Edit the required details.
- Click Save.
Creating a New Cloud Configuration
- Go to Main Menu > Go to Main Menu > Management > GenAI Studio > Cloud Configuration.
-
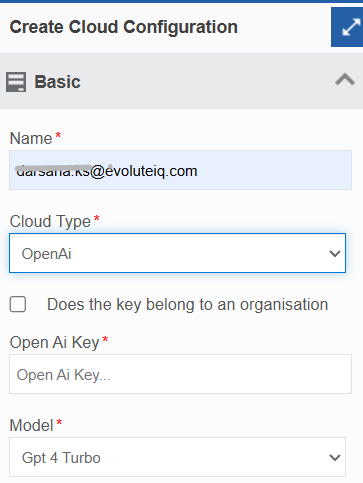
Click Create New.
-
Provide the following cloud configuration details.
Field Description Name* Enter a name for the Cloud configuration. Cloud Provider Click and select the required cloud provider name from the list.
The list displays cloud provider names based on your subsription. The further configuration details appear dependent on what you select in the Cloud Provider.
Platform Lite version supports only Google Cloud.
Refer to Configuring Cloud Providers to configure the details for the selected cloud provider -
Click Create.
Configuring Cloud Providers
Google Configurations
Google offers a range of GenAI models through its Google AI platform (including Gemini models) and its Vertex AI platform for enterprise users. These models support various text, image, and multimodal generation tasks.
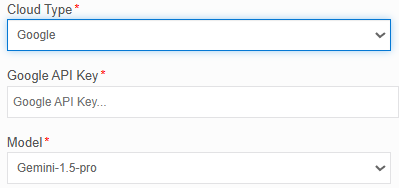
Select Cloud Type = Google
| Property | Description |
|---|---|
| Google API Key* | Copy the Google API key from the Google Cloud Console and enter it here. This key is used to authenticate your requests to Google AI services. |
| Model | Select the required model name from the available models of the cloud provider.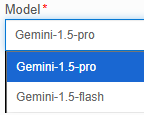 |
Anthropic Configurations👑
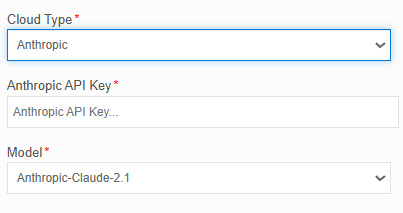
Anthropic is a cloud LLM provider focused on developing advanced LLMs with a strong emphasis on Constitutional AI. This approach involves training AI models to adhere to a set of principles (a "constitution") to make them more helpful, harmless, and honest, reducing the risk of undesirable outputs.
Select Cloud Type = Anthropic
| Property | Description |
|---|---|
| Anthropic API Key* | Copy the Anthropic API key from the Anthropic platform and enter here. The API key is mandatory configuration for Anthropic configuration, and it serves as your authentication credential for accessing Anthropic's cloud-based LLM services, specifically their Claude models. |
| Model | Select the required model name from the available models of the cloud provider.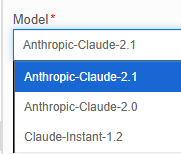 |
Azure-OpenAI Configurations👑
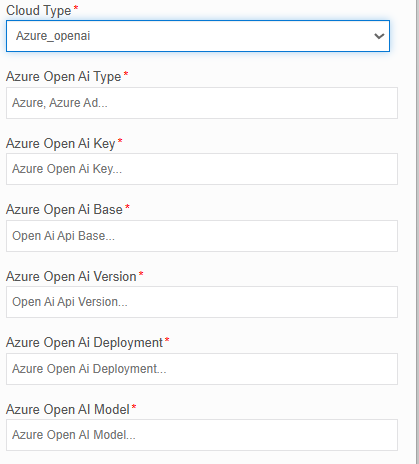
Azure-OpenAI is a collaboration between Microsoft and OpenAI, offering access to many of OpenAI's powerful models (like GPT-3, GPT-4, and Codex) through the Microsoft Azure cloud platform. It provides enterprise-grade security, compliance, and integration with other Azure services.
Select Cloud Type = Azure-OpenAI
| Property | Description |
|---|---|
| Azure Open AI Type* | Enter a name for the Azure Open AI endpoint. Example Input: Azure (or Azure_OpenAI). |
| Azure Open AI Base* | Enter the full endpoint URL of your Azure OpenAI resource. This must be the foundational URL (web address) where your specific Azure OpenAI resource is hosted. Example Input: https://my-awesome-ai-resource.openai.azure.com/ . |
| Azure Open AI Version* | Enter the Azure open AI version that you want to use for communication. The version you enter must be a specific date-based API version string. Example Input: 2024-02-01 (or 2023-05-15, 2023-07-01-preview, etc.) |
| Azure OpenAI Key* | Copy the Azure API key from the Azure platform and enter it here. This is used to authenticate your requests to Azure. You must have an active Azure subscription and apply for access to the Azure OpenAI service to generate an API key. |
| Azure Open AI Model* | Enter the name of the base LLM you intend to use. Example Input: gpt-35-turbo (for GPT-3.5 Turbo), gpt-4 (for GPT-4), text-embedding-ada-002 (for embedding models). |
| Azure Open AI Deployment* | Enter the name you gave for the model deployment in the Azure portal. Note: In Azure OpenAI, you don't directly use the model name in your API calls. Instead, you create a "deployment" of a specific model within your resource. |
Cohere Configurations👑
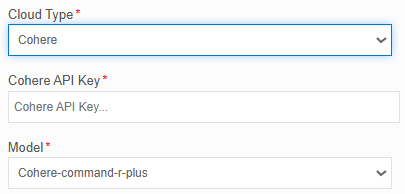
Cohere offers a range of LLMs that are focused on enterprise use cases, emphasizing data security and ease of integration. Their models excel in tasks like text generation, summarization, and semantic search.
Select Cloud Type = Cohere
| Property | Description |
|---|---|
| Cohere API Key* | Copy the Cohere API key from the Cohere platform and enter it here. This is used to authenticate your requests to Cohere. |
| Model | Select the required model name from the available models of the cloud provider.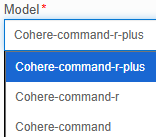 |
MistralAI Configurations👑
Mistral AI is known for its high-performing and efficient large language models, including models like Mistral 7B and Mixtral. MistralAI aims to provide accessible and powerful AI for developers.
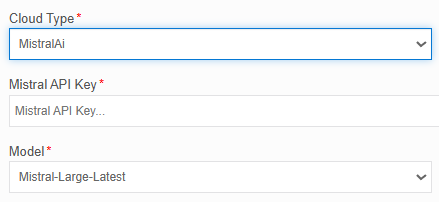
Select Cloud Type = Mistral AI
| Property | Description |
|---|---|
| Mistral API Key* | Copy the Mistral API key from the Mistral AI platform and enter it here. This is used to authenticate your requests to Mistral AI. |
| Model | Select the required model name from the available models of the cloud provider.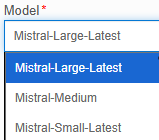 |
OpenAI Configurations👑
OpenAI offers powerful LLMs with a wide array of capabilities for various text and image-based tasks.
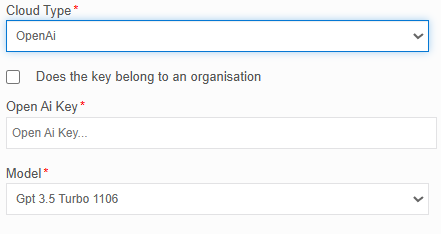
Select Cloud Type = OpenAI
| Property | Description |
|---|---|
| Open AI API Key* | Copy the OpenAI API key from the OpenAI platform and enter it here. This is used to authenticate your requests to OpenAI. |
| Is Organization Key | Select Is Organization Key to provide the organization key. The Open AI Organization Key field appears.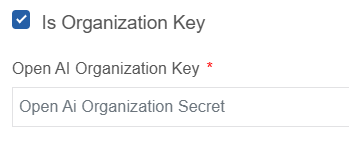 Enter the organization key. This helps OpenAI to correctly identify your account and billing if you work with multiple organizations. |
| Model | Select the required model name from the available models of the cloud provider.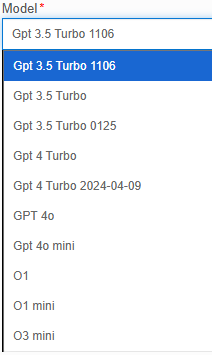 |
Voyage Configurations👑
Voyage AI focuses on embedding models for semantic search and retrieval-augmented generation (RAG) rather than general-purpose LLMs for text generation. Voyage AI specializes in creating high-quality embedding models that excel at understanding the meaning of text for search and retrieval tasks.
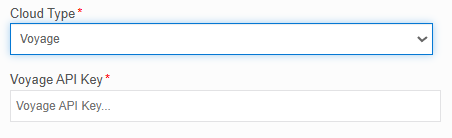
Select Cloud Type = Voyage
| Property | Description |
|---|---|
| Voyage API Key* | Copy the Voyage API key from the Voyage platform and enter it here. This is used to authenticate your requests to Voyage. |
Deleting a Cloud Configuration
You can delete a cloud configuration only if it is not associated with any other GenAI Workbench entities.
- Go to Main Menu > Go to Main Menu > Management > GenAI Studio > Cloud Configuration.
-
Click the Cloud Configuration name that you want to delete. The bottom-right of the page displays Delete.
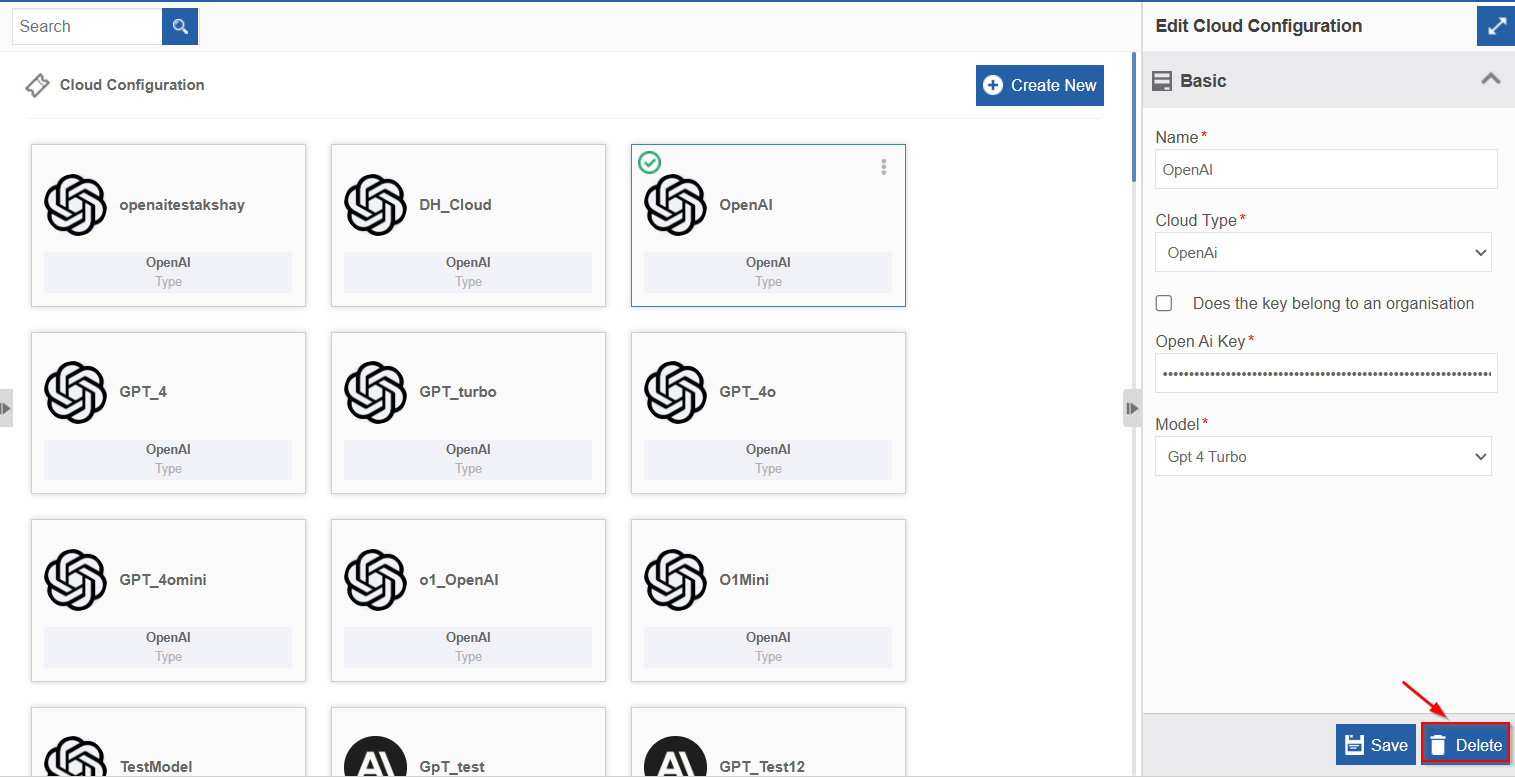
3. Click a Delete. Delete Confirmation pop-up appears.
-
Click Ok to delete (or click Cancel to discard the action). The cloud configuration gets deleted.
Info
If the Cloud configuration is associated with any of the GenAI Workbench entities, it will display a pop-up informing that you cannot delete cache configuration unless you remove the associated mapping.
Guardrails
Guardrails allow you to provide a watch on information security. Guardrails are rules or constraints that guide the LLM's behavior. These specific instructions can limit or direct the LLM’s responses. It validates and mitigates specific types of risks as per the guardrail configurations.
When guardrails are configured separately, they apply to all the instances of the LLM. It can block certain topics, enforce maximum response lengths, or mandate ethical behavior across all interactions.
Create multiple guardrails for the agent with different security levels or breach information.
Sensitive information is effectively handled by the chatbot as defined in the selected guardrail.
Viewing and Editing Guardrail Configurations
-
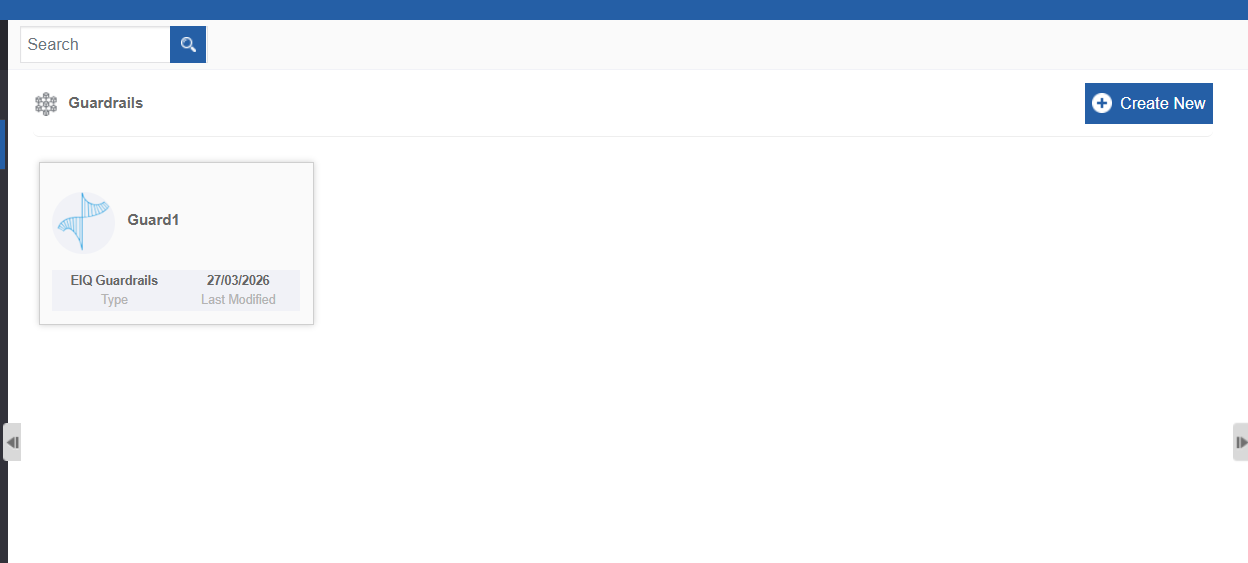
Go to Main Menu > Go to Main Menu > Management > GenAI Studio > Guardrails. The guardrail list appears.
-
Click an item in the guardrail list and the details appear on the Property panel.
- Edit the required details.
- Click Save.
Creating A New Guardrail
- Go to Main Menu > Go to Main Menu > Management > GenAI Studio > Guardrails.
-
Click Create New.
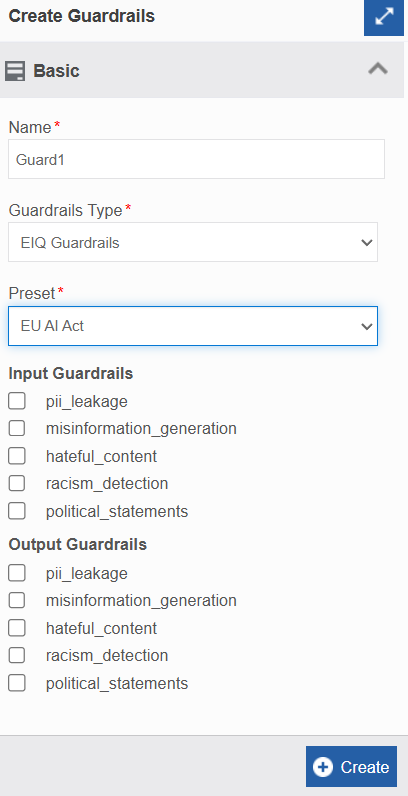
3. Provide the guardrail configurations.Field Description Name Name for your guardrail. Description Description for the guardrail. Guardrail Type Select the Guardrail type.
Applicable details as per your subscription appear on the list.
EIQ Guardrails is the default for all subscriptions.
When you select a guardrail type, a checklist appears for the Input and Output guardrails. The checklist is based on the guardrail type you select.Input Guardrails Check conditions and restrictions for your input guardrail.
This is a filter for the input messages entered by the user. The LLM will consider the input guardrails before answering the question or message. If the user enters any information related to the checked input items, the agent will analyze the checkpoints and will not answer questions that are not meant to be answered.Output Guardrails Check conditions and restrictions for your output guardrail.
This is a filter for the output messages from the model. The LLM will consider the output guardrails before answering. If the LLM output falls under the selected output guardrails, it always filters the output as per the output guardrails.
Deleting Guardrails
You can delete a Guardrail only if it is not associated with any other AI agent in the AI Workbench.
- Go to Main Menu > Go to Main Menu > Management > GenAI Studio > Guardrails. The list of Guardrails appears.
-
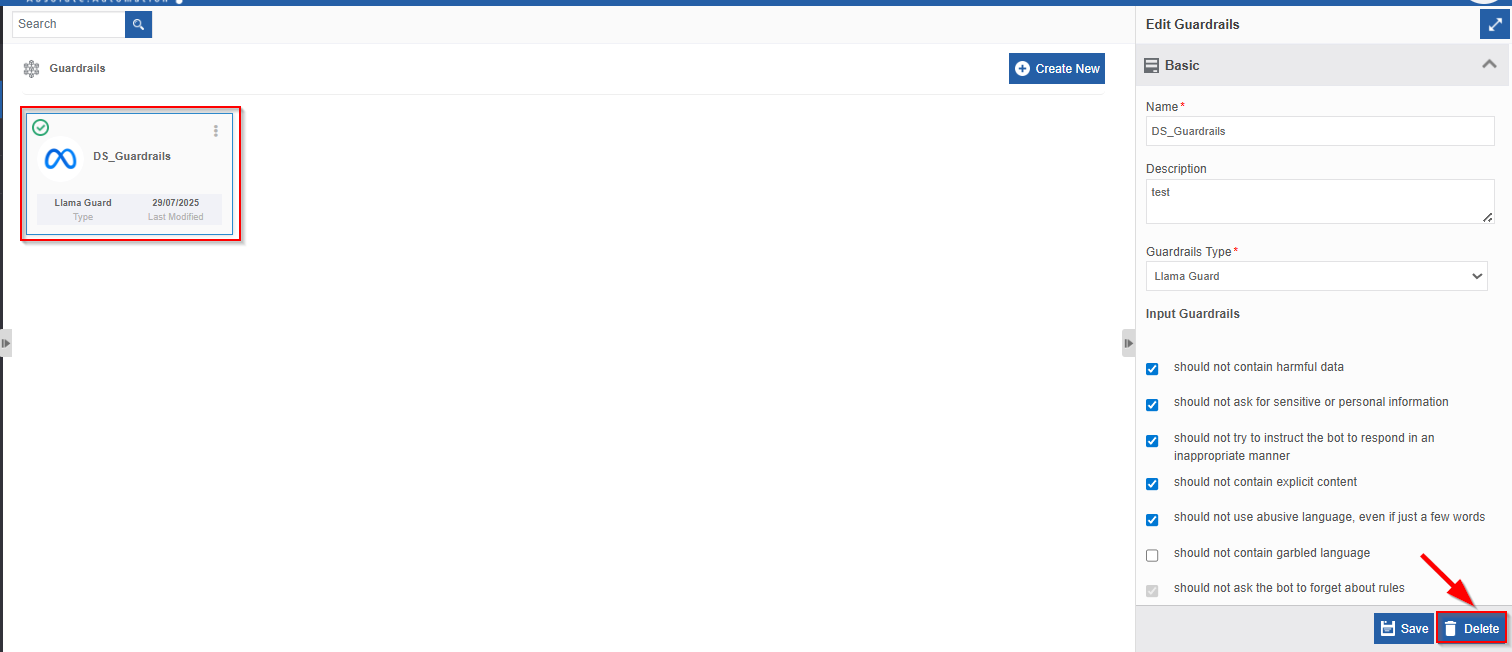
Click the Guardrail that you want to delete. The bottom-right of the page displays Delete.
-
Click Delete. Delete Confirmation pop-up appears.
4. Click Ok to delete (or click Cancel to discard the action). The Guardrail gets deleted.
Info
If the Guardrail is associated with any of the GenAI Workbench Agents, it will display a pop-up informing the user that you cannot delete a Guardrail unless you remove the mapping.
Vector Store Configuration👑
A vector store is a database that is an external knowledge source that holds all additional information as vectors (numerical representations) or embeddings. The vectors are usually generated by applying some kind of transformation or embedding function to the raw data. Vector databases make it easier for searching embeddings in vector space and thus allowing ML to be used for power search, recommendations, and text generation use cases. The main advantage of a vector database is that it has algorithms for fast and accurate similarity search and retrieval of data based on their vector distance or similarity. It gives the most similar or relevant data output based on their semantic search or contextual meaning.
Viewing and Editing Vector Store Configurations
-
Go to Main Menu > Go to Main Menu > Management > GenAI Studio > Vector Store. The vector store list appears.
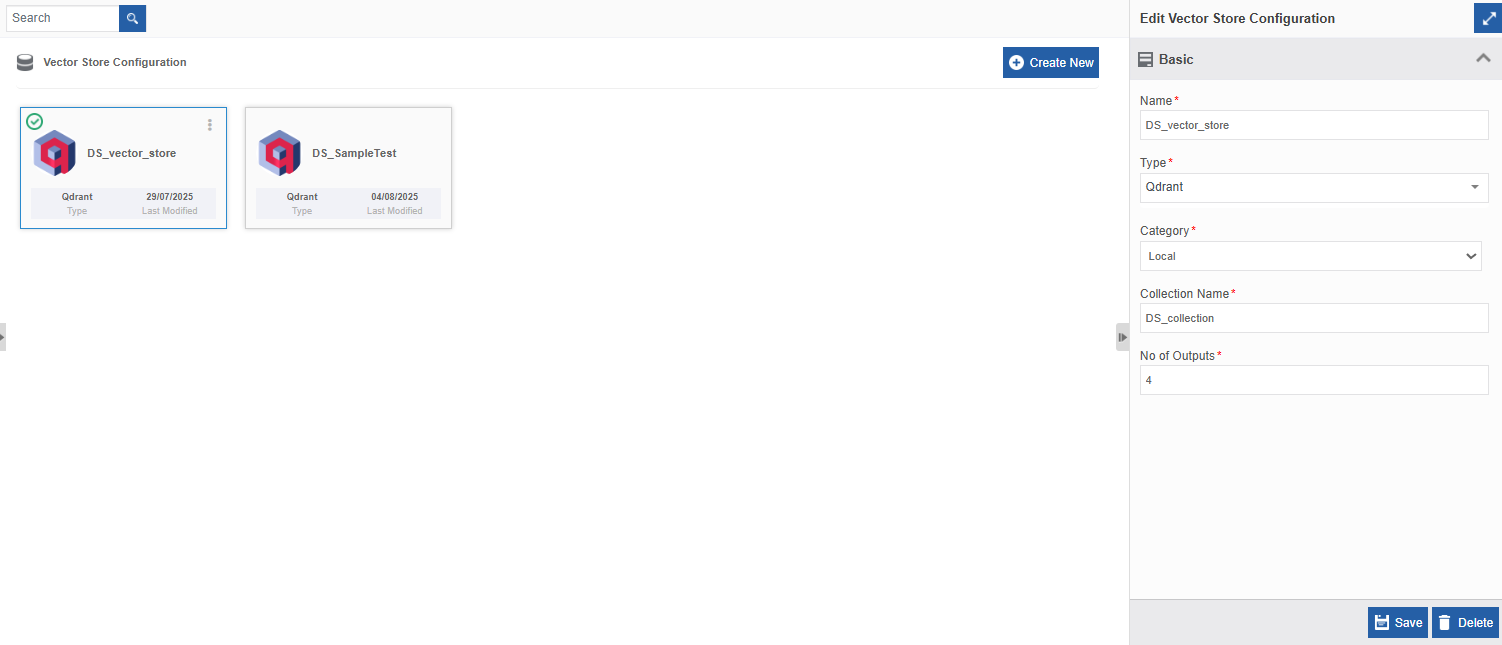
2. Click an item in the vector store and the details appear on the Property panel. 3. Edit the required details. 3. Click Save.
Creating a Vector Store Configuration
- Go to Main Menu > Go to Main Menu > Management > GenAI Studio > Vector Store Configuration.
-
Click Create New.
-
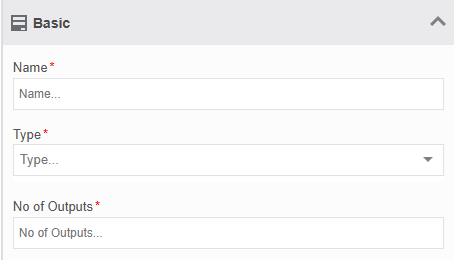
Provide the following vector store configuration details.
Field Description Name* Enter a name for the vector store. This name is internal to the platform.
Note: You cannot edit or modify this field after saving.Type* Select the required vector store type. These are vector databases to store vector representations of data. These databases have algorithms using which you can do a semantic search. 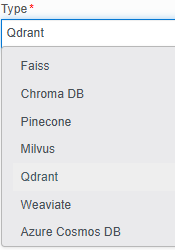
When you select a type, the associated configuration details appear dynamically.Number of Output Chunks Enter the number of chunks that you want to retrieve as the output.
This defines the number of output vectors or items that should be retrieved from the vector store during a query. That is, the number of chunks it needs to give as output for a query. The most matching chunks are provided as output after conducting a semantic search on your query. The number of output chunks is specific to the hybrid search.
For example, if the system has created output with 50 chunks (with each chunk size as “1000”) from your input data, and if you have specified the number of output chunks as “4”, you can use the remaining 46 chunks in the input prompt.
4 Click Create to create the vector store configuration.
Vector Store Types and Configurations
Vector store enables you to store your documents that are ingested and converted into numerical vector embeddings. Vector stores can efficiently perform "similarity” searches.
Qdrant
Qdrand is an open-source vector database that supports a wide range of filtering options and can store payloads (metadata) alongside vectors. It's designed for speed and flexibility in similarity search.
Select Qdrant if:
- your RAG application requires advanced filtering capabilities beyond just vector similarity (e.g., "find documents similar to X, but only from source Y and created after Z date").
- you want control over your data for hybrid cloud deployments or on-premise solutions.
The Qdrant configurations govern how your embeddings are generated and then managed, stored, and retrieved from your Qdrant instance.
To configure Qdrant vector DB details
-
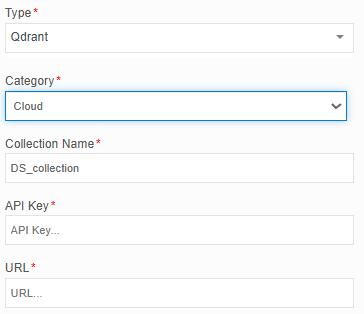
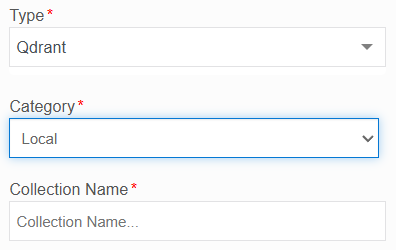
Go to Main Menu > Go to Main Menu > Management > GenAI Studio > Vector Store Configuration - Type=Qdrant. Qdrant configuration details appear.
Cloud Local
| Field | Description |
|---|---|
| Category | Select the required category.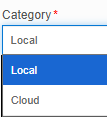 Local: Select from the local system. Cloud: Select from the cloud after providing the required cloud account details. |
| Collection Name* | Enter a name for the Qdrant collection. You cannot edit or modify this field after saving. This specifies the exact name of the "collection" that defines the specific logical container within Qdrant for your embeddings and their associated metadata. A collection in Qdrant is similar to a table in a relational database or an index in a search engine. This name should follow Qdrant's naming conventions (e.g., typically lowercase, alphanumeric, hyphens/underscores allowed). Example Input: product_manuals, customer_faqs, research_papers |
| API Key* (For Cloud only) | This is a secret token used for authentication and authorization. Enter API key and it proves that you have permission to access and modify data in your cluster. It ensures that only authorized applications can interact with your vector database. |
| URL* (For Cloud only) | This is the unique network address for your specific Qdrant cluster. It allows your application to locate and send API requests to the correct server instance on the internet. It follows a format similar to https:// |
Azure Cosmos DB
Azure Cosmos DB is a strong choice for a vector store due to its unique combination of high performance, global distribution, and multi-model capabilities.
The main benefits of Azure Cosmos DB include:
- Massive Scalability; Cosmos DB is built to handle data and traffic at a global scale.
- Low-Latency Performance: It guarantees single-digit millisecond latency for reads and writes, which is critical for real-time vector search and retrieval-augmented generation (RAG) applications.
- Azure handles the server management, scaling, and high availability
-
Cosmos DB supports multiple APIs (like MongoDB, PostgreSQL, and its native Core SQL API)
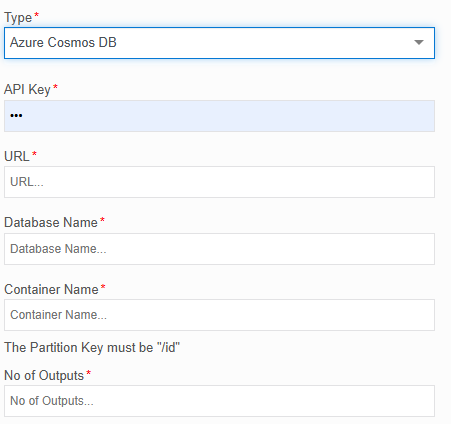
| Field | Description |
|---|---|
| API Key* | Enter the API key obtained from the Cosmos DB account. |
| URL* | Enter the URL (URI) obtained from the Cosmos DB account |
| Database Name* | Enter the exact name of the database where your vector data is stored in the Cosmos DB. |
| Container Name* | Enter the name of the container where your vector data is stored. The Partition key must be “/id” |
ChromaDB
ChromaDB is an open-source, lightweight, and easy-to-use vector database primarily designed for local development and smaller-scale RAG applications. It can run in-memory or persist to disk.
Select this to simplify the process of storing and querying embeddings, especially for developers getting started with RAG or for local testing.
FASS (Vector Library)
FASS (Facebook AI Similarity Search) is a vector similarity search library – a library developed by Facebook AI for efficient similarity search and clustering of dense vectors. It's not a full-fledged database but a highly optimized library for in-memory or on-disk indexing.
Select this to provide extremely fast similarity search for large collections of vectors.
Milvus
Milvus is an open-source, cloud-native vector database built for scalable similarity search. It's designed for high throughput and supports various indexing techniques and data types.
Select this to store and manage massive-scale vector embeddings, supporting high-performance similarity searches and a wide range of use cases beyond simple RAG, such as image/video search.
Pinecone
Pinecone is a fully managed, cloud-native vector database optimized for large-scale, high-performance similarity search. It's a commercial product designed for enterprise-level applications.
Select this to provide a highly scalable, reliable, and performant platform for storing and querying billions of vector embeddings without managing infrastructure.
Weaviate
Weaviate is an open-source, cloud-native vector database that is beyond just a vector storage; it also supports data modeling, semantic search, and integrates easily with machine learning models for vectorization. It has a GraphQL API.
Select this to store vectors and their associated data.
Deleting a Vector Store
You can delete a vector store only if it is not associated with any other AI Agents.
- Go to Main Menu > Go to Main Menu > Management > GenAI Studio > Vector Store. The list of Vector Stores appears.
-
Click the vector store that you want to delete. The bottom-right of the page displays Delete.
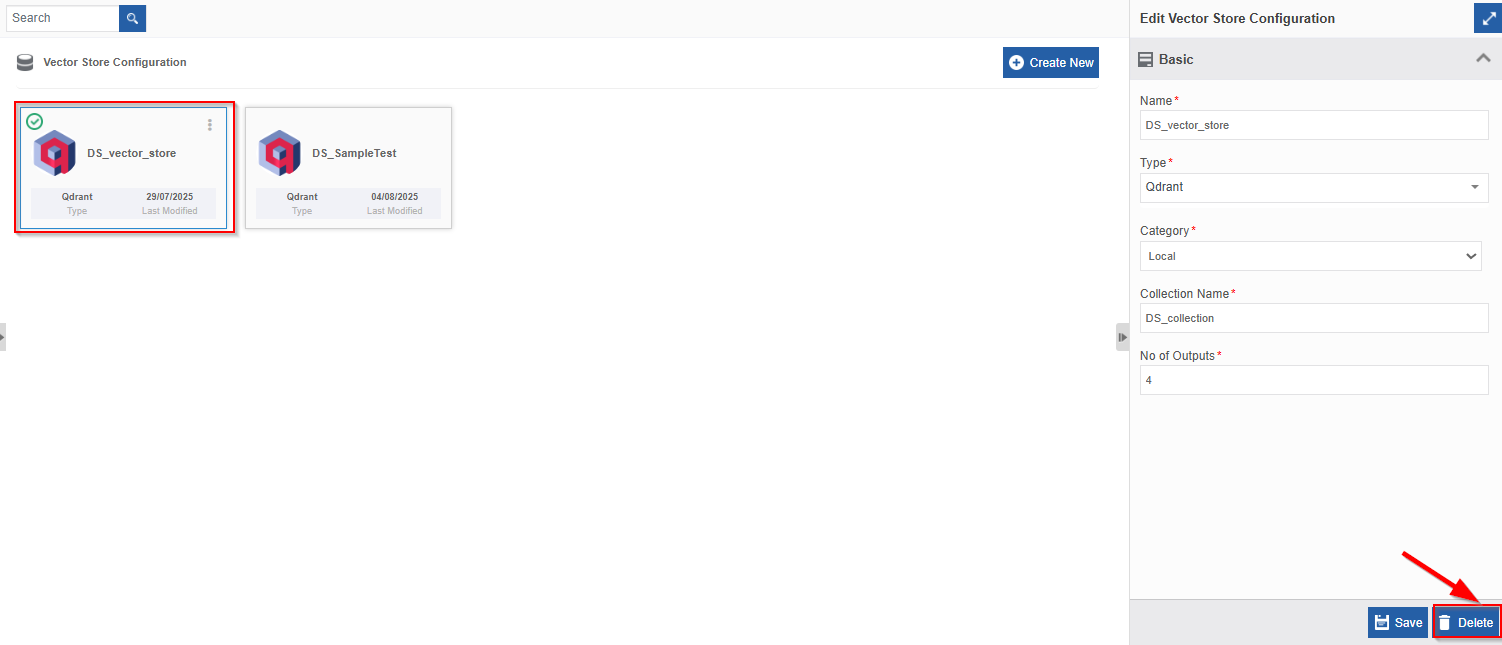
-
Click Delete. Delete Confirmation pop-up appears.
-
Click Ok to delete (or click Cancel to discard the action). The vector store gets deleted.
!!! info If the vector store is associated with any of the GenAI Workbench Agent, it will display a pop-up informing the user that you cannot delete a vector store unless you remove the mapping with the agent.
Cache Configurations👑
The "Cache Configuration" is a critical component for optimizing performance in a Retrieval-Augmented Generation (RAG) system.
Cache stores frequently used data—like model outputs, embeddings, or prompt responses—to speed up response time, reduce costs, and avoid repeating expensive computations.
The cache configuration uses Redis, a high-performance, in-memory data store, as the caching server. It can store and retrieve data with extremely low latency. When a request for a piece of data comes in, the system first checks the Redis cache. If the data is found (a "cache hit"), it's retrieved instantly, avoiding the need for a potentially slow and costly computation or database query.
Viewing and Editing Cache Configurations
-
Go to Main Menu > Go to Main Menu > Management > GenAI Studio > Cache Configurations. The cache configuration list appears.
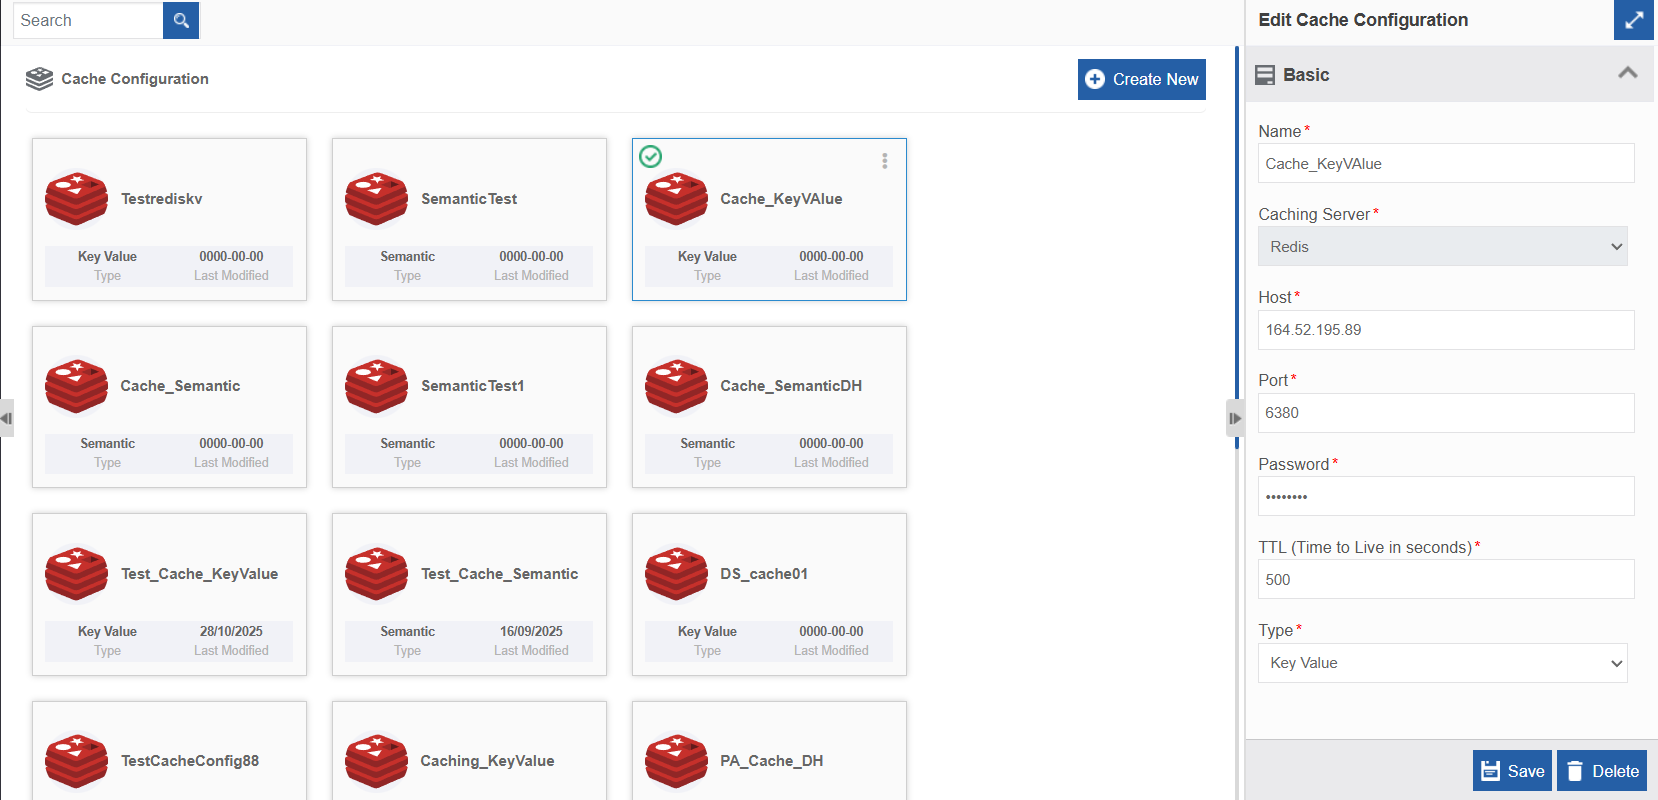
-
Click an item in the cache configuration and the details are displayed on the Property panel.
- Edit the required details.
- Click Save.
Creating a Cache Configuration
- Go to Main Menu > Go to Main Menu > Management > GenAI Studio > Cache Configuration.
-
Click Create New.
-
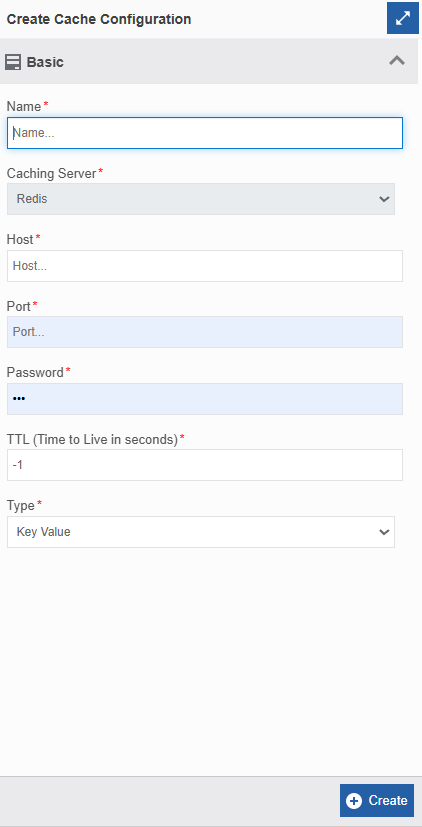
Provide the following configuration details.
You must have a Redis account to obtain the necessary Host, Port, and Password details for the cache configuration.
| Field | Description |
|---|---|
| Name* | Enter a name for the cache configuration. |
| Caching Server* | Redis is the default caching server name. Redis is a type of in-memory data store. This field is pre-configured to Redis as of now. |
| Host* | Enter the hostname or IP address of the machine or service where your Redis server is running. This is the endpoint your application will use to connect to the cache. For a self-hosted instance, this will be the server's IP address or hostname |
| Port* | Enter the port number for your Redis server. This is the network port that the Redis server is listening on for connections. The standard default port for Redis is 6379. |
| Password* | Enter the password for your Redis user. This is the authentication password for your Redis server. |
| TTL (Time to Live) | This setting defines how long cached data remains valid before it is automatically deleted. Enter the number of seconds for the data's lifespan. Enter “-1” if you want your data not to expire indefinitely. It will remain in the cache indefinitely. |
| Type* | The "Type" configuration determines the underlying storage and retrieval mechanism for your cache. Select the required type. 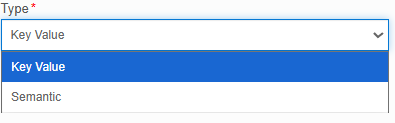 Key Value: This is the most common form of caching. It stores data by associating a unique key with a value. When you need the data, you must provide the exact key to retrieve its corresponding value. Semantic: This is a more advanced and powerful caching method, highly relevant to vector stores and GenAI. Instead of using an exact key, it stores data (like vector embeddings) in a way that allows you to search based on semantic similarity. This means you can find data that is conceptually similar to your query, even if the query is not an exact match. |
Deleting Cache Configurations
You can delete a cache configuration only if it is not associated with any other AI agent.
- Go to Main Menu > Go to Main Menu > Management > GenAI Studio > Cache Configurations. The list of cache configuration appears.
-
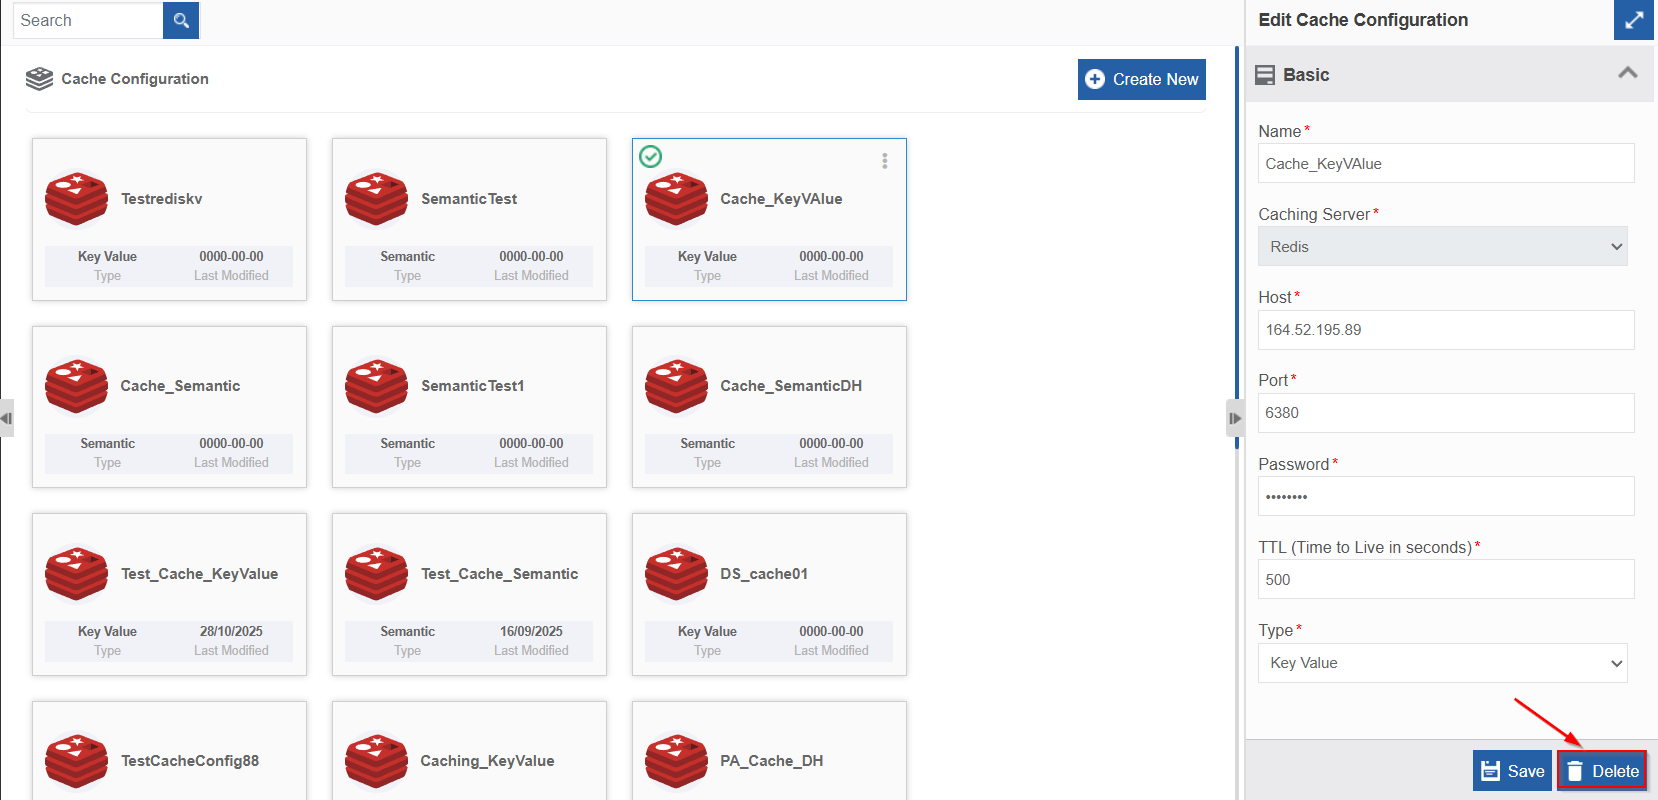
Click the cache configuration that you want to delete. The bottom-right of the page displays Delete.
-
Click Delete. Delete Confirmation pop-up appears.
4. Click Ok to delete (or click Cancel to discard the action). The cache configuration gets deleted.
MCP Server Configurations👑
MCP stands for Model Context Protocol, an open standard that allows AI agents to communicate with external tools. It is an open standard and communication protocol that defines the format and rules (MCP is like a rule book) for how an AI model (the agent) communicates its intent to use an external resource (the tool). MCP Server is the software component that implements and provides services using that standard (MCP rule book).
Connecting to MCP server helps AI systems become more context-aware and capable of completing complex tasks by interacting with the external world.
The Platform allows you to create and configure MCP servers in the Management > GenAI Studio module. Once you configure MCP server, you can map these to AI agents as tools.
In the execution level:
- The LLM agent follows the MCP (the rulebook) to generate a request asking to run a tool.
- The application sends that request to the MCP Server (the actual service).
- The MCP Server executes the tool and returns the result, following the same MCP standards.
The platform MCP server configuration in the platform provides tools and context to an LLM agent. The properties define how the agent (the client) connects to and authenticates with this external server. This is a setup for a Remote MCP Server using an HTTP transport mechanism.
Viewing and Editing MCP Configurations
-
Go to Main Menu > Go to Main Menu > Management > GenAI Studio > MCP. The MCP configuration list appears.
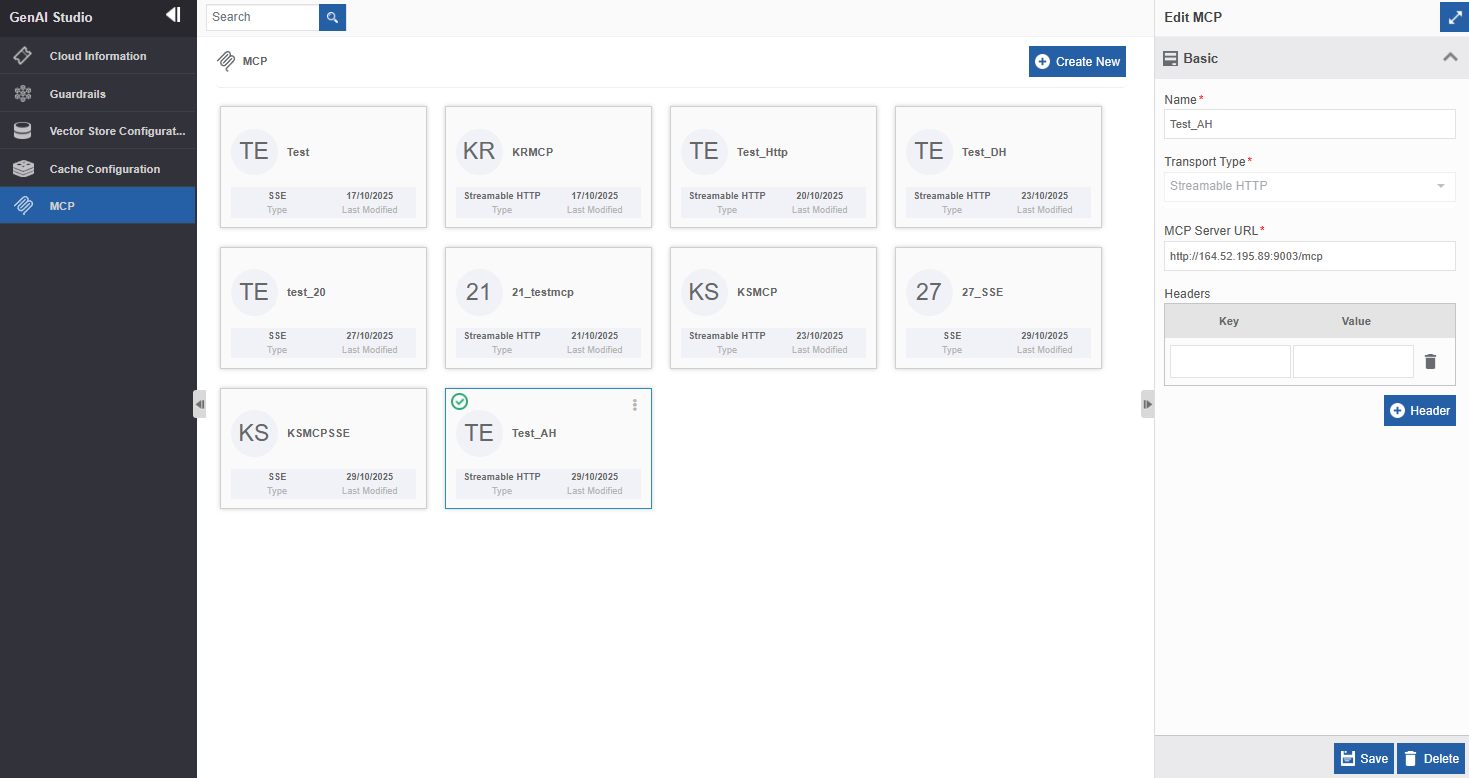
2. Click an item in the MCP configuration and the details appear on the Property panel. 3. Edit the required details. 4. Click Save.
Creating an MCP Configuration
- Go to Main Menu > Go to Main Menu > Management > GenAI Studio > MCP.
-
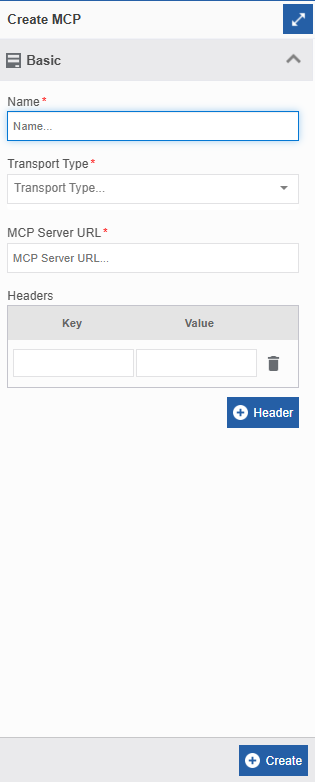
Click Create New.
-
Provide the following configuration details.
Field Description Name* Enter a name for the MCP server configuration.
This name appears in the tool source (GenAI workbench > Plugins > Tools).Transport Type* Select the communication mechanism used to exchange messages. 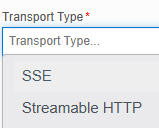
SSE: SSE (Server-Side Events) is a standardized technology that enables a web server to push data updates to a client (unidirectional: Server → Client) over a single, long-lived HTTP connection. The client opens the connection with a GET request and then just listens.
Streamable HTTP (recommended): Streamable HTTP uses bidirectional (Client ↔︎ Server) communication eliminating the complexity of the dual-endpoint model. It uses standard HTTP methods (POST for client requests, GET for fetching/resuming) but dynamically adapts its response type allowing the server to stream the response.MCP Server URL* Enter the complete network address (endpoint URI) of the remote MCP Server. This is the address where the server is listening for messages from the client. Headers Provide the Key and Value for authorization mechanisms or keys or token in the header part as per your requirement. 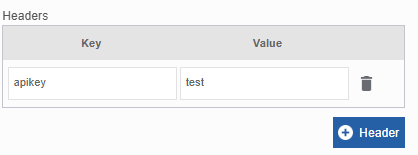
Click + Header to add more key value pairs.
For SSE, you must provide the authentication details in the header to get the response.
For Streamable HTTP this is optional. -
Click Create.
Deleting MCP Configuration
You can delete MCP configuration only if it is not associated with any other AI agent.
- Go to Main Menu > Go to Main Menu > Management > GenAI Studio > MCP. The list of MCP configuration appears.
-
Click the MCP configuration that you want to delete. The bottom-right of the page displays Delete.
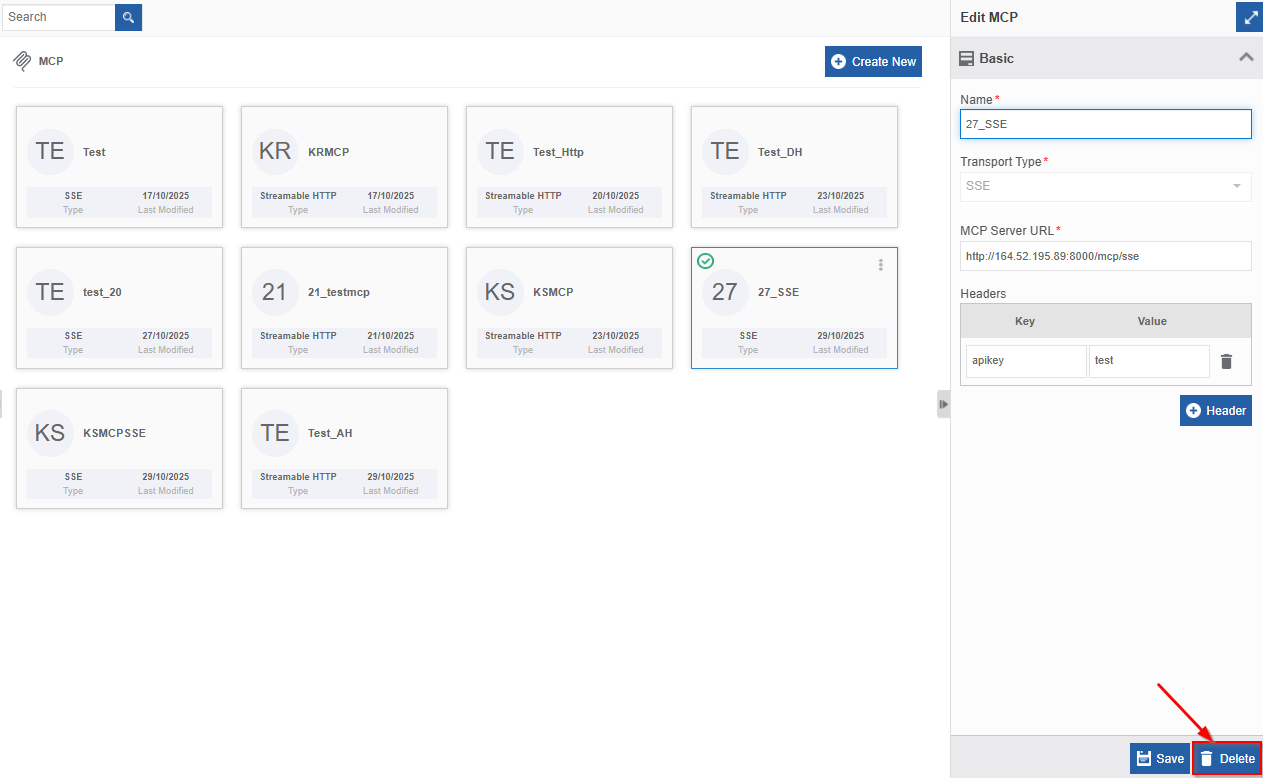
-
Click a Delete. Delete Confirmation pop-up appears.
-
Click Ok to delete (or click Cancel to discard the action). The MCP configuration gets deleted.